Chapter 1 — Why Kitchen Science Matters
Good cooks are not magicians, even when it looks that way from across the table. Most of what happens in a kitchen comes back to a handful of repeated patterns: heat changes texture, water carries and softens, fat enriches and smooths, salt sharpens, acid brightens, and time either helps a dish along or leaves it worse for the wait. Once a cook begins noticing those patterns, the kitchen gets less mysterious in a useful hurry.
This chapter explains what kitchen science means in plain terms and why it matters to ordinary meals. It is not here to make cooking feel formal. It is here to help the reader notice that better results often come from understanding what is happening rather than relying on luck, memory, or stubbornness.
We are not trying to turn supper into a laboratory exercise. We are trying to make the kitchen easier to read.
Core Lesson
Kitchen science is simply the practical study of what ingredients do when they meet heat, cold, water, air, fat, salt, acid, and time. That may sound grander than it is. In everyday cooking, it usually means learning to notice cause and effect.
A raw onion softens in a skillet because heat changes its structure and drives off moisture. Bread browns because heat dries the surface enough for flavor-building reactions to begin. A gravy thickens because starch absorbs liquid and swells. A vinaigrette briefly comes together because oil has been broken into tiny droplets through the vinegar, then slowly begins separating again because the mixture was never meant to stay together for long without help.
None of those changes is random. They happen for reasons, and those reasons become useful once the cook begins connecting them to decisions. If onions brown too fast, the heat may be too high. If soup tastes flat, it may need salt, reduction, acid, or simply more time for the flavors to settle together. If biscuits turn tough, the dough may have been handled too much. The point is not to memorize every rule. The point is to understand that results usually have causes.
That is what makes kitchen science worth learning. It gives the cook options besides guessing. Instead of saying, “That always happens to me,” the cook can begin asking, “What changed? What did the heat do? What did the liquid do? What was supposed to happen here?” Those are more useful questions.
This book is built on a few recurring kitchen forces.
Heat changes texture, sets proteins, melts fat, drives browning, and evaporates moisture.
Water carries heat, dissolves ingredients, softens starches and fibers, and controls whether a surface browns or steams.
Fat carries flavor, changes mouthfeel, and can either help create tenderness or make a dish feel heavy if used without purpose.
Salt seasons food, but it also affects moisture movement and helps bring other flavors into clearer focus.
Acid brightens, balances, and can change texture, especially in dairy, vegetables, and proteins.
Time often matters just as much as temperature. Some foods improve with patience. Others need to be pulled before time gets the better of them.
A cook does not need to think about all of those at once in every recipe. But most dishes involve at least two or three of them.
It also helps to clear up one common misunderstanding. Kitchen science is not mainly about making food complicated. In fact, it often pushes in the other direction. If you understand what is doing the real work in a recipe, you can stop fussing over steps that matter less and pay closer attention to the steps that matter more. That is a useful trade in any kitchen.
This kind of thinking also makes troubleshooting less personal. A broken sauce is not a moral failure. A dry pork chop is not evidence that you are doomed in a skillet. Most of the time, the food is simply responding to the conditions you gave it. That is good news, because conditions can be changed.
Three practical ideas will carry you through the rest of this book.
First, ingredients are always changing once cooking begins. Even a quiet pot is doing something.
Second, texture and flavor are usually the result of a few main forces working together, not a hundred tiny mysteries.
Third, most cooking problems become easier to solve when you ask what the food needed and what it got instead.
That is the heart of kitchen science. It is not meant to make a cook anxious. It is meant to make the cook observant.
What to Notice
When reading the rest of this book and cooking from it, begin by noticing a few repeatable cues.
- Look for changes in gloss. A sauce, dressing, or pudding often signals progress through the way its surface changes.
- Watch how moisture behaves. Some foods steam, some dry out, some release liquid before they reabsorb or reduce it.
- Pay attention to aroma. Browning, scorching, and proper doneness often announce themselves by smell before anything else.
- Notice how the spoon or knife moves. Resistance, looseness, coating, and drag all tell a story.
- Listen to the pan. A quiet simmer, a lively sizzle, and an aggressive boil are not the same thing.
- Taste in stages. Especially with soups, sauces, and dressings, the middle of cooking is often where the real lesson lives.
A good cook rarely watches only the clock. The food usually has more to say than the timer does.
Recipe 1 — Simple Mustard Vinaigrette
Why This Recipe Belongs Here
A vinaigrette is one of the easiest ways to see kitchen science in action without turning on the stove. It teaches how oil and water-based ingredients behave, why temporary structure can still be useful, and how seasoning and balance matter as much as any formal technique. It is a small recipe, but it introduces several ideas the rest of the book will keep returning to.
Yield / Time / Equipment
- Yield: About 3/4 cup
- Prep time: 5 minutes
- Cook time: none
- Equipment: Small bowl and whisk, or jar with lid
Ingredients
- 2 tablespoons vinegar or lemon juice
- 1 teaspoon Dijon mustard
- 1/2 teaspoon honey, optional
- 1/4 teaspoon kosher salt
- Black pepper to taste
- 6 tablespoons olive oil
Method
- In a small bowl, whisk together the vinegar or lemon juice, mustard, honey if using, salt, and pepper.
- Add the olive oil slowly while whisking until the dressing comes together.
- Taste and adjust with more salt, acid, or a little more oil as needed.
- Use at once, or store briefly and shake again before using.
What’s Happening Here
The vinegar or lemon juice forms the water-based phase, while the oil is broken into small droplets through whisking. Mustard helps the mixture hold together longer, but this is still a temporary emulsion. Over time it will begin separating again, which is not failure. It is simply the natural behavior of the ingredients.
Trouble Signs
- Too sharp: It needs a bit more oil, honey, or salt.
- Too flat: It likely needs more salt.
- Separates quickly: That is normal; whisk or shake again.
- Greasy mouthfeel: The balance may be too heavy on oil.
Variations
- Add minced shallot.
- Use red wine vinegar for a stronger edge.
- Stir in chopped herbs.
Recipe 2 — Creamy Old-Fashioned Oatmeal
Why This Recipe Belongs Here
Oatmeal is a useful first lesson because it shows how liquid, heat, starch, and salt change a simple ingredient into breakfast. It also reminds the cook that familiar foods follow the same rules as more impressive ones. A pot of oatmeal can be bland, gummy, loose, or just right depending on how those forces are handled.
Yield / Time / Equipment
- Yield: 2 servings
- Prep time: 2 minutes
- Cook time: 8 to 10 minutes
- Equipment: Small saucepan; spoon or whisk
Ingredients
- 2 cups water or a mix of water and milk
- 1 cup old-fashioned oats
- 1/4 teaspoon kosher salt
- 1 tablespoon butter, optional
- Maple syrup, brown sugar, fruit, or nuts for serving
Method
- Bring the water or water-and-milk mixture to a gentle boil.
- Stir in the oats and salt.
- Lower the heat and cook at a gentle simmer, stirring occasionally, until the oats soften and the mixture thickens, about 8 to 10 minutes.
- Stir in the butter if using.
- Serve warm with the toppings you like.
What’s Happening Here
As the oats cook, starch absorbs liquid and swells, which thickens the pot. The oats also soften as heat and moisture change their structure. Salt sharpens the flavor more than many people expect, and milk or butter can make the texture feel fuller without changing the underlying process.
Trouble Signs
- Too thick: It cooked too long or had too little liquid.
- Too loose: It needs another minute or two.
- Gummy texture: It may have been cooked too hard or stirred too aggressively.
- Bland flavor: It likely needs salt before it needs sweetness.
Variations
- Add cinnamon and apples.
- Stir in chopped pecans.
- Use half milk for a richer bowl.
Why This Works
Physical Change and Chemical Change in the Kitchen
Cooks do not need to sort every action into a strict science lesson, but it helps to know that some kitchen changes are mainly physical while others are more deeply chemical. Melting butter is mostly a physical change. The butter changes form, but it is still butter. Browning toast is a more substantial chemical change. New flavors, aromas, and colors are being created.
Many ordinary kitchen tasks involve both kinds of change. A sauce may physically thicken as starch swells, while the ingredients in it also change flavor as they cook. A piece of meat may warm, brown, firm, and lose moisture all in the same stretch of time.
The practical lesson is simple: if food changes, ask what kind of change you are seeing. That question often points toward the right correction.
Why Observation Beats Guessing
A good cook does not rely only on recipe time. Recipes are useful, but the food itself often gives better information. A pudding tells you when it has thickened. A roast tells you something by the way it yields. A dressing tells you whether it is balanced as soon as you taste it.
Looking, listening, smelling, touching, and tasting give the cook a running update on what the food is doing. When those signs are ignored, the cook is left mostly with hope.
The practical lesson here is worth keeping close: the recipe starts the work, but observation finishes it.
From the Old Books
Earlier household chemistry writers approached the kitchen with the useful belief that ordinary cooking was full of understandable change. They paid attention to heat, moisture, ingredients, and process, and they treated household work as something that could be observed and improved rather than merely endured.
Modern food science gives us better language for those changes, and it corrects some older explanations along the way. But the central idea remains sound: the kitchen becomes easier once the cook notices what ingredients are doing instead of treating every outcome as a surprise.
That is a sturdy place to begin this book.
Trouble Signs and Fixes
Problem: Food tastes flat
Likely cause: It may need salt, acid, or more concentration.
What to do now: Taste and adjust one thing at a time.
What to do next time: Season in stages rather than waiting until the end.
Problem: Sauce or dressing feels broken
Likely cause: The structure was temporary, or the ingredients separated.
What to do now: Whisk or shake again if the recipe allows.
What to do next time: Add the fat more gradually or include an emulsifying ingredient if appropriate.
Problem: Food browned too fast
Likely cause: The heat was too high, or the surface was too dry or thin for the method.
What to do now: Lower the heat and keep a closer watch.
What to do next time: Match the heat to the food more deliberately.
Problem: The texture is wrong, but the flavor is close
Likely cause: Heat, liquid, or timing was off even if the seasoning was not.
What to do now: Adjust what is still adjustable, such as adding liquid, reducing a little more, or resting longer.
What to do next time: Pay closer attention to visual and texture cues, not just ingredient amounts.
Kitchen Takeaway
If you remember one thing from this chapter, let it be this: food usually has a reason for turning out the way it does. Heat, water, fat, salt, acid, and time are doing most of the work. Once you start watching those forces, cooking becomes less mysterious and a good deal more manageable.
That is a good place to begin.Chapter 2 — Heat, Water, and Change
Heat and water are behind a surprising share of what happens in a kitchen. They soften rice, set eggs, tenderize vegetables, carry flavor into soups, and decide whether a skillet gives you browning or steam. A cook can go a long way by learning to ask two simple questions: how is the heat moving, and what is the moisture doing?
This chapter explains how heat travels through food, why water changes the way ingredients cook, and why boiling, simmering, steaming, and roasting are not just different words for the same thing. Once you understand those patterns, you can make better sense of why one method produces tenderness, another produces browning, and a third gives you something in between.
We are not trying to make the stove sound philosophical. We are trying to understand why the same ingredient can behave very differently in a pot, in a skillet, or in the oven.
Chapter 2 — Heat, Water, and Change
Core Lesson
Cooking begins with energy moving into food. In most home kitchens, that happens through three main routes: direct contact with a hot pan, hot air moving through an oven, or hot liquid and steam surrounding the food. The route matters because it shapes both speed and outcome.
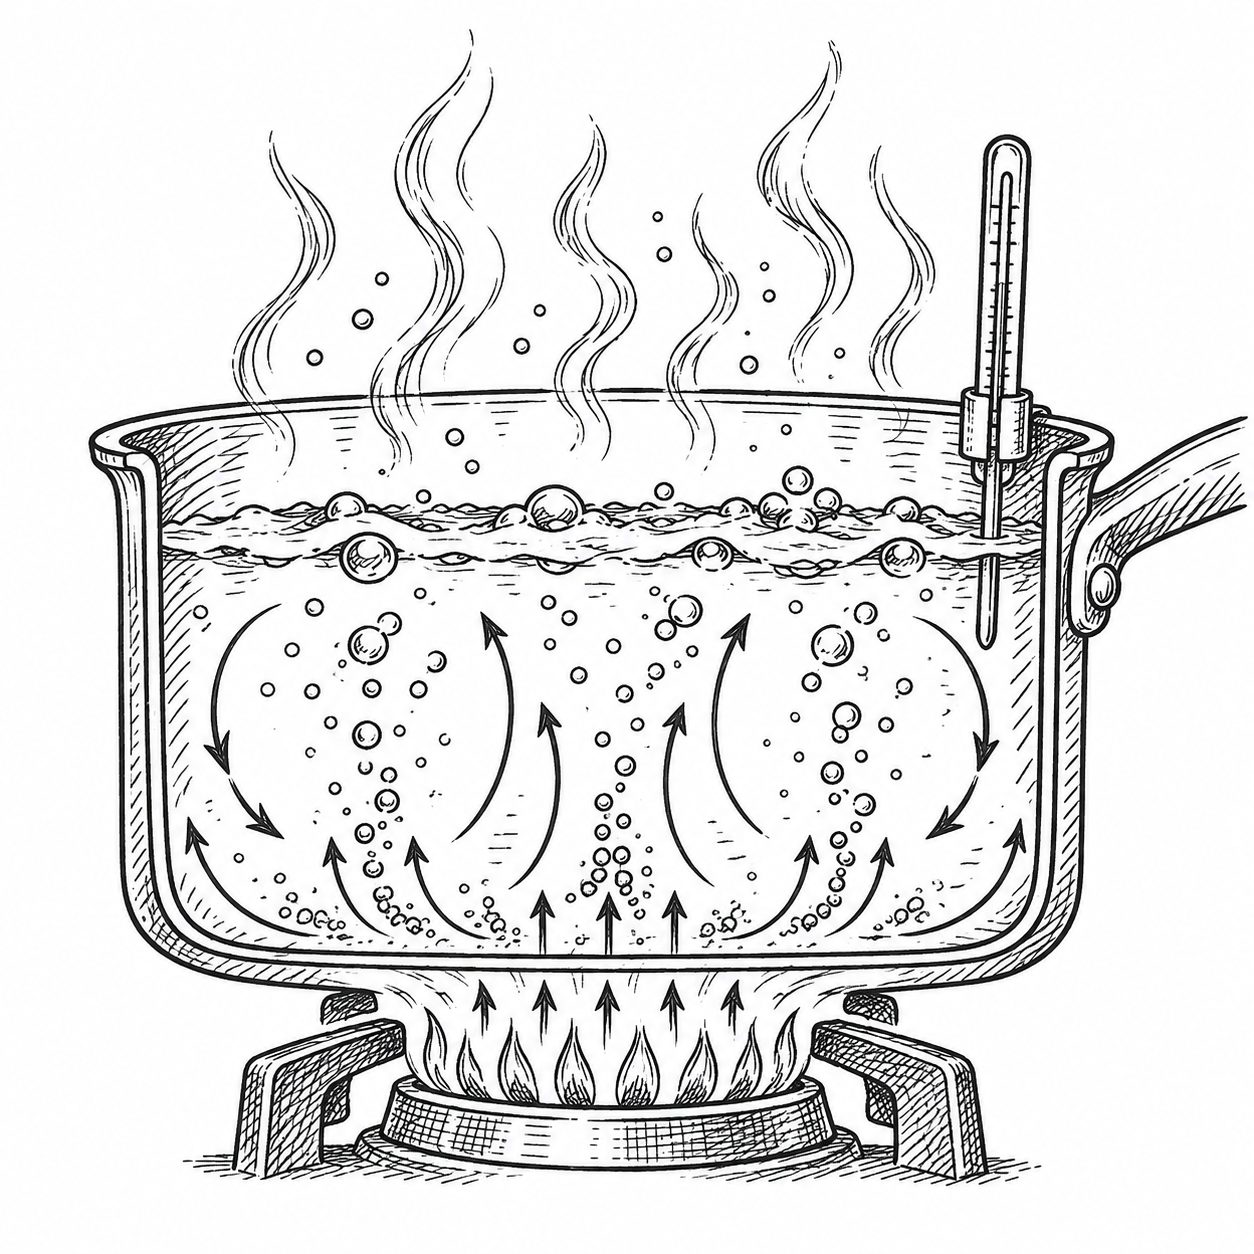
A skillet heats food mainly through contact. That is why a pork chop browns where it meets the pan, why pancakes color on the griddle, and why crowded vegetables often refuse to brown well. The food is competing for limited contact and, in many cases, releasing moisture that cools the surface and shifts the pan toward steaming.
An oven usually heats more gradually through hot air, though the pan or dish itself may provide additional direct heat. That makes roasting useful when you want the surface to dry and brown while the interior cooks more slowly. It is one reason roasted carrots taste different from boiled ones even if they begin as the same vegetable cut to the same size.
Water changes the story because it carries heat efficiently and holds food near the temperature of the simmer or boil. A pot of water can soften grains, vegetables, and proteins in ways that dry heat does not. But water also limits browning because the surface stays wet until enough moisture is driven off. If the surface is wet, temperature rise at that surface is partly tied up in evaporation rather than browning.
This is why boiling, simmering, and steaming deserve to be treated as distinct methods. Boiling is active and forceful. It moves food around, cooks aggressively, and can break delicate ingredients apart faster than needed. Simmering is gentler and often gives better control in stocks, soups, braises, sauces, grains, and beans because the heat is steady without being rough. Steaming cooks through hot water vapor and can preserve shape and moisture more effectively than direct boiling.
These are not abstract categories. They matter because different foods respond differently to each one. Rice benefits from water absorption and controlled steaming. Eggs reward gentler heat because their proteins set quickly and can turn rubbery if pushed too far. Carrots can go sweet and browned in a hot oven because dry heat encourages evaporation and surface color while the inside softens.
Evaporation is one of the most useful ideas in this chapter. When moisture leaves a food or a pot, it changes texture and concentration. A soup can grow fuller as water cooks away. A roasted vegetable can taste sweeter because moisture has reduced and browning has begun. A sauce can become more intense, but it can also become too salty if the cook forgets that water is leaving while seasoning stays behind.
This is why the lid matters. Covering a pot traps moisture and limits evaporation. That can help rice finish cooking, keep beans from drying out, or hold heat and humidity where a dish needs them. Removing the lid encourages evaporation and concentration. Neither choice is automatically better. Each is a tool.
Heat level matters too, but not always in the way impatient cooks hope. Higher heat does not simply mean faster and better. It can mean scorched milk, split sauce, burned sugar, or a browned exterior with an undercooked interior. Sometimes the right move is high heat for a short time. Sometimes it is moderate heat for longer.
Size and shape matter as well. A carrot cut into thick pieces cooks differently from thin coins. A thick chop tolerates a different heat pattern than a thin cutlet. Small pieces cook faster because heat has less distance to travel. That is not deep philosophy. It is just another reason knife cuts are part of cooking science whether the cook intends them that way or not.
Three practical ideas will carry you a long way here.
First, heat is not only about temperature. It is also about how the heat reaches the food.
Second, moisture can help cook food gently, but it can also delay browning and dilute flavor if not managed well.
Third, the same ingredient can give very different results depending on whether it is surrounded by liquid, exposed to dry heat, or cooked by contact with a hot surface.
Once those ideas begin to settle in, method choice becomes more deliberate. Instead of asking only how long something should cook, the cook begins asking what kind of change is needed and what method is most likely to get there.
What to Notice
When working with heat and water, pay attention to how the food and the cooking environment are behaving together.
- Watch the surface moisture. A wet surface usually steams before it browns.
- Look at the bubbles. A rolling boil, a gentle simmer, and trapped steam are different working conditions.
- Notice the sound. A lively sizzle often means evaporation and browning are happening. A quiet pot tells a different story.
- Watch how fast the edges change. In eggs, pancakes, and vegetables, the edges often reveal whether the heat is too high.
- Pay attention to pan crowding. Food packed too closely often releases enough moisture to slow browning.
- Notice what the lid does. With the lid on, moisture stays in the system. With it off, concentration begins to change.
A cook who watches moisture and heat together will usually understand the pot better than one who watches only the clock.
Recipe 1 — Soft Scrambled Eggs
Why This Recipe Belongs Here
Scrambled eggs are a clear lesson in heat control. They set quickly, tighten easily, and show almost at once whether the cook has chosen gentleness or force. They teach that food can move from tender to overdone in a hurry when proteins meet too much heat.
Yield / Time / Equipment
- Yield: 2 servings
- Prep time: 5 minutes
- Cook time: 5 to 7 minutes
- Equipment: Small nonstick skillet or well-seasoned pan; spatula
Ingredients
- 4 eggs
- 2 tablespoons milk or cream, optional
- 1/4 teaspoon kosher salt
- Black pepper to taste
- 1 tablespoon butter
Method
- Crack the eggs into a bowl and whisk with the milk or cream if using, along with the salt and pepper.
- Heat a small skillet over medium-low heat and add the butter.
- When the butter is melted and lightly foamy, pour in the eggs.
- Stir gently with a spatula, moving the eggs from the edges toward the center.
- Continue cooking slowly until the eggs are softly set but still moist.
- Remove from the heat just before they look fully done.
- Serve at once.
What’s Happening Here
The egg proteins are denaturing and linking together as the heat rises, which is what turns a loose mixture into soft curds. Because eggs set quickly, gentle heat gives the cook more control over that process. Pulling them from the pan slightly early matters because carryover heat continues the setting for a short time after cooking stops.
Trouble Signs
- Rubbery eggs: The heat was too high or the eggs cooked too long.
- Watery eggs: They were undercooked or not given time to set properly.
- Dry curds: The eggs stayed in the pan too long.
- Browned spots: The pan was too hot for soft scrambling.
Variations
- Stir in chopped chives.
- Add grated cheese at the end.
- Finish with a small spoonful of crème fraîche or butter for extra softness.
Recipe 2 — Perfect Pot of Rice
Why This Recipe Belongs Here
Rice is one of the clearest lessons in controlled absorption. It shows how water, heat, evaporation, and a covered pot work together. It also teaches that some foods need both liquid cooking and trapped steam to finish well.
Yield / Time / Equipment
- Yield: About 3 cups cooked rice
- Prep time: 5 minutes
- Cook time: 18 to 20 minutes, plus resting time
- Equipment: Medium saucepan with lid
Ingredients
- 1 cup long-grain white rice
- 2 cups water
- 1/2 teaspoon kosher salt
- 1 teaspoon butter or oil, optional
Method
- Rinse the rice if desired.
- Combine the rice, water, salt, and butter or oil if using in a saucepan.
- Bring to a boil.
- Stir once, lower the heat to the barest simmer, and cover.
- Cook 18 minutes without lifting the lid.
- Remove from the heat and let stand, covered, 10 minutes.
- Fluff with a fork and serve.
What’s Happening Here
The rice absorbs water as the starches hydrate and the grains soften. Once the pot is covered and the heat lowered, the rice finishes through a combination of gentle liquid cooking and trapped steam. Lifting the lid too often interrupts that controlled environment and can throw off both timing and texture.
Trouble Signs
- Hard center: It needs a little more time or slightly more water.
- Mushy rice: Too much water or too much heat.
- Scorched bottom: The simmer was too active.
- Uneven texture: The lid was lifted too often or the heat was not steady.
Variations
- Cook in light broth instead of water.
- Add a bay leaf.
- Use the same method as a base for pilaf after toasting the rice first.
Recipe 3 — Roasted Carrots
Why This Recipe Belongs Here
Roasted carrots show how dry heat and evaporation change a vegetable. They become sweeter, more concentrated, and more deeply flavored than they would in water. This recipe makes the difference between moist cooking and dry cooking easy to taste.
Yield / Time / Equipment
- Yield: 4 servings
- Prep time: 10 minutes
- Cook time: 25 to 35 minutes
- Equipment: Sheet pan
Ingredients
- 1 1/2 pounds carrots, peeled and cut into even pieces
- 1 tablespoon olive oil
- 1/2 teaspoon kosher salt
- 1/4 teaspoon black pepper
- 1 teaspoon honey or maple syrup, optional
Method
- Heat the oven to 425°F.
- Spread the carrots on a sheet pan.
- Drizzle with olive oil and season with salt and pepper.
- Toss well and spread in a single layer with some space between pieces.
- Roast 20 minutes.
- Turn the carrots and roast 5 to 15 minutes more, until tender and browned in spots.
- Add the honey or maple syrup in the last few minutes if using.
What’s Happening Here
As the carrots roast, moisture evaporates, the surface dries enough to brown, and the flavor becomes more concentrated. The oven is not only softening the vegetable. It is changing the balance between water, sugar, and surface chemistry. Crowding the pan traps steam and shifts the result away from roasting and toward a softer, paler finish.
Trouble Signs
- Pale carrots: The pan was crowded or the oven was not hot enough.
- Burnt edges, firm centers: The pieces were too large or uneven.
- Soft but not roasted: Too much steam built up on the pan.
- Scorched sweetener: Added too early.
Variations
- Add cumin or smoked paprika.
- Finish with lemon juice.
- Toss with chopped parsley before serving.
Why This Works
Boiling, Simmering, and Steaming Are Not the Same
Boiling, simmering, and steaming all rely on water, but they produce different kitchen conditions. A rolling boil is forceful. It cooks quickly, moves food around, and can break delicate ingredients apart. A simmer is gentler and often better for soups, sauces, grains, beans, and eggs because it gives the cook more control. Steaming cooks through hot vapor and can preserve shape and moisture well without immersing food directly in water.
The practical lesson is simple: if the food seems too delicate for a hard boil, it probably is.
Why Dry Heat Builds Flavor Differently
Dry heat encourages evaporation at the surface of food. Once enough surface moisture leaves, temperatures can rise further and browning reactions become more active. That is why roasted vegetables, browned meat, and toasted bread usually taste deeper than their boiled or steamed counterparts.
This does not make dry heat better in every case. It makes it different. Dry heat is useful when the cook wants concentration, color, or crust. Moist heat is useful when the cook wants tenderness, hydration, or gentler transfer of heat.
The practical lesson here is worth keeping close: choose the method based on the change you want, not just habit.
From the Old Books
Earlier household chemistry writers paid close attention to the way heat and water changed food. They may not have framed every difference in the language of heat transfer, evaporation, or protein setting, but they understood from practice that boiling, baking, simmering, and roasting were not interchangeable.
Modern food science gives us sharper language for those distinctions. We can now explain more clearly how moisture affects browning, why gentle heat matters for some proteins, and how evaporation changes both texture and flavor. But the older practical lesson still stands comfortably: method matters because ingredients respond differently to different conditions.
That is one of the first durable truths in cooking.
Trouble Signs and Fixes
Problem: Food will not brown
Likely cause: The surface is too wet, the pan is crowded, or the heat is too low.
What to do now: Give the food more space, raise the heat if appropriate, or let moisture cook away.
What to do next time: Dry the surface well and avoid crowding.
Problem: Food cooks outside before the center catches up
Likely cause: The heat is too aggressive for the size or thickness of the food.
What to do now: Lower the heat or finish more gently.
What to do next time: Match the method to the thickness of the ingredient.
Problem: Rice is uneven or patchy
Likely cause: The simmer was unstable, or the lid was lifted too often.
What to do now: Add a splash of water, cover, and let it finish gently.
What to do next time: Keep the lid on and the heat low.
Problem: Eggs are tough
Likely cause: Too much heat or too much time.
What to do now: Pull them from the pan immediately.
What to do next time: Use gentler heat and stop earlier.
Problem: Vegetables are soft but bland
Likely cause: They softened in moisture without enough browning or seasoning.
What to do now: Add seasoning and, if possible, finish with a higher-heat roast or sauté.
What to do next time: Decide whether you want tenderness alone or tenderness with concentration and browning.
Kitchen Takeaway
If you remember one thing from this chapter, let it be this: heat never works alone. Moisture changes what heat can do and how quickly it can do it. Once you begin watching heat and water together, method choice becomes clearer and results become easier to predict.
That is a strong beginning for the rest of the kitchen.
Chapter 3 — Salt, Acid, and Flavor
Salt and acid are small things that make a large difference. A pinch of salt can sharpen a soup that tasted dull a minute earlier. A squeeze of lemon can wake up a rich dish, steady a sauce, or keep a salad from tasting heavy. These ingredients do not usually get the credit that heat, butter, or a browned crust do, but they often decide whether food tastes complete.
This chapter explains how salt and acid affect flavor, why they sometimes change texture as well as taste, and how a cook can use them to bring a dish into clearer focus rather than simply making it salty or sour. Once you understand those patterns, seasoning becomes less like guesswork and more like adjustment.
We are not trying to make every meal taste clever. We are trying to make it taste finished.
Core Lesson
Salt is often introduced as if it were only a seasoning. It is that, certainly, but it also does more than many cooks first realize. Salt helps other flavors come into focus. It can make sweetness taste clearer, bitterness seem less blunt, and savory notes feel fuller and more distinct. In practical kitchen terms, salt often makes food taste more like itself.
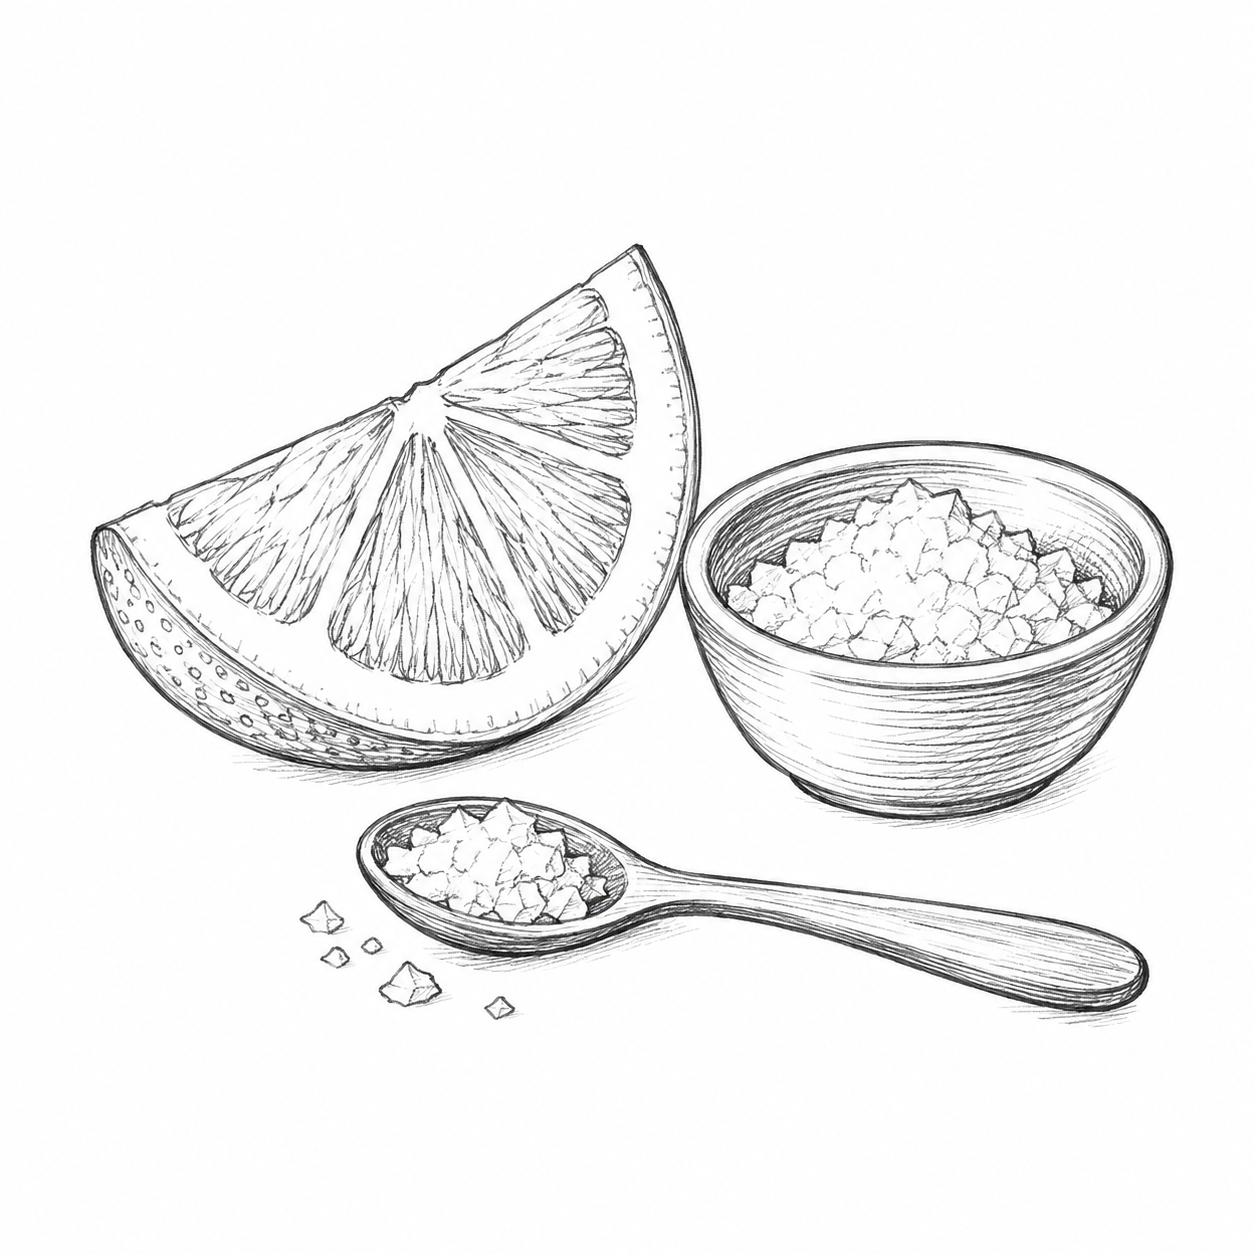
That is one reason unsalted food can taste flat even when all the right ingredients are present. The dish may not be missing complexity. It may simply be missing definition. Add salt carefully, and the shape of the flavor often becomes easier to notice.
Salt also affects moisture. It can draw water out of vegetables, which is why sliced cucumbers begin giving up liquid after they are salted. Given more time, salt can also move inward and help season food more evenly. This is part of why salting meat ahead of time can improve not only flavor but the feel of the final dish.
Acid plays a different role. Where salt tends to clarify and deepen, acid often brightens and lifts. Lemon juice, vinegar, buttermilk, yogurt, and tomatoes all bring acidity, but not in the same form or with the same force. Acid can cut through richness, balance sweetness, sharpen aroma, and keep a dish from feeling heavy or muddy.
Acid changes texture too. It can firm some vegetables and soften others over time. It can affect proteins in eggs, fish, meat, and dairy. In dairy, acid can push proteins toward curdling if the conditions are right. In slaws and quick salads, acid can soften raw vegetables while still leaving them lively. In marinades, acid can alter the outer texture of proteins, though not always in the generous way cooks imagine.
This is why salt and acid are best thought of as tools for adjustment rather than as ingredients that simply make food “salty” or “sour.” A bean soup may need salt to feel round and complete, then a small splash of vinegar at the end to lift the whole pot. A slaw may need acid for brightness, but still taste thin until salt gives the vegetables and dressing some definition. A sauce may be rich and technically sound, yet still need a little lemon to stop tasting sleepy.
The order and timing matter as well. Salt added early has more time to distribute and work into the food. Acid added early may mellow as it cooks or may change the structure of certain ingredients along the way. Acid added at the end often tastes brighter and more direct. That is why a tomato sauce simmered for an hour tastes different from the same sauce finished with a splash of red wine vinegar just before serving.
This is also where overcorrection causes trouble. Too much salt can flatten nuance instead of sharpening it. Too much acid can make a dish feel harsh, thin, or restless. The cook’s task is not to make these ingredients noticeable for their own sake. The task is to use them until the food feels awake and properly balanced.
Balance does not mean perfect symmetry. It means the main qualities of a dish are working together instead of fighting for the last word. A rich dish may need brightness. A sharp dish may need fat or sweetness. A bland dish may need salt before it needs anything else. The best correction depends on what is missing, not on habit.
Three practical ideas will carry you a long way here.
First, salt often makes food taste more like itself rather than merely more salty.
Second, acid brightens and balances, but it can also change texture.
Third, both salt and acid are best used in stages, with tasting in between, rather than in one heroic correction at the end.
Once those ideas begin to settle in, seasoning gets calmer. The cook stops hoping a dish will somehow improve on its own and starts making small, deliberate adjustments instead.
What to Notice
When working with salt and acid, pay attention to how the dish changes after each adjustment.
- Taste for definition. Salt often makes flavors clearer before it makes them obviously salty.
- Watch for moisture release. Salted vegetables may soften and weep liquid quickly.
- Notice brightness. A little acid often changes the whole shape of a dish more than its quantity would suggest.
- Look at dairy carefully. Heat plus acid can push milk- or cream-based sauces toward curdling.
- Pay attention to heaviness. Rich foods often need acid not because they are wrong, but because they are tired.
- Taste twice. Salt and acid can both seem strong at first, then settle into the dish after a minute.
A thoughtful cook usually seasons in steps and listens to what the food says back.
Recipe 1 — Quick Cucumber Salad
Why This Recipe Belongs Here
A cucumber salad is one of the simplest ways to see both salt and acid at work. Salt draws out moisture, acid brightens the vegetables, and the whole dish changes in a matter of minutes. It is a small, clean lesson in how texture and flavor can shift quickly with very little heat or effort.
Yield / Time / Equipment
- Yield: 4 servings
- Prep time: 10 minutes
- Cook time: none
- Equipment: Bowl; knife
Ingredients
- 2 cucumbers, thinly sliced
- 1/2 teaspoon kosher salt, plus more to taste
- 2 tablespoons rice vinegar or apple cider vinegar
- 1 teaspoon sugar or honey
- Black pepper to taste
- 1 tablespoon chopped dill or parsley, optional
Method
- Place the sliced cucumbers in a bowl and sprinkle with the salt.
- Let stand 10 minutes.
- Add the vinegar, sugar or honey, black pepper, and herbs if using.
- Toss well and taste.
- Adjust with a little more salt or vinegar if needed.
- Serve at once or chill briefly.
What’s Happening Here
The salt begins drawing moisture from the cucumbers, which softens them slightly and creates some liquid in the bowl. The vinegar brightens the flavor and shifts the texture a little further. The sugar softens the sharpness of the acid without hiding it. In a dish this simple, even small seasoning changes are easy to notice.
Trouble Signs
- Too watery: The cucumbers gave off more liquid than expected.
- Too sharp: The acid needs a little sweetness or more cucumber to carry it.
- Flat flavor: It likely needs more salt before anything else.
- Too soft: It sat too long after salting.
Variations
- Add thinly sliced red onion.
- Use yogurt for a creamier version.
- Add red pepper flakes for heat.
Recipe 2 — Buttermilk Coleslaw
Why This Recipe Belongs Here
Coleslaw shows how salt, acid, and dairy can work together. The cabbage needs seasoning, the dressing needs brightness, and the buttermilk provides both tang and body. It is a useful lesson in balance because too little acid leaves the slaw dull, while too much can make it feel harsh or watery.
Yield / Time / Equipment
- Yield: 6 servings
- Prep time: 15 minutes
- Cook time: none
- Equipment: Large bowl; whisk
Ingredients
- 1 small green cabbage, finely shredded
- 1 carrot, grated
- 1/2 teaspoon kosher salt, plus more to taste
- 1/3 cup mayonnaise
- 1/4 cup buttermilk
- 1 tablespoon apple cider vinegar
- 1 teaspoon Dijon mustard
- 1 teaspoon sugar
- Black pepper to taste
Method
- Place the cabbage and carrot in a large bowl and toss with the salt.
- In a smaller bowl, whisk together the mayonnaise, buttermilk, vinegar, mustard, sugar, and black pepper.
- Pour the dressing over the vegetables and toss well.
- Let stand 10 to 15 minutes, then taste.
- Adjust with more salt or vinegar if needed.
- Serve chilled or cool.
What’s Happening Here
The salt begins softening the cabbage and pulling out a little moisture, while the buttermilk and vinegar brighten the dressing. The mayonnaise adds fat and body, keeping the slaw from tasting thin. The proportions matter: too much acid makes the slaw sharp, while too little leaves it heavy.
Trouble Signs
- Watery slaw: The cabbage released a lot of moisture.
- Heavy dressing: It needs more acid or salt.
- Too sharp: The vinegar is outpacing the fat and sweetness.
- Undersalted: The cabbage itself still tastes flat.
Variations
- Add celery seed.
- Use red cabbage for part of the mix.
- Stir in sliced green onion.
Recipe 3 — Lemon Pan Sauce
Why This Recipe Belongs Here
A lemon pan sauce teaches how acid can finish a dish rather than dominate it. The sauce begins with browned flavor from the pan, then a little liquid, reduction, and citrus bring it into focus. It is a good reminder that acid is often most useful not at the beginning, but at the end, when the dish needs brightness more than structure.
Yield / Time / Equipment
- Yield: About 1/2 cup
- Prep time: 5 minutes
- Cook time: 5 to 7 minutes
- Equipment: Skillet
Ingredients
- 1 teaspoon minced shallot or onion
- 1/2 cup stock or white wine
- 1 to 2 teaspoons lemon juice
- 1 tablespoon cold butter
- Salt and black pepper to taste
Method
- After cooking meat or vegetables, pour off excess fat from the skillet, leaving the browned bits behind.
- Add the shallot and cook briefly if needed.
- Pour in the stock or wine and scrape the pan to loosen the browned bits.
- Simmer until reduced by about half.
- Remove from the heat and stir in the lemon juice.
- Swirl in the cold butter.
- Taste and adjust salt and pepper.
- Spoon over the food at once.
What’s Happening Here
The pan liquid dissolves the browned bits and reduction concentrates the flavor. The lemon juice is added near the end so its acidity stays bright and direct rather than cooking into the background. The butter rounds the sauce and keeps the finish from feeling too sharp.
Trouble Signs
- Too sharp: Too much lemon or too little butter.
- Flat sauce: It may need salt before more acid.
- Too salty: The reduction went too far.
- Greasy finish: Too much pan fat remained.
Variations
- Add capers.
- Use parsley or thyme at the end.
- Replace lemon with a small splash of vinegar.
Why This Works
Why Salt Changes More Than Saltiness
Salt affects taste directly, but it also changes how other flavors are perceived. In the right amount, it can make sweetness seem clearer, bitterness less blunt, and savory flavors more distinct. That is why an undersalted dish often tastes vague rather than obviously wrong.
Salt also affects water movement. In vegetables, it can pull moisture outward. In proteins, given enough time, it can move inward and season more evenly. This is one reason salt can change texture as well as flavor.
The practical lesson is simple: salt is often less about making food salty than about making it legible.
Why Acid Brightens a Dish
Acid brightens because it shifts the way the rest of the dish is perceived. In rich or starchy foods, it can make flavors seem clearer and less heavy. In dressings and sauces, it can sharpen the finish and make the whole dish feel more awake.
Acid can also affect proteins and dairy, which is why lemon, vinegar, and cultured ingredients need to be handled with some awareness in milk- or cream-based dishes.
The practical lesson here is worth keeping close: acid is often the final adjustment that tells the dish to sit up straight.
From the Old Books
Earlier household chemistry writers understood that small ingredients could have outsized effects in the kitchen. They paid attention to seasoning, to the way acids altered foods, and to the practical differences among ingredients that might seem minor on paper but mattered at the table.
Modern food science gives us a clearer explanation for why salt sharpens flavor, why acid changes texture as well as taste, and why timing affects whether acidity feels mellow or bright. But the older kitchen lesson still stands: small adjustments can change the whole dish.
That is especially true of salt and acid.
Trouble Signs and Fixes
Problem: Dish tastes flat
Likely cause: It may need salt, acid, or both.
What to do now: Add one at a time in small amounts and taste after each change.
What to do next time: Season in stages instead of waiting until the end.
Problem: Vegetables turned watery after seasoning
Likely cause: Salt drew out moisture.
What to do now: Drain if needed or adjust the dressing to account for the liquid.
What to do next time: Salt earlier and drain, or season closer to serving.
Problem: Dairy sauce curdles after lemon or vinegar
Likely cause: The acid hit the sauce when it was too hot or too low in fat.
What to do now: Pull it from the heat and stir gently, though full recovery may not be possible.
What to do next time: Lower the heat and add acid gradually.
Problem: Food tastes sharp rather than bright
Likely cause: Too much acid or not enough fat, sweetness, or salt to support it.
What to do now: Round it out with a little fat, sweetness, or a larger base ingredient if possible.
What to do next time: Add acid in smaller stages.
Problem: Dish tastes salty but still unfinished
Likely cause: It may need acid or another balancing element, not more salt.
What to do now: Try a small splash of vinegar or lemon.
What to do next time: Ask what the dish is missing before adding more salt by habit.
Kitchen Takeaway
If you remember one thing from this chapter, let it be this: salt and acid are not there to announce themselves. They are there to help the rest of the food make sense. Used well, they do not take over the dish. They bring it into focus.
That is a skill worth learning early.
Chapter 4 — Starches, Sugars, and Browning
Starches and sugars do a great deal of work in an ordinary kitchen. They thicken gravy, give pudding its body, help sweet potatoes turn silky, and make an apple crisp smell like dessert is not far off. Browning, for its part, brings flavor where there was once only heat and raw ingredients. Once you understand what starch, sugar, and browning are up to, you can make better sense of why food changes in the pan, in the pot, and in the oven.
We are not after a chemistry lecture here. We are after better cooking. This chapter will help you understand why sauces thicken, why sugar behaves differently as heat rises, and why a little color often means a lot more flavor.
Core Lesson
A great deal of cooking comes down to how ingredients respond to heat and moisture. Starch and sugar may sit quietly in the pantry, but once they meet liquid, fat, and heat, they start making things happen.
Let’s begin with starch. Starch is found in flour, cornstarch, potatoes, grains, and plenty of other familiar ingredients. When starch is mixed with liquid and heated, its tiny granules begin to absorb water and swell. This process is often described as gelatinization, though the plain kitchen lesson is simpler: starch takes up liquid, expands, and thickens what is in the pot. That is why a thin mixture of milk and flour can become gravy, and why a pudding base can change from pourable to spoonable with just a few more minutes at the stove.
That thickening only works well under the right conditions. If the heat is too low, thickening may take forever and leave you wondering whether supper has stalled out. If the heat is too high, starch mixtures can scorch on the bottom before they thicken properly. If flour or starch is not well dispersed, you get lumps instead of a smooth sauce. Most of the time, what the cook needs is not magic but patient heat, steady whisking, and enough time for the starch to do its work.
Sugar behaves differently. It may dissolve into liquid, where it adds sweetness and helps shape texture, or it may be heated more directly, where it begins to transform. At first, sugar simply melts and loosens. As heat continues, it darkens and develops more complex flavors. Mild sweetness can move toward nuttiness, toastiness, bitterness, and depth.
Browning is not just about color. It is about flavor, aroma, and texture. A browned crust on an apple crisp or the deeper color at the edges of roasted sweet potatoes suggests that heat has done more than warm the food through. It has changed the flavor of the surface in ways you can smell before you even take a bite.
Not all browning is the same. Sometimes food browns because sugars themselves are changing under heat. Sometimes browning comes from sugars and proteins reacting together at the surface of food. The exact labels matter less than the practical outcome: dry heat tends to build color and deeper flavor, while moisture tends to soften, dissolve, and carry heat inward. The balance between those two forces shapes a great many dishes.
Think about what happens when you roast sweet potatoes. Their moisture slowly evaporates, their natural sugars become more noticeable, and the surfaces begin to color. The outside grows deeper in flavor while the inside turns tender. Or consider apple crisp. The fruit below softens as its juices release, while the topping dries, browns, and turns crumbly. Same oven. Same heat source. Different ingredients, different behavior.
This is why paying attention matters. If your gravy stays pale and floury, it likely needed either a little more cooking or a better start. If your pudding turns thick but chalky, the starch may have overcooked or the mixture may not have been balanced well. If your sweet potatoes burn before they soften, the oven may be too hot or the pieces too small. If your crisp topping browns before the fruit is bubbling, the dish may need covering for part of the bake. Kitchen science sounds fancy until you realize it often comes down to noticing what the food is telling you.
Three practical ideas will carry you a long way here.
It also helps to know that starch thickening and surface browning do not usually happen under the same conditions. Starch often does its work in the presence of liquid, while strong browning usually picks up after surface moisture has dropped enough for temperatures to rise further. That is one reason a sauce thickens in a pot while a crisp topping browns in the oven. Same kitchen, different physical conditions.
First, starch needs both liquid and heat to thicken well. Dry starch sitting in a spoon will not do much for you. It needs to be dispersed and heated in a controlled way.
Second, sugar changes as heat rises. It can sweeten gently, help retain moisture, or develop darker, richer flavors when pushed further.
Third, browning usually means flavor is developing. Pale food is not always wrong, but golden-brown food often tastes fuller, rounder, and more finished.
Once you begin watching for those patterns, cooking starts to feel less like guesswork and more like good judgment. That is a pleasant shift for any cook, and it makes the kitchen a calmer place to stand.
What to Notice
When working with starches, sugars, and browning, watch for cues that tell you whether things are headed in the right direction.
- Look for gloss. A well-thickened pudding or gravy usually looks smoother and shinier than a raw mixture.
- Watch the bubbles. Thick mixtures bubble differently than thin ones. They often rise more slowly and pop with a heavier motion.
- Smell for change. Browning brings nutty, toasty, warm aromas. Scorching smells sharp, bitter, or harsh.
- Notice the spoon. A sauce that lightly coats the back of a spoon is telling you it has gained body.
- Check the edges. In baked dishes, the edges often brown first. That gives you an early warning of whether the whole dish is moving too fast.
- Listen to the pan. A quiet simmer is one thing. A hard, aggressive boil in a milk or starch mixture is often trouble coming down the road.
A good cook learns to watch these signs the same way a gardener watches the weather. You do not have to fuss over every second, but it helps to know what you are looking at.
Recipe 1 — Cream Gravy
Why This Recipe Belongs Here
Cream gravy is one of the clearest ways to see starch at work in a real kitchen. A little flour, a little fat, and a steady addition of milk can turn into something smooth, savory, and deeply comforting. It also teaches an important lesson: starch thickening is simple, but it is not careless work. Rush it, and you will meet lumps, raw flour taste, or a pan that lets you know you were not paying attention.
Yield / Time / Equipment
- Yield: About 2 cups
- Prep time: 5 minutes
- Cook time: 10 to 12 minutes
- Equipment: Medium skillet or saucepan; whisk
Ingredients
- 3 tablespoons bacon drippings or unsalted butter
- 3 tablespoons all-purpose flour
- 2 cups whole milk, warmed slightly
- 1/2 teaspoon kosher salt, plus more to taste
- 1/4 teaspoon black pepper, plus more to taste
- Pinch of cayenne, optional
Method
- Set a medium skillet or saucepan over medium heat and add the bacon drippings or butter.
- Once the fat is melted and warm, sprinkle in the flour. Whisk steadily until a smooth paste forms.
- Cook the flour-fat mixture for 1 to 2 minutes, whisking often, until it smells lightly toasty but has not browned much.
- Add the milk a little at a time, whisking well after each addition to keep the mixture smooth.
- Once all the milk is added, continue cooking over medium to medium-low heat, whisking often, until the gravy thickens enough to coat a spoon.
- Stir in the salt, pepper, and cayenne if using. Taste and adjust seasoning.
- Serve warm.
What’s Happening Here
The flour provides starch, and the fat helps disperse it so it can thicken more evenly once the milk is added. As the mixture heats, the starch granules absorb liquid and swell, turning a thin base into gravy. Cooking the flour briefly at the beginning keeps the gravy from tasting raw. If the heat gets too high or the milk goes in too fast, the mixture can lump or scorch.
Trouble Signs
- Lumpy gravy: The milk likely went in too quickly, or the flour was not whisked smoothly at the start.
- Thin gravy: It may need a few more minutes of cooking; starch thickening is not always instant.
- Raw flour taste: The flour-fat mixture needed a little more cooking before the milk was added.
- Scorched flavor: The heat was too high, or the pan was not stirred often enough.
Variations
- Use sausage drippings and browned sausage for a breakfast-style gravy.
- Add a pinch of rubbed sage for a savory note.
- For a slightly lighter version, use part milk and part unsalted broth.
Recipe 2 — Vanilla Stovetop Pudding
Why This Recipe Belongs Here
Pudding is starch thickening in softer clothes. It shows how starch, sugar, milk, and heat work together to create a smooth dessert with body. It also teaches that thickened mixtures keep changing as they cool. A pudding that looks a touch loose in the pot may set up just right on the spoon once it rests.
Yield / Time / Equipment
- Yield: 4 to 6 servings
- Prep time: 10 minutes
- Cook time: 10 minutes
- Equipment: Medium saucepan; whisk; heatproof bowl or ramekins
Ingredients
- 2 cups whole milk
- 1/2 cup granulated sugar
- 3 tablespoons cornstarch
- 1/4 teaspoon kosher salt
- 2 egg yolks
- 1 tablespoon unsalted butter
- 2 teaspoons vanilla extract
Method
- In a medium saucepan, whisk together the sugar, cornstarch, and salt.
- Add the milk gradually, whisking until smooth.
- Stir in the egg yolks until well combined.
- Place the saucepan over medium heat and cook, whisking constantly, until the mixture thickens and begins to bubble slowly.
- Once thickened, cook for 30 to 60 seconds more, still whisking, to fully activate the starch and smooth out the texture.
- Remove from the heat and stir in the butter and vanilla.
- Pour into a bowl or individual ramekins. Press a piece of parchment or plastic wrap against the surface if you want to prevent a skin.
- Cool slightly, then chill until set.
What’s Happening Here
Cornstarch thickens the pudding as it heats with the milk, while egg yolks add richness and help round out the texture. Sugar sweetens the mixture and also affects how quickly things set and thicken. The pudding will seem somewhat loose before cooling, then become firmer as it chills. If cooked too aggressively, the eggs can curdle and the starch can form an uneven texture.
Trouble Signs
- Too thin: It likely needed a little more heat or a little more time at a gentle bubble.
- Grainy texture: The heat may have been too high, or the pudding was not whisked smoothly.
- Skin on top: That is natural, though some folks do not care for it. Cover the surface directly if you want it smooth.
- Curdled bits: The eggs cooked too hard or too fast.
Variations
- Add 2 tablespoons cocoa powder with the dry ingredients for chocolate pudding.
- Stir in a little cinnamon or nutmeg for a warmer flavor.
- Top with sliced bananas and whipped cream for an easy pudding dessert.
Recipe 3 — Roasted Sweet Potatoes
Why This Recipe Belongs Here
Sweet potatoes show, in a kindly way, how sugar and browning can deepen flavor. Their natural sweetness becomes more noticeable as they cook, and their edges can turn beautifully golden in the oven. They are forgiving enough for a weeknight meal but interesting enough to teach a real lesson about moisture loss, surface browning, and concentrated flavor.
Yield / Time / Equipment
- Yield: 4 servings
- Prep time: 10 minutes
- Cook time: 30 to 40 minutes
- Equipment: Sheet pan
Ingredients
- 2 pounds sweet potatoes, peeled if desired and cut into 1-inch pieces
- 2 tablespoons olive oil
- 1 teaspoon kosher salt
- 1/2 teaspoon black pepper
- 1/2 teaspoon smoked paprika, optional
- 1 tablespoon maple syrup or brown sugar, optional for extra glaze
Method
- Heat the oven to 425°F.
- Spread the sweet potatoes on a sheet pan. Drizzle with olive oil and sprinkle with salt, pepper, and paprika if using.
- Toss well, then spread the pieces into a single layer with a little room between them.
- Roast for 20 minutes.
- Turn the pieces and roast for 10 to 20 minutes more, until tender inside and browned at the edges.
- If using maple syrup or brown sugar, toss with it during the last 5 minutes of roasting.
- Serve hot.
What’s Happening Here
As the sweet potatoes roast, their moisture begins to evaporate and their natural sweetness becomes more concentrated. The dry heat of the oven encourages browning on the outside while the inside softens and turns tender. Crowding the pan traps steam, which slows browning and leaves the potatoes softer and paler than you probably intended.
Trouble Signs
- Pale and soft but not browned: The pan was crowded, or the oven was not hot enough.
- Dark outside, firm inside: The pieces were too large, or the heat was too high for the size.
- Soggy texture: Too much steam built up on the pan.
- Burnt sugary spots: Added sweetener too early.
Variations
- Toss with chili powder and cumin for a savory version.
- Finish with a squeeze of lime for contrast.
- Sprinkle with chopped pecans after roasting for crunch.
Recipe 4 — Apple Crisp
Why This Recipe Belongs Here
Apple crisp brings several chapter ideas to the same table. The apples soften and release juice, the sugar sweetens and deepens, and the topping browns into something crumbly and fragrant. It teaches how moisture moves, how starch can help manage fruit juices, and how browning creates a better finish. It is also the sort of dessert that makes a house smell like somebody had a very good plan.
Yield / Time / Equipment
- Yield: 6 to 8 servings
- Prep time: 20 minutes
- Cook time: 40 to 50 minutes
- Equipment: 8-inch or 9-inch baking dish; mixing bowl
Ingredients
For the filling
- 5 cups peeled and sliced apples
- 1/3 cup brown sugar
- 1 tablespoon all-purpose flour or cornstarch
- 1 teaspoon cinnamon
- 1 tablespoon lemon juice
- Pinch of salt
For the topping
- 3/4 cup old-fashioned oats
- 1/2 cup all-purpose flour
- 1/2 cup brown sugar
- 1/2 teaspoon cinnamon
- 1/4 teaspoon kosher salt
- 6 tablespoons cold unsalted butter, cut into pieces
Method
- Heat the oven to 375°F.
- In a bowl, toss the apples with the brown sugar, flour or cornstarch, cinnamon, lemon juice, and salt. Spread in the baking dish.
- In another bowl, combine the oats, flour, brown sugar, cinnamon, and salt.
- Cut the butter into the dry topping mixture with your fingers or a pastry cutter until crumbly and well distributed.
- Scatter the topping evenly over the apples.
- Bake for 40 to 50 minutes, until the fruit is bubbling and the topping is golden brown.
- Let rest at least 10 minutes before serving.
What’s Happening Here
The apples soften as heat breaks down their structure and draws out juices. The flour or cornstarch in the filling helps thicken those juices so the crisp does not turn soupy. In the topping, the butter coats some of the flour and oats, helping create a crumbly texture rather than a solid crust. Browning on top adds deeper flavor and contrast to the soft fruit below.
Trouble Signs
- Runny filling: The fruit released more juice than the starch could handle, or the crisp was served before it had time to rest.
- Pale topping: It needed more oven time, or the butter was not distributed well enough for good browning.
- Dry topping: Too little butter.
- Burning top, underdone fruit: Cover loosely with foil and continue baking until the filling bubbles.
Variations
- Use a mix of tart and sweet apples for better flavor.
- Add chopped pecans or walnuts to the topping.
- Serve with vanilla ice cream or lightly sweetened whipped cream.
Why This Works
Why Sauces Thicken
A starch-thickened sauce works because starch granules absorb water, swell, and begin to interfere with the free movement of liquid around them. As heat rises, the granules hydrate more fully and the mixture becomes more viscous. In many kitchen discussions, this thickening transition is described as gelatinization. In practical terms, it is the point where milk and flour stop behaving like a thin liquid and begin behaving like gravy or pudding.
The exact thickening behavior depends on the kind of starch, the amount of liquid present, the temperature reached, and how well the starch was dispersed at the start. Flour contains starch along with proteins and other components, so flour-thickened sauces usually have a softer, less direct thickening power than cornstarch, which is more concentrated. Cornstarch generally thickens more clearly and with a glossier finish, while flour often gives a more opaque, familiar body. That difference in texture is one reason puddings and glossy pie fillings are often built with cornstarch, while gravy and roux-based sauces often rely on flour.
Fat matters too. In a gravy, the flour is first coated in fat, which helps separate the starch particles and lowers the chance of lumping when liquid is added. Once the milk goes in and the mixture heats, the starch can hydrate more evenly. If the liquid is added too quickly, or if dry starch is not well dispersed, the outer layer of a lump may hydrate and thicken before the inside has a chance to break apart. That is why lumps are stubborn once they get established.
There is also a timing issue. Many starch-thickened mixtures look thin right up until the point where they noticeably gain body. That does not mean nothing is happening. It means the starch is still heating, hydrating, and swelling toward the point where the texture change becomes obvious. The practical lesson is straightforward: start smoothly, whisk well, and allow enough heat and time for the starch to finish its work before judging the result.
Browning and Caramel Flavor
When foods turn golden and aromatic, surface chemistry is changing in ways that strongly affect flavor. Two processes matter most here. One is caramelization, in which sugars break down and reorganize under heat, producing darker color and more complex flavors. The other is Maillard browning, in which sugars and amino compounds, usually from proteins, react together to form a wide range of flavorful brown compounds.
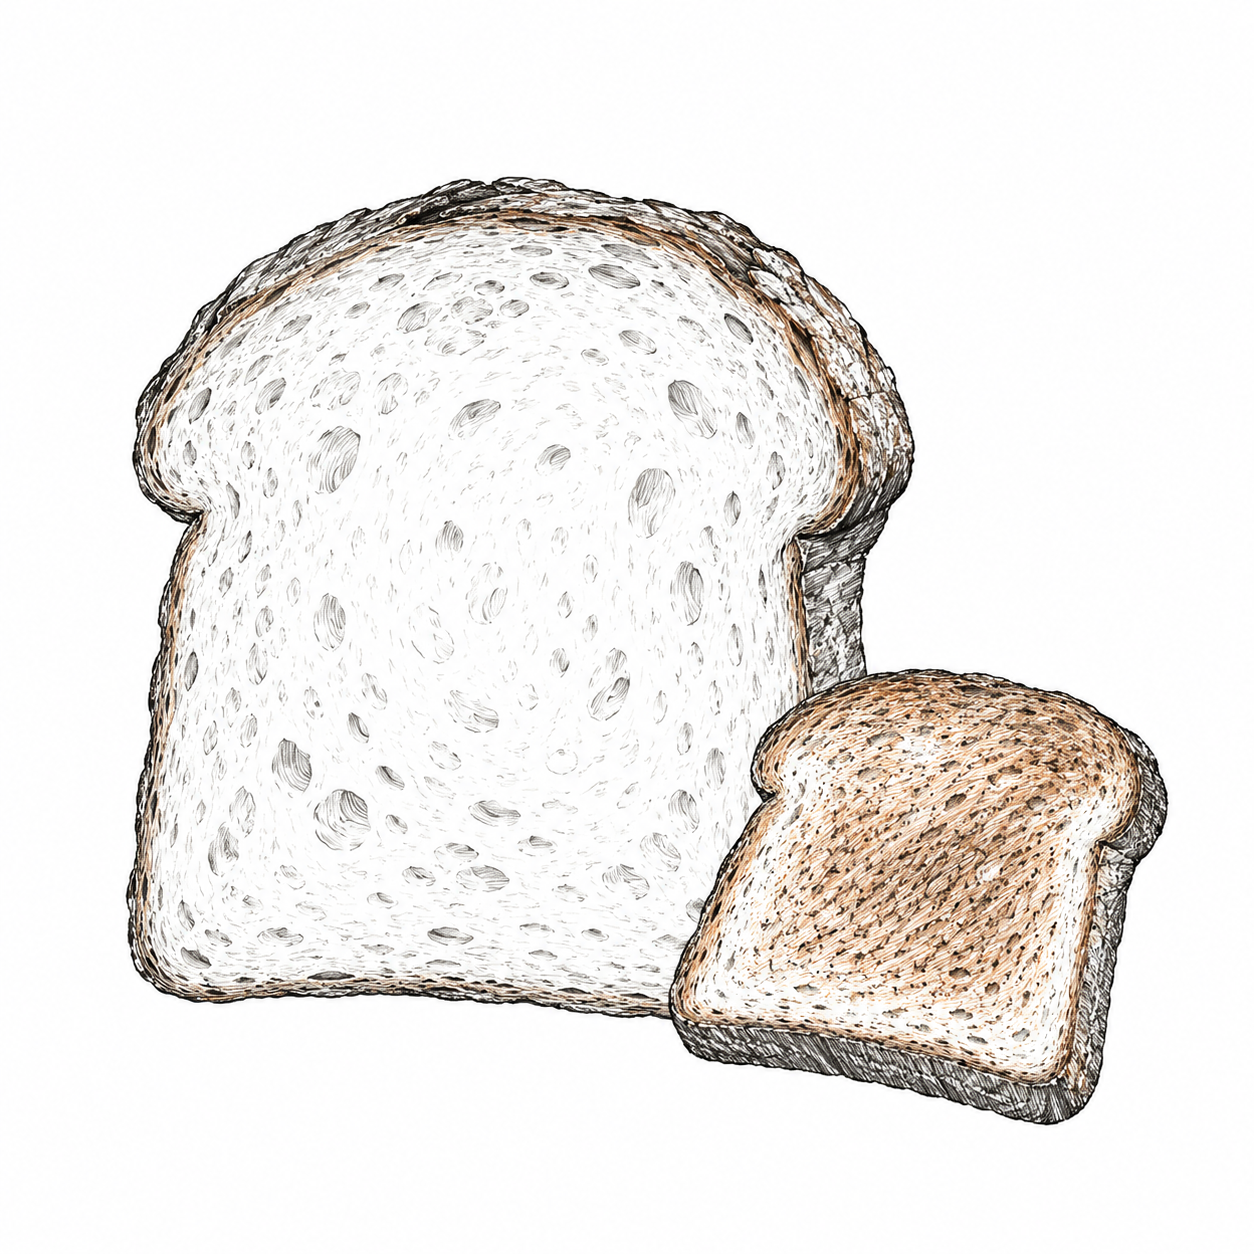
In the kitchen, these processes often overlap, but they are not identical. Caramelization is more closely tied to sugar itself and usually requires relatively high heat with less moisture. Maillard browning depends on both sugars and proteins being present and tends to drive the savory, roasted, toasted flavors people associate with browned bread, seared meat, and baked crusts. A fruit dessert such as apple crisp leans more heavily on sugar-driven browning in the topping and on flavor concentration in the fruit, while roasted sweet potatoes may show both sugar concentration and some browning chemistry at their surfaces.
Moisture is a major control point. When the surface of food is wet, heat energy goes first toward evaporating water. That slows surface temperature rise and delays browning. Once the surface dries enough, browning can move forward more effectively. That is why crowded pans often yield pale vegetables and why a crisp topping needs open oven heat rather than trapped steam.
The practical lesson is just as useful: if you want deeper flavor, you usually need enough heat, enough exposed surface area, and limited surface moisture. If you trap too much steam, you often trade browning for softness.
From the Old Books
Earlier household chemistry writers paid close attention to what happened when starches and sugars met heat, even if they did not always use the terms we would choose today. They understood from experience that flour could thicken a sauce, that sugar changed under heat, and that cooking transformed ingredients in ways that mattered for texture, flavor, and usefulness at the table.
Modern food science gives us better language for these changes. We can speak more clearly now about starch gelatinization, moisture loss, and the complex reactions behind browning. But the older cooks were not guessing in the dark. They were careful observers. They knew that raw flour needed cooking, that heat had to be managed, and that a browned surface usually brought more flavor than a pale one.
That old kitchen wisdom still holds up just fine. We simply have a sharper flashlight for seeing it now.
Trouble Signs and Fixes
Problem: Gravy is lumpy
Likely cause: The flour was not whisked smoothly into the fat, or the milk was added too quickly.
What to do now: Whisk firmly and keep cooking gently. If needed, strain the gravy.
What to do next time: Add the liquid gradually and whisk well from the beginning.
Problem: Gravy tastes raw
Likely cause: The flour-fat base did not cook long enough before the liquid was added.
What to do now: Simmer a little longer if the texture allows.
What to do next time: Give the flour a minute or two in the fat before moving on.
Problem: Pudding will not thicken
Likely cause: Not enough heat, not enough time, or inaccurate starch measurement.
What to do now: Keep cooking over medium heat, whisking steadily, until slow bubbles appear.
What to do next time: Measure carefully and do not pull it off the stove too soon.
Problem: Sweet potatoes are burnt outside and firm inside
Likely cause: Pieces were too large for the oven temperature, or sugar was added too early.
What to do now: Lower the heat slightly or cover loosely and continue roasting until tender.
What to do next time: Cut evenly sized pieces and wait until late in roasting to add extra sweetener.
Problem: Apple crisp is watery
Likely cause: The fruit released a lot of juice, the filling lacked enough starch, or the crisp was served too soon.
What to do now: Let it rest so the juices can settle and thicken some.
What to do next time: Add a little more flour or cornstarch to juicy fruit and bake until the filling bubbles well.
Problem: Crisp topping is pale
Likely cause: It needed more time, or the oven heat was too low.
What to do now: Bake a bit longer, watching closely.
What to do next time: Make sure the topping is spread loosely enough to brown and the oven is fully heated.
Kitchen Takeaway
If you remember one thing from this chapter, let it be this: heat and moisture are always negotiating with texture and flavor. Starch thickens when you treat it right. Sugar changes as heat rises. Browning usually means flavor is getting somewhere good. Learn to watch for those signs, and a whole lot of cooking gets less mysterious and more manageable.
That is a fine trade for any kitchen.
Chapter 5 — Fats, Oils, and Emulsions
Fat has a way of making itself known in the kitchen. It carries flavor, softens texture, helps food brown, and turns plain ingredients into something fuller and more satisfying. Oils, butter, egg yolks, and cream all behave differently, but they share one important job: they change how food feels, tastes, and comes together.
This chapter explains how fats work, why oil and water usually part ways when left to themselves, and how cooks coax them into cooperation. Once you understand a few simple rules about fat and emulsions, you can make better dressings, steadier sauces, more tender baked goods, and vegetables that taste finished instead of merely cooked.
We are not here to make this fancier than it needs to be. We are here to understand why some mixtures stay smooth while others break, why butter behaves differently from oil, and why a little attention to fat can improve a dish more than a whole lot of last-minute fussing.
Core Lesson
Fat is more than richness. It changes the structure of food, the movement of heat, and the way flavor lands on the tongue. That is one reason a buttered biscuit feels different from a dry cracker, and why a spoonful of mayonnaise can seem to round out a sandwich in a way plain oil never would.
At the most basic level, fats are not comfortable mixing with water. Oil and water can be shaken together for a moment, but given time, they separate. This is not a kitchen failure so much as a basic property of the ingredients. Water is polar, meaning its molecules interact strongly with one another and with other polar substances. Fats are largely nonpolar, so they gather with their own kind instead. That helps explain why a bowl of oil and vinegar keeps drifting apart after you shake it. The ingredients are not being stubborn. They are following their nature.
A cook does not need to turn the kitchen into a chemistry classroom to make use of that idea. It is enough to understand that oil and water separate for a reason, and that bringing them together requires some combination of force, structure, and support.
An emulsion is what you get when one liquid is dispersed into another in tiny droplets. In cooking, that usually means oil droplets suspended in a water-based phase. Some emulsions are temporary, like a simple vinaigrette that holds together just long enough to dress a salad before it starts thinking about separating again. Others are more stable, like mayonnaise, where egg yolk helps keep those droplets apart and slows the return of separation.
That stabilizing power comes from emulsifiers. An emulsifier is a substance that can interact with both fat and water, helping them coexist in a smoother mixture. Egg yolk is one of the best-known kitchen emulsifiers because it contains lecithin and other compounds that help lower the tension between the oil phase and the water phase. Mustard can help too, though it usually plays more of a supporting role than a starring one.
The size of the droplets matters. The smaller and more evenly distributed they are, the smoother and more stable the emulsion tends to be. That is one reason adding oil slowly, especially at the beginning, helps mayonnaise come together. You are giving the mixture time to build a network that can hold the fat in suspension rather than letting it flood the bowl all at once.
Viscosity matters too. As an emulsion thickens, the droplets move less freely, which helps slow their recombining. In plain terms, once the structure starts building, it becomes easier for the mixture to stay together.
Fat also affects texture in baked goods. When fat coats flour, it can limit how much water reaches the flour proteins. That matters because those proteins help form gluten, which gives dough strength and chew. In biscuits or pie dough, a cook often wants tenderness more than chew, so the fat acts partly as a barrier. It shortens the structure, which is one reason older baking language sometimes calls certain fats "shortening." The practical takeaway is plain enough: fat can help keep baked goods tender by interfering with too much structural development.
Butter and oil are not interchangeable in every situation, even when a recipe says they are. Butter contains fat, yes, but also water and milk solids. Those milk solids bring flavor and can brown beautifully, but they can also scorch if the heat climbs too high. Oil is more straightforward. It lacks water and milk solids, so it often handles higher heat more calmly. If butter tastes warmer and rounder, oil often behaves steadier and cleaner under hard cooking conditions.
Cream adds another layer to the story. It is an emulsion in its own right, with fat dispersed in water. Whipped cream changes structure because agitation traps air while the fat helps support that foam. A pan sauce finished with cream or butter becomes richer not only because of flavor but because fat alters the texture and the way the sauce spreads across the palate.
Most emulsion problems come down to three things: imbalance, speed, or temperature. Too much fat added too quickly can overwhelm a forming emulsion. Too little emulsifier can leave the mixture without enough support. Too much heat can cause certain emulsions, especially warm butter-and-egg sauces, to break. When that happens, the fat separates out, and the sauce loses its smooth body.
A cook who understands these patterns has a distinct advantage. You begin to see mayonnaise not as a miracle but as an organized suspension. You stop blaming yourself when vinaigrette separates and instead recognize it as the natural behavior of a temporary emulsion. You understand why cold butter worked into flour can make a biscuit tender, and why an overly hot pan can turn butter from nutty and lovely to dark and bitter in short order.
Three practical ideas will carry you a long way here.
First, fat and water do not stay together without help. If you want a stable mixture, you need either an emulsifier, vigorous mixing, or both.
Second, the way fat is introduced matters. Slow addition and steady mixing usually build better structure than dumping everything together and hoping for the best.
Third, fat changes texture as much as flavor. It can tenderize, smooth, enrich, and help carry aromas. Used carelessly, it can also make food greasy, heavy, or broken.
Once you know what role the fat is playing, you have a better chance of using it on purpose rather than by habit.
What to Notice
When working with fats and emulsions, pay attention to cues that tell you whether the mixture is building structure or starting to come apart.
- Look for gloss. A good emulsion often looks smooth and lightly shiny rather than slick or separated.
- Watch the thickness. As mayonnaise forms, the mixture noticeably gains body. That change is telling you the droplets are being held in suspension.
- Notice pooling. If oil begins collecting around the edges or on top, the emulsion may be underbuilt or breaking.
- Smell the butter. Properly cooked butter smells nutty and warm. Burnt butter smells sharp and dark in a way that lets you know you have gone too far.
- Feel the dough. In biscuits and similar doughs, fat should leave the mixture crumbly before liquid goes in, not pasty and overworked.
- Watch the pan. Butter foams as its water cooks off. That visual cue tells you something about where you are in the cooking process.
These are the sorts of signs that make a cook steadier with time. The food often tells the story before the final result does.
Recipe 1 — Homemade Mayonnaise
Why This Recipe Belongs Here
Mayonnaise is one of the clearest kitchen demonstrations of a stable emulsion. Oil and a water-based ingredient begin in tension with one another, then come together into something thick, smooth, and remarkably cohesive when the process is handled well. It teaches patience, sequence, and the importance of droplet size better than almost anything else in the home kitchen.
Yield / Time / Equipment
- Yield: About 1 cup
- Prep time: 10 minutes
- Cook time: none
- Equipment: Medium bowl; whisk, or immersion blender and jar
Ingredients
- 1 egg yolk, room temperature
- 1 teaspoon Dijon mustard
- 1 tablespoon lemon juice or white wine vinegar
- 1/4 teaspoon kosher salt
- 3/4 cup neutral oil, such as grapeseed or light olive oil
- 1 teaspoon water, if needed to loosen
Method
- In a medium bowl, whisk together the egg yolk, mustard, lemon juice or vinegar, and salt until smooth.
- Begin adding the oil a few drops at a time, whisking constantly until the mixture starts to thicken.
- Once the emulsion has clearly begun to form, add the remaining oil in a very slow, steady stream, whisking all the while.
- If the mayonnaise becomes too thick, whisk in a teaspoon of water.
- Taste and adjust with more salt or lemon juice as needed.
- Refrigerate and use within a few days.
What’s Happening Here
The egg yolk and mustard help emulsify the oil into the water-based ingredients. At first, the mixture is fragile, which is why the early oil must go in very slowly. As the droplets become smaller and more evenly distributed, the mixture thickens and gains stability. Once that structure is established, the remaining oil can be added more confidently. If too much oil goes in before the emulsion is built, the mixture can separate.
Trouble Signs
- Thin and oily mixture: The oil likely went in too fast before the emulsion formed.
- Broken mayonnaise: Try whisking a fresh yolk in a clean bowl and slowly adding the broken mixture into it.
- Too thick: Whisk in a teaspoon of water.
- Flat flavor: It may need more salt or acid.
Variations
- Add minced garlic for aioli-style flavor.
- Stir in chopped herbs for a sandwich spread.
- Use part olive oil for stronger flavor, but keep it moderate to avoid bitterness.
Recipe 2 — Blender Hollandaise
Why This Recipe Belongs Here
Hollandaise shows a warm emulsion at work. It is richer and more fragile than mayonnaise, and that makes it a useful teacher. It shows how butter, egg yolk, acid, and temperature interact, and why a sauce can go from smooth to broken if the heat is not respected.
Yield / Time / Equipment
- Yield: About 3/4 cup
- Prep time: 5 minutes
- Cook time: 5 minutes
- Equipment: Blender
Ingredients
- 3 egg yolks
- 1 tablespoon lemon juice
- 1/4 teaspoon kosher salt
- Pinch of cayenne, optional
- 1/2 cup unsalted butter
Method
- Place the egg yolks, lemon juice, salt, and cayenne if using in a blender.
- Melt the butter until hot and fully liquid but not browned.
- Blend the yolk mixture for a few seconds.
- With the blender running on low, slowly drizzle in the hot butter until the sauce thickens and turns smooth.
- Serve at once, or hold briefly in a warm, not hot, place.
What’s Happening Here
The blender breaks the butter into fine droplets and disperses them through the egg-yolk mixture, while the yolks help stabilize the emulsion. The warmth of the butter also helps the yolks thicken slightly, which gives hollandaise some of its body. Too much heat can push the eggs too far and make the sauce break or turn grainy. Too little warmth can leave it thin and underdeveloped.
Trouble Signs
- Sauce is very thin: The butter may not have been warm enough, or too little was added.
- Sauce breaks: The mixture overheated or the proportions went out of balance.
- Grainy texture: The eggs began to overcook.
- Greasy surface: The butter was not held in suspension.
Variations
- Add a touch of hot sauce for a sharper finish.
- Use orange juice in place of some lemon juice for a softer citrus note.
- Spoon over asparagus, poached eggs, or roasted vegetables.
Recipe 3 — Pan-Roasted Green Beans with Butter Finish
Why This Recipe Belongs Here
This recipe shows fat in a simpler, everyday role. Butter is not serving as a formal emulsion here so much as a finishing fat that brings flavor, gloss, and a fuller mouthfeel. It also shows why butter is often best added toward the end of cooking, when you want its flavor without risking too much scorching.
Yield / Time / Equipment
- Yield: 4 servings
- Prep time: 10 minutes
- Cook time: 10 to 12 minutes
- Equipment: Large skillet
Ingredients
- 1 pound green beans, trimmed
- 1 tablespoon neutral oil
- 1 tablespoon unsalted butter
- 1/2 teaspoon kosher salt, plus more to taste
- 1/4 teaspoon black pepper
- 1 teaspoon lemon juice, optional
Method
- Heat a large skillet over medium-high heat and add the oil.
- Add the green beans and cook, stirring every minute or so, until they begin to blister in spots and turn crisp-tender.
- Lower the heat to medium and add the butter.
- Toss until the butter coats the beans and smells nutty and warm.
- Season with salt and pepper, then finish with lemon juice if using.
- Serve at once.
What’s Happening Here
The oil handles the higher initial heat and helps the beans blister without immediately scorching. The butter is added later for flavor and finish, when its milk solids are less likely to burn. As the butter melts and lightly foams, it coats the beans and carries aroma across their surface. This is less about building an emulsion than about understanding how different fats behave at different stages.
Trouble Signs
- Butter burns quickly: The heat was still too high when it was added.
- Beans are pale and soft: The pan was crowded, or the heat was too low.
- Greasy finish: Too much fat for the amount of vegetables.
- Tough beans: They needed a little more cooking time.
Variations
- Add sliced almonds at the end.
- Use a pinch of red pepper flakes for heat.
- Finish with grated Parmesan for a richer dish.
Why This Works
Why Emulsions Hold Together
An emulsion holds together when one liquid is broken into fine droplets and dispersed through another, while something in the mixture helps keep those droplets from quickly merging back together. In kitchen emulsions, that "something" is often an emulsifier such as lecithin from egg yolk, along with the mechanical force of whisking or blending.
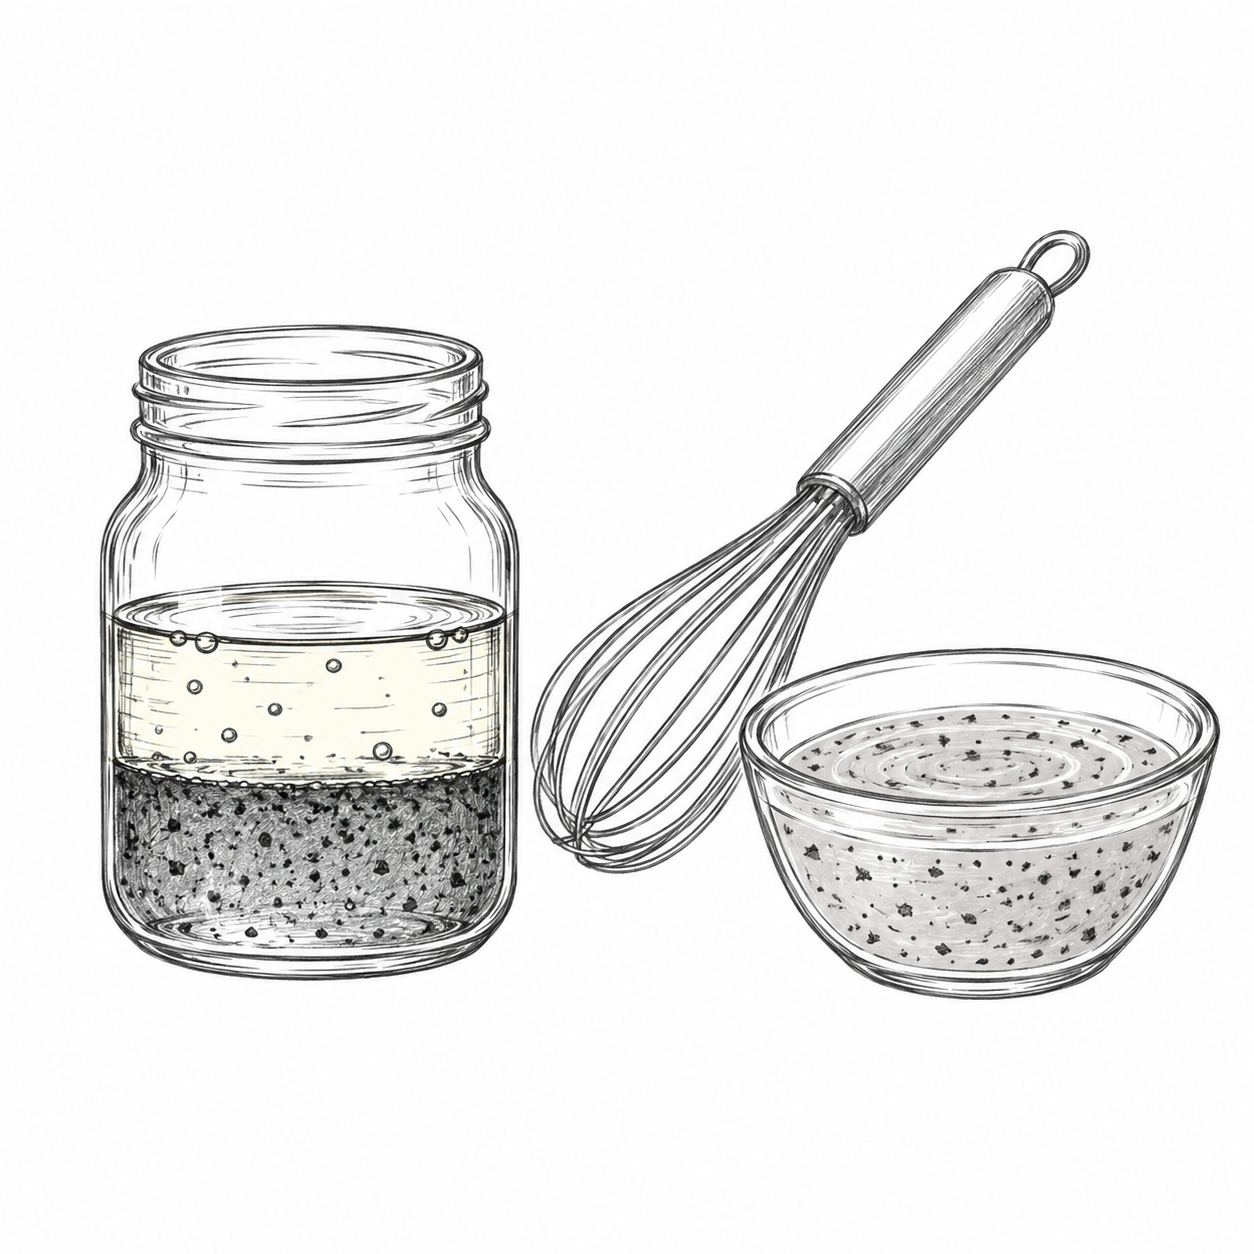
A stable emulsion depends on several things happening at once. The droplets need to become small. They need to be distributed evenly. And the mixture needs enough emulsifier and enough viscosity to slow the natural tendency of like droplets to reunite. That is why mayonnaise thickens as it forms: the growing number of tiny oil droplets makes it harder for the mixture to flow freely, and the emulsion becomes more structured.
Temperature can help or hurt. If ingredients are extremely cold, certain emulsions may resist forming smoothly. If the mixture gets too warm, especially in egg-based sauces, the structure can weaken or the proteins can overcook. Ratio matters too. Every emulsion has a point where the dispersed phase overwhelms the supporting structure. When that happens, the droplets merge and the mixture separates.
From the cook’s point of view, the practical lesson is simple: begin slowly, build the structure, and respect the balance of temperature and proportion.
Butter, Oil, and Heat
Butter and oil both provide fat, but they do not behave the same under heat. Butter contains milk solids and water along with fat. Those milk solids bring flavor and can brown into pleasant nuttiness, but they can also burn. Oil is more heat-stable because it lacks those milk solids and water.
This matters in everyday cooking. A skillet of vegetables may start with oil for steadier high-heat cooking, then finish with butter for flavor. A sauce might be enriched with butter off the heat so it stays glossy rather than greasy. Understanding the composition of the fat helps explain why one choice behaves calmly while another can turn on you in a hurry.
The practical lesson here is worth keeping close: choose the fat not just for taste, but for the job it needs to do.
From the Old Books
Earlier household chemistry writers understood well enough that fats were not merely indulgent extras. They recognized that fats softened mixtures, enriched food, and changed the way ingredients behaved in cooking. Even without the modern language of emulsifiers, polarity, or droplet stability, they could see plainly that grease, cream, butter, and oils did not all act alike.
Modern food science lets us describe those differences more precisely. We can explain why egg yolk helps stabilize mayonnaise, why butter browns but oil behaves more steadily at high heat, and why fat can limit structural development in dough. Still, the older practical lesson remains sound: fat is not just there for richness. It is doing structural work whether the cook notices it or not.
Trouble Signs and Fixes
Problem: Mayonnaise will not thicken
Likely cause: The oil was added too quickly before the emulsion had a chance to form.
What to do now: Start with a fresh yolk in a clean bowl and slowly whisk the failed mixture into it.
What to do next time: Add the first portion of oil drop by drop and wait for clear thickening before speeding up.
Problem: Hollandaise breaks
Likely cause: The mixture overheated, or the butter was added too aggressively.
What to do now: Try whisking a teaspoon of warm water into the sauce to bring it back together.
What to do next time: Keep the sauce warm, not hot, and add the butter slowly enough for the emulsion to form.
Problem: Butter burns in the skillet
Likely cause: The heat was too high, or the butter went in too early.
What to do now: Lower the heat and start again if the flavor has turned bitter.
What to do next time: Use oil for the initial cooking and add butter later.
Problem: Butter sauce or warm emulsion turns greasy
Likely cause: The fat separated instead of staying dispersed, often because the sauce got too hot or the structure was weak.
What to do now: Pull the sauce off the heat and whisk in a teaspoon of warm water if the style of sauce allows.
What to do next time: Build the emulsion more gradually and finish it over gentler heat.
Problem: Sauce looks slick instead of smooth
Likely cause: The fat separated rather than staying incorporated.
What to do now: Remove from heat and whisk in a small splash of water if the sauce permits.
What to do next time: Finish the sauce more gently and watch the temperature closely.
Kitchen Takeaway
If you remember one thing from this chapter, let it be this: fat is doing more than making food rich. It is carrying flavor, shaping texture, and sometimes holding a whole mixture together. Learn when fat needs help, when it needs restraint, and when it is best added at the very end, and your cooking will start feeling steadier in a hurry.
That is a useful bit of kitchen understanding to keep close at hand.Chapter 6 — Eggs and Proteins
Eggs are one of the clearest teaching tools in the kitchen because they respond so visibly to heat. They go from loose to tender, from glossy to firm, from silky to rubbery, often in just a few minutes. Proteins more broadly behave in similar ways. They tighten, set, and change texture as heat, acid, salt, and agitation begin working on their structure.
This chapter explains why eggs set, why custards curdle, why foams can hold or collapse, and how proteins can be either delicate or sturdy depending on how they are handled. Once you understand those patterns, eggs become easier to cook well and many other kitchen behaviors begin making more sense too.
We are not trying to make breakfast sound complicated. We are trying to understand why proteins are so useful and so easy to push too far.
Chapter 6 — Eggs and Proteins
Core Lesson
Proteins are long, folded molecules that hold particular shapes until something disrupts them. In the kitchen, the most common disruptors are heat, acid, salt, and physical agitation. When proteins lose their original structure, the change is often called denaturation. Once denatured, they may begin linking to one another in new ways. When enough of those links form, the food changes texture and may set into a network. In eggs, this is the main reason a liquid mixture becomes a soft scramble, a custard, or a sliceable frittata.
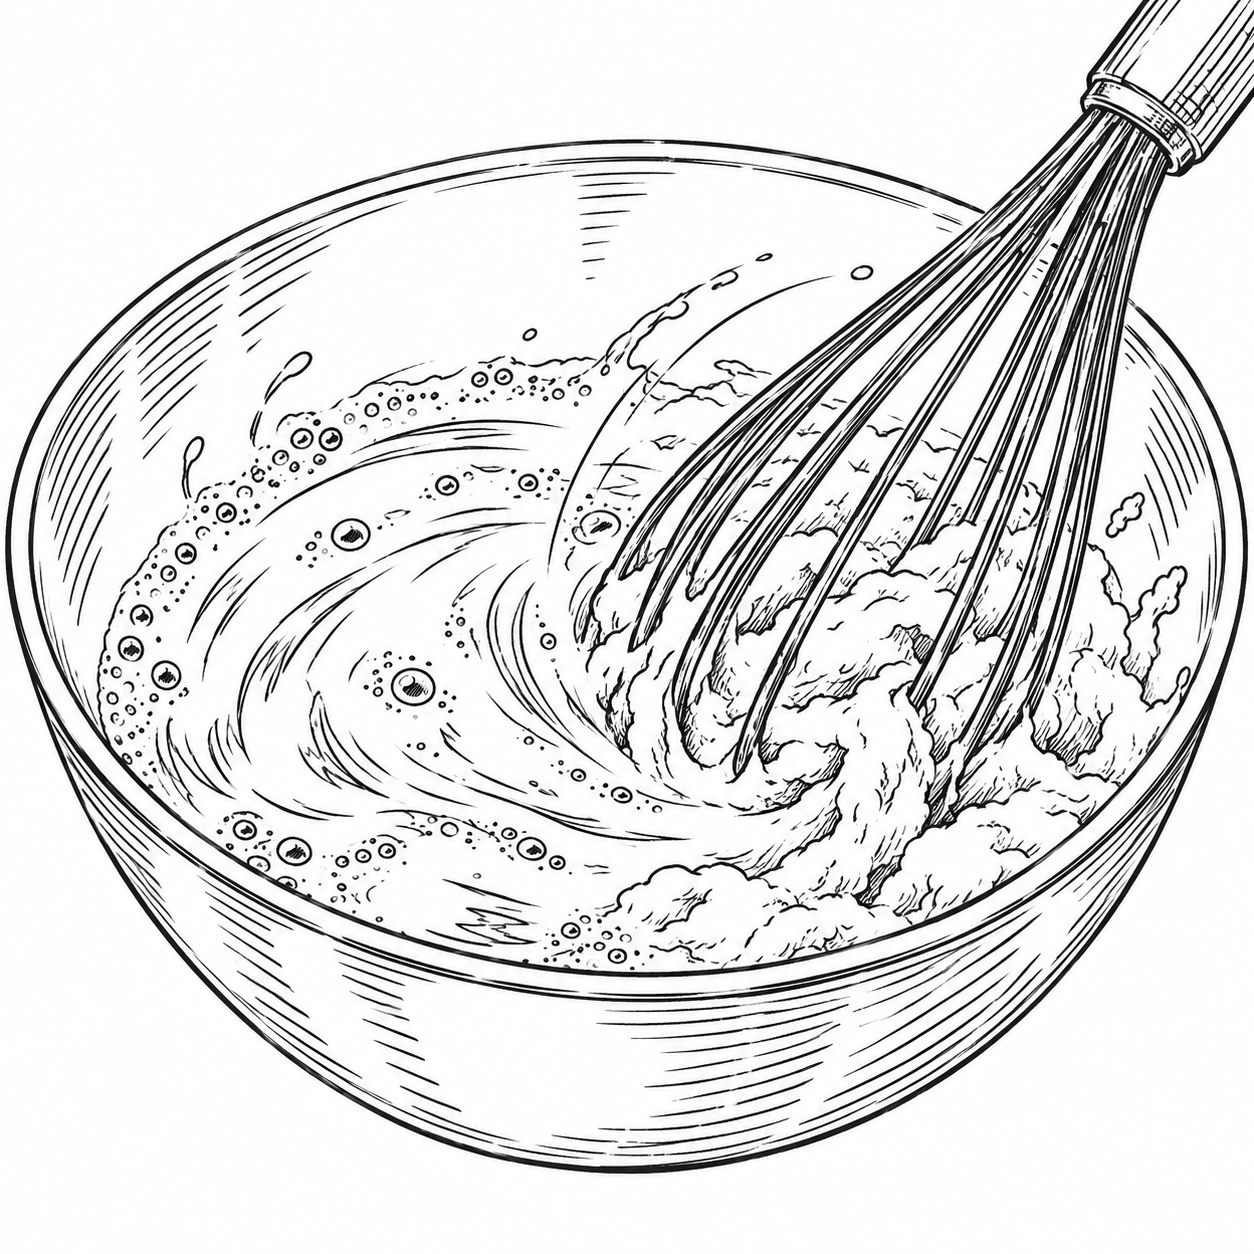
Eggs make this easier to see than almost any other ingredient. Their proteins begin in a loose, fluid state. As heat rises, they denature and then coagulate, meaning they connect into a more organized structure. In plain kitchen terms, the eggs go from liquid to tender curds or a smooth custard. Push them further, and that structure tightens too much, squeezing out moisture and producing a texture that feels dry, rubbery, grainy, or watery in all the wrong ways.
This is why eggs reward more restraint than many cooks first assume. The range between underdone and overdone is not always wide. A softly scrambled egg, for example, depends on stopping the cooking while the curds are still moist, because carryover heat continues the setting for a short while after the pan leaves the burner. Custard asks for similar control on a larger scale. It needs enough heat to build a stable protein network, but not so much that the network tightens too aggressively.
Proteins do not all behave identically. Egg whites and yolks differ. Dairy proteins differ from egg proteins. Meat proteins behave differently again. But the broad lesson still holds: once proteins begin changing shape and linking together, texture changes follow. That is why this chapter matters well beyond eggs.
Foam is another part of the protein story. When egg whites are beaten, proteins unfold and begin forming a network around tiny pockets of air. That is what allows a meringue to rise and hold shape. But that structure is delicate. Not enough whipping and the foam stays weak. Too much and it can grow dry, grainy, or unstable. Sugar can help stabilize the foam, while even a little fat can interfere with its formation.
Acid changes protein behavior too. In some cases, a small amount of acid can help a foam or shift the way proteins set. In other cases, acid can push proteins toward curdling, especially when heat is already involved. This is one reason lemon in a dairy sauce needs care, and one reason certain egg-based mixtures respond noticeably to acidic ingredients.
Water and dilution matter as well. Eggs baked gently in a custard with milk and sugar behave differently from eggs scrambled alone in a skillet. The added ingredients spread out the proteins, soften the final texture, and slow the process somewhat. This is why a custard feels delicate where a plain egg can turn firm so quickly.
Temperature control matters in at least three ways. First, it controls how quickly proteins denature. Second, it affects how tightly the final network forms. Third, it determines whether the setting happens evenly or too abruptly at the edges and not enough in the center. That is why a water bath helps baked custards and why moderate heat is often the better path for eggs.
Agitation matters too. Stirring scrambled eggs changes curd size. Whisking a custard base blends proteins with sugar and milk. Beating egg whites traps air and builds foam. In each case, movement is not incidental. It helps shape the final structure.
Three practical ideas will carry you a long way here.
First, proteins set because their structure changes and then links together.
Second, gentle heat usually gives more control than aggressive heat.
Third, once proteins tighten too far, the texture is hard to rescue completely.
Once those ideas settle in, eggs stop feeling temperamental. They start looking like a clear, visible lesson in how proteins behave when the kitchen gets involved.
What to Notice
When working with eggs and proteins, watch for cues that tell you whether the structure is forming well or tightening too far.
- Look for gloss. Soft eggs and custards often look moist and lightly glossy before they turn dry.
- Watch the edges first. Protein setting often begins at the hottest parts of the pan or dish.
- Notice the jiggle. A custard can be properly set while the center still trembles slightly.
- Pay attention to curd size. Stirring changes whether scrambled eggs form small tender curds or larger firmer ones.
- Watch foam texture. Egg whites move from bubbly to creamy to peaked as structure develops.
- Look for weeping or separation. That often means the proteins tightened too far.
Protein cookery usually gives visible warning before it gives full disappointment.
Recipe 1 — Baked Custard
Why This Recipe Belongs Here
Custard is one of the clearest demonstrations of protein setting in the kitchen. It is simple enough to show the principle plainly and delicate enough to punish rough handling. That makes it a fine teacher. It asks for patience, steadiness, and the good sense to stop before the eggs go too far.
Yield / Time / Equipment
- Yield: 4 to 6 servings
- Prep time: 10 minutes
- Cook time: 35 to 45 minutes
- Equipment: Baking dish or ramekins; roasting pan for water bath optional
Ingredients
- 2 cups whole milk
- 3 eggs
- 1/3 cup sugar
- 1 teaspoon vanilla extract
- Pinch of kosher salt
- Grated nutmeg, optional
Method
- Heat the oven to 325°F.
- Warm the milk slightly, but do not boil it.
- In a bowl, whisk together the eggs, sugar, vanilla, and salt.
- Gradually whisk the warm milk into the egg mixture.
- Pour into ramekins or a baking dish.
- Place in a water bath if desired for gentler heat.
- Bake 35 to 45 minutes, until the custard is mostly set but still trembles slightly in the center.
- Cool before serving warm or chilled.
What’s Happening Here
The egg proteins are forming the network that sets the custard, while the milk and sugar soften the overall texture and flavor. The water bath, if used, helps moderate the heat so the proteins set more evenly. If the custard bakes too hard or too long, the protein network tightens too much and the texture turns curdled, watery, or grainy.
Trouble Signs
- Curdled texture: The custard got too hot.
- Watery seepage: The proteins tightened too far and squeezed out liquid.
- Underset center: It needs a little more time.
- Rubbery texture: It was baked too aggressively.
Variations
- Add cinnamon or nutmeg.
- Use a little citrus zest.
- Top with berries or lightly sweetened whipped cream.
Recipe 2 — Simple Frittata
Why This Recipe Belongs Here
A frittata shows protein setting in a more savory, everyday form. It teaches how eggs can form a stable structure around vegetables, cheese, and other additions, and how careful finishing keeps that structure tender rather than dry. It is less delicate than custard, but it follows the same basic rules.
Yield / Time / Equipment
- Yield: 4 servings
- Prep time: 10 minutes
- Cook time: 12 to 15 minutes
- Equipment: Oven-safe skillet
Ingredients
- 6 eggs
- 2 tablespoons milk or cream
- 1/2 teaspoon kosher salt
- Black pepper to taste
- 1 tablespoon olive oil or butter
- 1 cup cooked vegetables, such as onions, spinach, or mushrooms
- 1/2 cup shredded cheese, optional
Method
- Heat the oven to 375°F.
- Whisk together the eggs, milk or cream, salt, and pepper.
- Heat the oil or butter in an oven-safe skillet over medium heat.
- Add the vegetables and warm them through.
- Pour in the egg mixture and stir gently once or twice to distribute the fillings.
- Cook on the stove just until the edges begin to set.
- Sprinkle with cheese if using.
- Transfer to the oven and bake until the center is just set, about 8 to 10 minutes.
- Rest briefly before slicing.
What’s Happening Here
The eggs are building a protein network strong enough to hold the fillings in place, while the milk or cream softens the final texture slightly. Starting on the stove begins the setting process at the edges, and the oven finishes it more gently than leaving the skillet over direct heat the whole time. If the frittata cooks too long, the proteins tighten and the texture turns dry.
Trouble Signs
- Rubbery texture: It baked too long or too hot.
- Wet center: It needs more time.
- Watery slices: The fillings released too much liquid.
- Browned bottom: The stove heat stayed too high for too long.
Variations
- Use roasted peppers and onions.
- Add fresh herbs at the end.
- Use goat cheese or feta for a sharper finish.
Recipe 3 — Meringue
Why This Recipe Belongs Here
Meringue shows what proteins can do when air, agitation, and sugar join the process. It turns liquid egg whites into a foam that can hold shape, rise, and dry into a crisp or chewy structure depending on how it is baked. It is one of the clearest examples of proteins doing structural work without becoming simply firm or rubbery.
Yield / Time / Equipment
- Yield: Enough for one pie topping or about 20 small meringues
- Prep time: 15 minutes
- Cook time: 1 hour or more depending on use
- Equipment: Clean bowl; whisk or mixer; sheet pan if baking meringues
Ingredients
- 3 egg whites
- 1/2 teaspoon cream of tartar, optional
- 3/4 cup sugar
- 1 teaspoon vanilla extract, optional
Method
- Heat the oven to 225°F if making crisp baked meringues.
- Place the egg whites in a very clean bowl.
- Beat until foamy.
- Add the cream of tartar if using.
- Continue beating while adding the sugar gradually.
- Beat until the foam is glossy and holds firm peaks.
- Stir in the vanilla if using.
- Spread as needed for a pie topping or pipe onto a sheet pan for individual meringues.
- Bake until dry and set, adjusting time for size and use.
What’s Happening Here
Beating unfolds some of the egg-white proteins and helps them form a network around tiny air bubbles. Sugar helps stabilize that foam and gives it a smoother, glossier finish. If fat is present in the bowl or yolk contaminates the whites, the foam may struggle to form properly. If the meringue is beaten too far, the structure can become dry and unstable.
Trouble Signs
- Foam will not build: The bowl or whites may have fat contamination.
- Grainy meringue: The sugar did not dissolve well or the foam was overbeaten.
- Weeping: The structure is unstable or the sugar ratio is off.
- Collapsed foam: It did not develop enough structure before baking.
Variations
- Add lemon zest.
- Use as a pie topping.
- Pipe into small shells and fill after baking.
Recipe 4 — Egg Drop Soup
Why This Recipe Belongs Here
Egg drop soup is a good reminder that proteins can set delicately in liquid as well as in a skillet or oven. It teaches how temperature, agitation, and dilution change the final result. The same eggs that can become a solid frittata can also become tender ribbons if the conditions are right.
Yield / Time / Equipment
- Yield: 4 servings
- Prep time: 10 minutes
- Cook time: 10 minutes
- Equipment: Pot; whisk or fork
Ingredients
- 4 cups chicken stock
- 2 eggs
- 1 teaspoon cornstarch mixed with 1 tablespoon water, optional
- 1/2 teaspoon kosher salt, or to taste
- White or black pepper to taste
- 1 sliced green onion
Method
- Bring the stock to a gentle simmer.
- Add the cornstarch slurry if using and simmer briefly to give the soup a little body.
- Beat the eggs in a small bowl.
- Stir the soup gently in one direction.
- Drizzle in the eggs slowly.
- Let the egg ribbons form and set for a few seconds.
- Season with salt and pepper and finish with green onion.
- Serve hot.
What’s Happening Here
The hot liquid sets the egg proteins almost immediately, but because the eggs are diluted into thin strands, the result stays tender rather than dense. Stirring and pour speed control whether the soup forms fine ribbons or larger strands. This is protein setting again, just in a much lighter structure than scrambled eggs or custard.
Trouble Signs
- Cloudy clumps instead of ribbons: The eggs went in too quickly or the soup boiled too hard.
- No real ribbons: The stock was not hot enough.
- Rubbery strands: The soup was too hot or the eggs were overagitated.
- Thin, empty-feeling soup: It may need seasoning or a little body from starch.
Variations
- Add ginger.
- Use sesame oil at the finish.
- Add corn or peas for a fuller soup.
Why This Works
Why Custard Sets Gently and Then All at Once
Custard usually seems quiet right up until it begins to set. That is because the egg proteins are gradually denaturing and linking together as the temperature rises, but the visible change in texture becomes obvious only once enough of that network has formed. The setting looks sudden even though the process has been underway for a while.
Because the protein network is delicate, a custard has a narrow comfortable range. Too little heat and it stays loose. Too much and the network tightens too far, squeezing out liquid and producing curdling or graininess.
The practical lesson is simple: pull a custard when it is almost fully set, not when it looks fully firm in the oven.
Why Foams Need Clean Conditions
Protein foams such as meringue depend on unfolded egg-white proteins building a structure around trapped air. Fat interferes with that process. Even a small amount of yolk or grease can keep the foam from forming as fully as it should.
Sugar helps stabilize the foam, but it cannot fully rescue a bowl that started with contamination. This is why clean tools and patient whipping matter so much in meringue work.
The practical lesson here is worth keeping close: when protein is doing delicate structural work, the setup matters as much as the ingredients.
From the Old Books
Earlier household chemistry writers paid close attention to eggs because eggs made kitchen change easy to see. They understood from practice that eggs thickened mixtures, set dishes, and responded quickly to heat. They also knew that delicate preparations could be spoiled by haste or too much fire.
Modern food science gives us a more exact vocabulary for those observations. We can describe denaturation, coagulation, foam formation, and the effects of dilution or added sugar. But the older practical lesson still stands comfortably: eggs reward attention, and proteins do not tolerate rough handling for long.
That is one reason they remain such good teachers.
Trouble Signs and Fixes
Problem: Eggs turn rubbery
Likely cause: Too much heat or too much time.
What to do now: Pull them from the heat immediately.
What to do next time: Use gentler heat and stop earlier.
Problem: Custard curdles or weeps
Likely cause: The protein network tightened too far.
What to do now: Chill and serve if acceptable, but full repair is unlikely.
What to do next time: Use gentler heat and remove it while the center still trembles slightly.
Problem: Meringue will not whip properly
Likely cause: Fat contamination or insufficient whipping.
What to do now: Start over with a clean bowl if needed.
What to do next time: Keep the bowl spotless and separate the eggs carefully.
Problem: Frittata is watery
Likely cause: The fillings released too much liquid.
What to do now: Let it rest briefly and slice carefully.
What to do next time: Cook wet vegetables first or drain them better.
Problem: Egg drop soup forms clumps instead of ribbons
Likely cause: The eggs were added too fast or the soup was boiling too hard.
What to do now: Lower the heat and adjust technique on the next pour.
What to do next time: Use a gentler simmer and drizzle the eggs more slowly.
Kitchen Takeaway
If you remember one thing from this chapter, let it be this: proteins are useful because they change structure. Eggs, more than almost any other ingredient, let you watch that happen in real time. Handle them with some restraint, and they become tender, airy, or delicately set. Push them too far, and they let you know quickly.
That makes them frustrating on bad days and excellent teachers on good ones.
Chapter 7 — Flour, Gluten, and Dough
Flour can look plain enough sitting in the pantry, but it is one of the most changeable ingredients in the kitchen. With a little water and a light hand, it can become tender biscuits or delicate muffins. With more mixing and time, it can build the stretchy structure that gives bread its chew and shape. That range is what makes flour so useful and, every now and then, so frustrating.
This chapter explains how flour behaves once it meets water, why mixing matters more than many cooks realize, and how gluten helps some doughs while getting in the way of others. Once you understand those patterns, you can make better choices about stirring, kneading, resting, and stopping before a good dough turns into a tough one.
We are not trying to turn the biscuit bowl into a laboratory. We are trying to understand why a gentle hand makes some baked goods tender, why bread improves from steady kneading, and why flour needs different treatment depending on what you want it to become.
Core Lesson
Flour is mostly starch, but it also contains proteins that matter a great deal once water enters the picture. When flour is moistened and mixed, two of its main proteins, glutenin and gliadin, begin interacting to form gluten, a flexible network that gives dough structure. In plain kitchen terms, gluten is what helps dough hold together, stretch, trap gas, and keep its shape.
That can be a very good thing. In yeast bread, gluten is one of the main reasons a loaf can rise instead of spreading flat. The dough develops strength, elasticity, and the ability to capture the gases produced during fermentation. Without enough structure, bread would not have much lift or chew.
But too much gluten development can be trouble in the wrong recipe. Biscuits, muffins, pancakes, and pie dough usually want tenderness more than stretch. In those foods, too much mixing gives the proteins more opportunity to organize, which can leave the final texture tough, rubbery, or disappointingly bready. That is why recipes for quick breads often tell you to stir just until combined and then stop.
Water is the trigger. Dry flour on its own is quiet. Add water, milk, buttermilk, or eggs, and the proteins can begin linking up. Mixing speeds that process along by bringing the proteins into repeated contact. Time matters too. A dough that rests may continue hydrating and changing even when the cook has stepped away for a moment.
Fat changes the story. In biscuits and pie dough, cold fat coats some of the flour and helps limit how much water reaches the proteins right away. That reduces gluten development and helps produce a more tender, flaky texture. This is part of what bakers mean when they say fat "shortens" a dough.
Temperature matters as well. Warm doughs often behave more softly and more actively, while colder doughs can be easier to handle and less prone to overdevelopment in certain applications. That is one reason biscuit dough benefits from cold fat and restrained handling, while bread dough often needs enough warmth to ferment and expand well.
Flour type also plays a role. All-purpose flour can do many jobs reasonably well, which is why so many home cooks keep it on hand. But different flours are milled and blended with different protein levels, and those differences affect how much structure they tend to build. Bread flour usually develops stronger dough. Cake flour usually yields a finer, more tender crumb.
Technique matters as much as ingredient choice. A biscuit dough can be ruined by overhandling even if the proportions are correct. A loaf of bread can remain squat and dense if kneading stops before enough structure develops. A muffin batter can go from tender to tunnel-ridden just because someone kept stirring too long.
Three practical ideas will carry you a long way here.
First, water wakes flour up. Once liquid goes in, the dough or batter begins changing.
Second, mixing builds structure. Whether that is good or bad depends on the goal.
Third, fat and temperature can help keep a dough tender by slowing or limiting gluten development.
Once you begin thinking in those terms, a recipe becomes less like a list of chores and more like a set of structural instructions. That is useful knowledge whether you are baking biscuits for supper or kneading bread on a quiet Saturday morning.
What to Notice
When working with flour and dough, watch for cues that tell you whether the structure is where it ought to be.
- Look at the surface. A bread dough that is becoming smoother is often building structure. A biscuit dough should still look somewhat rough, not polished.
- Feel the resistance. Kneaded dough begins to push back a little. Muffin batter should not.
- Watch the crumbly stage. In biscuits or pie dough, flour rubbed with fat should look pebbly or shaggy before the liquid goes in.
- Notice elasticity. Dough that stretches and springs back is telling you gluten has developed.
- Pay attention to drag. An overmixed batter often feels thicker and more resistant than it should.
- Watch the finished crumb. Tunnels, chewiness, or toughness often point back to too much mixing.
A good dough usually tells you what it needs if you listen with your hands as much as your eyes.
Recipe 1 — Flaky Buttermilk Biscuits
Why This Recipe Belongs Here
Biscuits are one of the clearest lessons in controlled restraint. They depend on flour for structure, but not too much structure. They need enough handling to come together, enough layering to rise, and enough cold fat to create tenderness. They teach that flour behaves best when the cook knows when to stop.
Yield / Time / Equipment
- Yield: 8 biscuits
- Prep time: 15 minutes
- Cook time: 12 to 15 minutes
- Equipment: Mixing bowl; pastry cutter or fingers; biscuit cutter; sheet pan
Ingredients
- 2 cups all-purpose flour
- 1 tablespoon baking powder
- 1/2 teaspoon baking soda
- 1 teaspoon kosher salt
- 1 tablespoon sugar, optional
- 6 tablespoons cold unsalted butter, cut into pieces
- 3/4 cup cold buttermilk, plus a little more if needed
- 1 tablespoon melted butter, optional for brushing
Method
- Heat the oven to 425°F.
- In a mixing bowl, whisk together the flour, baking powder, baking soda, salt, and sugar if using.
- Cut the cold butter into the flour mixture with a pastry cutter or your fingers until the mixture looks shaggy, with some pieces about the size of peas.
- Pour in the buttermilk and stir gently just until the dough starts to come together. Add a small splash more if dry pockets remain.
- Turn the dough onto a lightly floured surface and pat it into a rectangle.
- Fold the dough over itself a few times, then pat it to about 1-inch thick.
- Cut biscuits straight down with a cutter. Do not twist.
- Place on a sheet pan, close together for softer sides or farther apart for crisper edges.
- Bake 12 to 15 minutes, until risen and golden. Brush with melted butter if desired.
What’s Happening Here
The flour provides the framework, but the cold butter interrupts how fully that framework can develop. As the biscuits bake, the butter melts, moisture turns to steam, and the dough lifts into layers. Gentle mixing keeps the gluten from becoming too strong, while folding creates some structure without overworking the dough. Twist the cutter or knead too much, and the biscuits often let you know by rising unevenly or turning tougher than they ought to be.
Trouble Signs
- Tough biscuits: The dough was overmixed or overhandled.
- Poor rise: The dough may have been pressed too thin, the cutter twisted, or the leavening was weak.
- Dry biscuits: Too little buttermilk or too much flour during handling.
- Dense texture: The dough may have been worked until smooth instead of left shaggy.
Variations
- Add chopped chives and black pepper for a savory biscuit.
- Use half butter and half bacon drippings for extra flavor.
- Sprinkle flaky salt on top before baking.
Recipe 2 — Basic Muffins
Why This Recipe Belongs Here
Muffins are useful because they show how quickly a batter can become overdeveloped. They ask for a light hand, simple mixing, and enough discipline to leave a few lumps alone. They are a reminder that more mixing is not always better.
Yield / Time / Equipment
- Yield: 12 muffins
- Prep time: 10 minutes
- Cook time: 18 to 22 minutes
- Equipment: Muffin tin; paper liners or greased cups; mixing bowls
Ingredients
- 2 cups all-purpose flour
- 1/2 cup sugar
- 1 tablespoon baking powder
- 1/2 teaspoon kosher salt
- 1 cup milk
- 1/3 cup neutral oil or melted butter
- 1 egg
- 1 teaspoon vanilla extract
Method
- Heat the oven to 375°F. Line or grease a 12-cup muffin tin.
- In one bowl, whisk together the flour, sugar, baking powder, and salt.
- In another bowl, whisk together the milk, oil or melted butter, egg, and vanilla.
- Pour the wet ingredients into the dry ingredients and stir gently just until no large dry patches remain. A few lumps are fine.
- Divide the batter among the muffin cups.
- Bake 18 to 22 minutes, until lightly golden and a tester comes out clean.
- Cool briefly, then remove from the pan.
What’s Happening Here
Once the liquid meets the flour, the proteins begin forming structure. Stirring helps the batter come together, but too much stirring gives those proteins more opportunity to build toughness. That is why muffin batter should be mixed only until combined. A few lumps are not a sign of failure. They are often a sign that the cook showed restraint.
Trouble Signs
- Tough muffins: The batter was overmixed.
- Tunnels in the crumb: Too much stirring built too much structure.
- Dry muffins: Overbaking or too much flour.
- Flat tops: The batter may have sat too long before baking, or the leavening was weak.
Variations
- Fold in blueberries or diced apples.
- Add cinnamon and streusel topping.
- Replace a portion of the milk with buttermilk for a tangier muffin.
Recipe 3 — Simple Sandwich Loaf
Why This Recipe Belongs Here
Bread is the other side of the flour story. Here, structure is not the enemy. It is the goal. A sandwich loaf teaches how hydration, kneading, and time build a dough that can trap gas, rise well, and slice into something useful for everyday meals.
Yield / Time / Equipment
- Yield: 1 loaf
- Prep time: 20 minutes, plus rising time
- Cook time: 30 to 35 minutes
- Equipment: Mixing bowl; loaf pan
Ingredients
- 3 1/4 cups bread flour or all-purpose flour, plus more as needed
- 2 1/4 teaspoons instant yeast
- 1 tablespoon sugar
- 1 1/4 teaspoons kosher salt
- 1 cup warm water
- 2 tablespoons unsalted butter, softened, or neutral oil
- 1/4 cup milk
Method
- In a mixing bowl, combine the flour, yeast, sugar, and salt.
- Add the warm water, butter or oil, and milk. Stir until a shaggy dough forms.
- Turn onto a lightly floured surface and knead 8 to 10 minutes, until smoother and more elastic.
- Place in a lightly greased bowl, cover, and let rise until doubled, about 1 hour.
- Deflate gently, shape into a loaf, and place in a greased loaf pan.
- Let rise again until the dough crowns about 1 inch above the rim, 30 to 45 minutes.
- Heat the oven to 375°F.
- Bake 30 to 35 minutes, until golden brown and the loaf sounds hollow when tapped.
- Cool before slicing.
What’s Happening Here
Water hydrates the flour and allows gluten to begin forming, while kneading organizes and strengthens that network. As the dough develops, it becomes more elastic and better able to trap the gases produced by the yeast. That structure is what gives bread its rise and chew. If kneading stops too soon, the loaf may stay dense. If the dough overproofs, the structure can weaken and collapse instead of holding its shape.
Trouble Signs
- Dense loaf: Not enough kneading, insufficient rise, or weak yeast activity.
- Loaf spreads instead of rising up: The dough lacked enough structure or overproofed.
- Tight crumb: Too little fermentation time or too little hydration.
- Collapsed top: The second rise went too far.
Variations
- Brush the top with butter after baking for a softer crust.
- Replace a small portion of the flour with whole wheat flour.
- Add oats on top for texture.
Why This Works
Why Mixing Changes Texture
When flour meets liquid, its proteins begin hydrating. As mixing continues, those proteins are brought into repeated contact and begin forming the gluten network that gives dough strength and elasticity. In recipes such as bread, that is helpful. In recipes such as muffins or biscuits, too much of that same development can work against tenderness.
That is why recipes that look similar on paper may ask for very different handling. Bread dough is often kneaded on purpose to strengthen structure. Muffin batter is stirred only until combined because the goal is a softer crumb. Biscuit dough is handled lightly so the fat can interrupt structure rather than letting it take over.
The practical lesson is plain: mixing is not just combining ingredients. It is shaping texture.
Flour, Fat, and Tenderness
Fat affects dough by coating some of the flour particles and limiting how quickly water can fully hydrate all the proteins. That slows gluten development and helps produce a more tender result. In biscuits, cold butter also leaves behind small pockets that help create layers and lift as the dough bakes.
This is one reason a biscuit dough should not be worked until smooth like bread dough. The roughness is part of the design. A few visible pieces of fat, a somewhat shaggy surface, and restrained handling all help guide the final texture in the right direction.
The practical lesson is worth remembering: if you want tenderness, handle the dough lightly and stop before it turns smooth and overworked.
From the Old Books
Earlier household chemistry writers understood very well that flour did not behave the same way in every preparation. They may not have spoken in modern terms about gluten networks or protein development, but they knew from practice that bread required one kind of handling and biscuits or cakes required another. They recognized that mixing, moisture, and fat changed texture in predictable ways.
Modern food science gives us a more exact vocabulary. We can describe protein hydration, gluten development, and the role of fat in limiting structure. But the old kitchen lesson still stands without much trouble: the way you handle flour matters nearly as much as the flour itself.
That is a useful truth, and it has been holding steady for a long while now.
Trouble Signs and Fixes
Problem: Biscuits are tough
Likely cause: The dough was mixed or handled too much after the liquid was added.
What to do now: They can still be eaten warm with butter or put to use under gravy.
What to do next time: Stir only until combined, pat gently, and stop before the dough turns smooth.
Problem: Muffins have tunnels
Likely cause: The batter was overmixed.
What to do now: There is no real fix after baking.
What to do next time: Leave a few lumps in the batter and stop stirring earlier.
Problem: Bread loaf is dense
Likely cause: The dough did not develop enough structure, or the rise was insufficient.
What to do now: Slice thin and toast it.
What to do next time: Knead until the dough becomes smoother and more elastic, and allow enough rise time.
Problem: Bread collapses after rising
Likely cause: The dough overproofed during the second rise.
What to do now: Bake it anyway and use it for toast or crumbs if needed.
What to do next time: Bake when the dough looks airy and expanded but not weak or sagging.
Problem: Dough feels sticky and unruly
Likely cause: Hydration is high, or the flour has not fully absorbed the liquid yet.
What to do now: Let it rest briefly before adding more flour.
What to do next time: Remember that time can solve some stickiness more cleanly than extra flour can.
Kitchen Takeaway
If you remember one thing from this chapter, let it be this: flour does not just sit there and behave. The moment liquid and mixing enter the picture, structure begins to form. The only real question is whether you want more of it or less of it.
Once you learn to answer that question, biscuits, muffins, and bread all start making better sense, and the dough in front of you becomes much easier to trust.
Chapter 8 — Yeast and Chemical Leavening
Some baked goods rise because living yeast produces gas over time. Others rise because baking soda or baking powder reacts more quickly once liquid and heat enter the picture. In both cases, the important question is the same: can the dough or batter trap the gas long enough to turn it into lift instead of waste?
This chapter explains how yeast works, how chemical leavening differs from fermentation, and why timing matters so much once a batter or dough has been mixed. Once you understand those patterns, biscuits, rolls, cakes, and waffles begin to make more sense, and the rise of a baked good stops feeling like a small act of mercy.
We are not trying to make every baker keep a chemistry set next to the flour canister. We are trying to understand where the lift comes from and what helps it stay put.
Core Lesson
Leavening is the process of creating and trapping gas so that a dough or batter becomes lighter, taller, and more open in texture. The gas itself is not enough. It must be produced under the right conditions, and the surrounding structure must be ready to hold it.
Yeast handles the first job slowly. Yeast is a living organism that feeds on available sugars and produces carbon dioxide and other byproducts as it ferments. In bread dough, that carbon dioxide becomes trapped in the gluten network, and the dough expands over time. Fermentation also develops flavor, which is one reason yeast breads taste different from quick breads even when the ingredient list is not worlds apart.
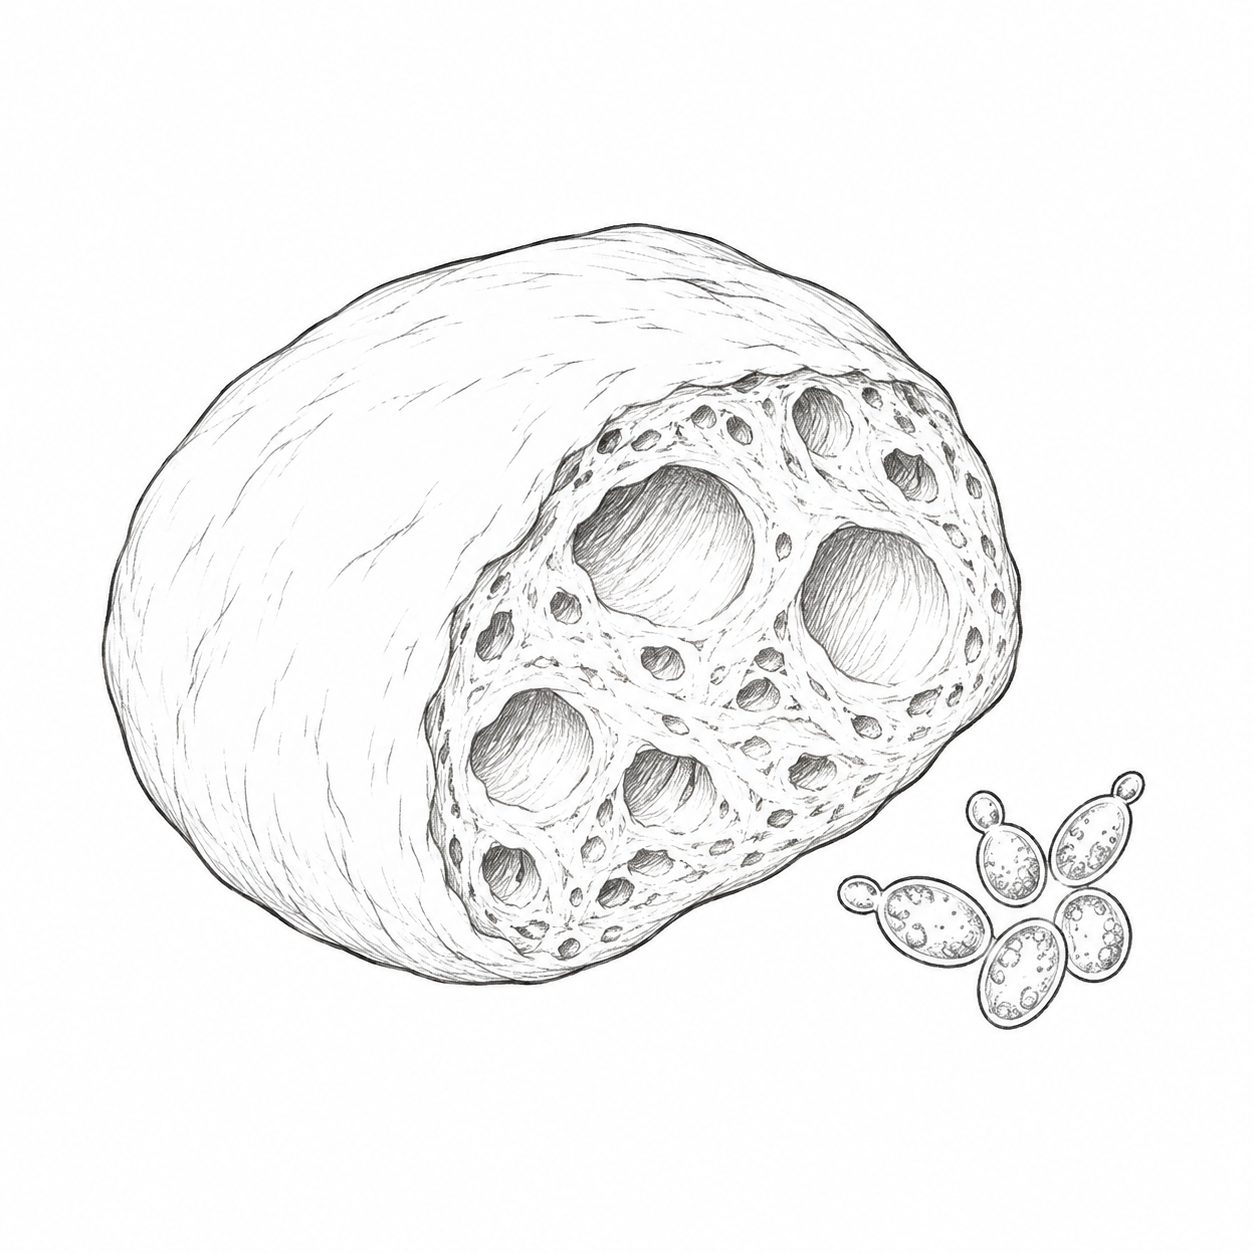
Chemical leavening works faster. Baking soda reacts when it meets acid and moisture, producing carbon dioxide. Baking powder contains baking soda along with acids that allow the reaction to happen in a more controlled way, often partly when liquid is added and partly again in the oven. That is why baking powder is often called double-acting. The details may stay in the background while you bake, but the practical lesson matters: once certain batters are mixed, the clock has entered the conversation.
This is where Chapter 7 and Chapter 8 meet. Chapter 7 explained structure: flour, gluten, tenderness, and handling. Chapter 8 explains lift. A dough or batter needs enough structure to trap the gas that leavening produces, but not so much toughness that the result turns heavy. That balance changes from one recipe to another.
A yeast roll needs enough gluten structure to stretch and hold fermentation gases as the dough rises. A muffin or cake batter needs enough structure to catch the gases from baking powder without becoming tough. A biscuit depends on chemical leavening, but also on steam from butter and liquid, along with a dough soft enough to rise without being overworked.
Timing matters differently depending on the leavening method. Yeast dough needs time. It needs time to ferment, expand, and often improve in flavor. Pulling that process short usually gives you a denser, less developed result. Chemical leavening, on the other hand, often needs prompt baking once the wet and dry ingredients come together. Wait too long, and some of the available gas is spent before the oven has a chance to turn it into lift.
Temperature matters too. Yeast is active within a useful range and sluggish or stressed outside it. Dough that is too cold may rise very slowly. Dough that is too hot may ferment too aggressively or damage the yeast. In quick breads, oven temperature affects how fast the structure sets relative to how fast the gases expand. Too cool, and the batter may spread or rise weakly before setting. Too hot, and the outside may set before the interior lift has fully developed.
Acid also matters, especially with baking soda. A recipe using buttermilk, yogurt, molasses, brown sugar, lemon juice, or vinegar may rely on that acidity to trigger the soda. Without enough acid, baking soda may leave behind not only weak lift but also an unpleasant soapy or harsh flavor. Baking powder is more self-contained, which is one reason it is so common in home baking.
Steam deserves mention as well. As doughs and batters heat up, water turns to vapor and expands. That added push helps with lift, especially in biscuits, waffles, popovers, and similar preparations. Steam is not the whole story, but it is often part of it.
Three practical ideas will carry you a long way here.
First, leavening only helps if the structure can trap the gas.
Second, yeast needs time, while chemical leavening often needs prompt baking.
Third, baking soda and baking powder are related but not interchangeable in every recipe.
Once those ideas settle in, the rise of a baked good becomes easier to read. A dense roll, a flat muffin, or a biscuit that barely lifted usually has a reason behind it.
What to Notice
When working with leavening, pay attention to cues that tell you whether gas is being produced, trapped, or lost.
- Watch volume. Yeast dough should expand visibly with time.
- Look at the crumb. Fine, even lift tells a different story than tunnels, density, or collapse.
- Notice batter timing. Some batters change quickly after mixing and should not be left waiting around.
- Pay attention to aroma. Yeast fermentation brings a distinct bread-like smell as it develops.
- Watch the oven spring. The early stage of baking often reveals whether the structure and leavening were aligned.
- Notice the surface. Cracks, doming, or poor rise may tell you the structure set too soon or too late.
Leavening is easier to manage when the cook notices not just whether a baked good rose, but how it rose.
Recipe 1 — Yeast Dinner Rolls
Why This Recipe Belongs Here
Yeast rolls are the clearest everyday lesson in fermentation-based lift. They show how time, gluten structure, and trapped gas work together. They also show that a good rise is not only about volume. It is about texture, flavor, and the way the dough develops before it ever reaches the oven.
Yield / Time / Equipment
- Yield: 12 rolls
- Prep time: 20 minutes, plus rising time
- Cook time: 18 to 22 minutes
- Equipment: Mixing bowl; baking dish or sheet pan
Ingredients
- 3 1/4 cups all-purpose flour or bread flour, plus more as needed
- 2 1/4 teaspoons instant yeast
- 1 tablespoon sugar
- 1 1/4 teaspoons kosher salt
- 1 cup warm milk or water
- 3 tablespoons unsalted butter, softened
- 1 egg
Method
- In a mixing bowl, combine the flour, yeast, sugar, and salt.
- Add the warm milk or water, butter, and egg.
- Stir until a shaggy dough forms.
- Knead until smoother and elastic, about 8 minutes.
- Cover and let rise until doubled, about 1 hour.
- Divide into 12 pieces and shape into rolls.
- Arrange in a greased pan or on a sheet pan.
- Let rise again until puffy, 30 to 45 minutes.
- Heat the oven to 375°F.
- Bake 18 to 22 minutes, until golden.
- Brush with butter if desired.
What’s Happening Here
The yeast is producing gas gradually as the dough ferments, and the gluten network is trapping that gas so the dough expands rather than spreading out flat. The second rise improves the final lightness, while the oven gives an added burst of expansion before the structure sets. If the dough is underproofed, the rolls may bake dense. If overproofed, the structure may weaken and collapse more easily.
Trouble Signs
- Dense rolls: The dough did not rise enough or lacked enough structure.
- Collapsed tops: The second rise went too far.
- Pale flavor: Fermentation time was too short.
- Tight crumb: The dough needed more proofing or slightly better development.
Variations
- Brush with garlic butter.
- Add honey in place of some sugar.
- Sprinkle flaky salt on top before baking.
Recipe 2 — Simple One-Bowl Cake
Why This Recipe Belongs Here
A simple cake shows chemical leavening in a clean, practical form. It depends on baking powder for lift, but that lift only matters if the batter holds together long enough to set around it. It is a good reminder that chemical leavening is fast, useful, and still dependent on structure.
Yield / Time / Equipment
- Yield: One 8-inch or 9-inch cake
- Prep time: 10 minutes
- Cook time: 30 to 35 minutes
- Equipment: Cake pan; mixing bowl
Ingredients
- 1 1/2 cups all-purpose flour
- 3/4 cup sugar
- 1 1/2 teaspoons baking powder
- 1/2 teaspoon kosher salt
- 2 eggs
- 1/2 cup milk
- 1/3 cup neutral oil or melted butter
- 1 teaspoon vanilla extract
Method
- Heat the oven to 350°F. Grease the pan.
- In a bowl, whisk together the flour, sugar, baking powder, and salt.
- Add the eggs, milk, oil or melted butter, and vanilla.
- Stir until the batter is smooth.
- Pour into the prepared pan.
- Bake 30 to 35 minutes, until a tester comes out clean.
- Cool before serving.
What’s Happening Here
The baking powder produces gas as the batter is mixed and then again more strongly in the oven. The flour, eggs, and starches must set around that expanding gas in time for the cake to hold its shape. If the batter sits too long before baking, some leavening power may be spent early. If the structure is too weak, the cake may rise and then sink.
Trouble Signs
- Flat cake: The leavening was weak or the batter sat too long.
- Sunken center: The structure was too weak or the cake was disturbed too early.
- Dense crumb: Not enough lift or too much flour.
- Harsh baking flavor: Too much leavening or poorly balanced ingredients.
Variations
- Add lemon zest.
- Use buttermilk for a tangier cake.
- Top with berries and whipped cream.
Recipe 3 — Belgian-Style Waffles
Why This Recipe Belongs Here
Waffles are a good leavening lesson because they rely on chemical lift, steam, and batter structure at the same time. The exterior wants to crisp while the interior stays light. That makes them a useful middle case between a quick bread and a more delicate batter.
Yield / Time / Equipment
- Yield: 4 to 6 waffles
- Prep time: 10 minutes
- Cook time: about 15 minutes total
- Equipment: Waffle iron; mixing bowls
Ingredients
- 2 cups all-purpose flour
- 1 tablespoon baking powder
- 1/2 teaspoon kosher salt
- 2 tablespoons sugar
- 2 eggs
- 1 3/4 cups milk
- 1/2 cup melted butter or neutral oil
- 1 teaspoon vanilla extract
Method
- Heat the waffle iron.
- In a bowl, whisk together the flour, baking powder, salt, and sugar.
- In another bowl, whisk together the eggs, milk, butter or oil, and vanilla.
- Stir the wet ingredients into the dry ingredients just until combined.
- Cook in the waffle iron according to the manufacturer’s directions until golden and crisp.
- Serve at once.
What’s Happening Here
The baking powder provides lift, while the hot waffle iron quickly sets the outer structure and drives off enough moisture to build crispness. Steam adds to the expansion as the batter cooks. If the batter is overmixed, the waffles may turn tougher. If the iron is not hot enough, the waffles may steam more than crisp.
Trouble Signs
- Pale waffles: The iron was not hot enough.
- Dense interior: The batter was overmixed or the leavening was weak.
- Soft exterior: Too much moisture remained, or the waffles were stacked and trapped steam.
- Harsh chemical taste: Too much baking powder.
Variations
- Add cinnamon.
- Fold in blueberries.
- Finish with toasted pecans.
Why This Works
Why Baking Soda and Baking Powder Are Not the Same
Baking soda is sodium bicarbonate, and it needs acid to react fully in a useful way. If the recipe does not provide enough acidity, baking soda may not give proper lift and can leave behind an unpleasant taste.
Baking powder already contains baking soda plus acids that allow the reaction to happen more reliably once liquid and heat are involved. That is why it is more self-contained and more common in many cakes, muffins, and waffles.
The practical lesson is simple: baking soda depends on the recipe for acid, while baking powder brings more of its own system with it.
Why Timing Matters More in Quick Breads
Chemical leavening starts working as soon as the ingredients are mixed, though much of the action continues in the oven. That means a batter left sitting too long may lose part of its lifting power before baking begins.
This matters less in yeast doughs, where time is part of the process. In quick breads and cakes, however, prompt baking often makes the difference between a lively rise and a dull one.
The practical lesson here is worth keeping close: once the batter is mixed, delay is rarely helpful.
From the Old Books
Earlier household chemistry writers paid close attention to rising agents because they could see plainly that some baked goods depended on fermentation while others depended on quicker chemical change. They may not have laid out modern reaction language the way we would now, but they understood that timing, ingredients, and method all affected whether a dough or batter actually lifted.
Modern food science gives us a cleaner explanation of gas production, double-acting baking powder, yeast fermentation, and the relationship between structure and lift. But the older practical lesson still holds: a baked good rises best when the leavening method fits the recipe and the cook respects its timing.
That remains one of the most useful truths in baking.
Trouble Signs and Fixes
Problem: Yeast dough barely rises
Likely cause: The yeast was weak, the dough was too cold, or fermentation time was too short.
What to do now: Give it more time in a warm but not hot place.
What to do next time: Check the yeast, watch the dough temperature, and do not rush the rise.
Problem: Quick bread or cake bakes up flat
Likely cause: The leavening was weak, expired, or partly spent before baking.
What to do now: There is little rescue once baked.
What to do next time: Mix promptly and bake without delay.
Problem: Harsh chemical flavor
Likely cause: Too much baking soda or baking powder, or poor acid balance.
What to do now: Serve with toppings if possible.
What to do next time: Measure carefully and make sure baking soda has enough acid to work with.
Problem: Dough rises, then collapses
Likely cause: It overproofed and the structure weakened.
What to do now: Bake anyway and use for toast or crumbs if needed.
What to do next time: Bake once the dough looks puffy and expanded, not fragile or slack.
Problem: Waffles are soft instead of crisp
Likely cause: The waffle iron was too cool or steam got trapped after cooking.
What to do now: Keep finished waffles in a single layer on a rack in a warm oven.
What to do next time: Preheat the iron thoroughly and avoid stacking.
Kitchen Takeaway
If you remember one thing from this chapter, let it be this: lift comes from gas, but good rise depends on the batter or dough being ready to hold it. Yeast, baking soda, and baking powder get there in different ways, and each asks the cook to respect a different kind of timing.
Once you see that clearly, a flat result stops looking like bad luck and starts looking like a solvable problem.
Chapter 9 — Milk, Butter, and Cream
Milk, butter, and cream can make a dish feel generous in a hurry. They soften sharp edges, round out flavor, and bring a kind of comfort that plain water or broth usually cannot manage on their own. But dairy is not only about richness. It is also one of the clearest places where heat, fat, water, and protein all have to get along.
This chapter explains how dairy behaves in the pan, why milk can scorch, why cheese sauces can turn grainy, and why cream often gives a cook a little more room to work. Once you understand those patterns, you can build smoother sauces, better macaroni and cheese, steadier whipped cream, and a pot of grits that tastes cared for instead of merely finished.
We are not aiming for restaurant fuss here. We are trying to understand why dairy sometimes behaves sweetly and sometimes gives trouble, and how a cook can guide it without much drama.
Core Lesson
Dairy looks simple, but it is a complicated system. Milk contains water, proteins, milk sugar, minerals, and, depending on the kind, varying amounts of fat. Cream contains the same basic elements in different proportions, with more fat and therefore a richer feel and a different kind of stability. Butter changes the arrangement again, concentrating milk fat while leaving only small amounts of water and milk solids behind.
Those proportions matter in the kitchen. They help explain why cream can usually handle heat more calmly than milk, why butter browns and can also burn, and why cheese does not always melt into a smooth sauce just because a cook hopes it will.
Let’s begin with milk. Milk is mostly water, but the proteins and sugars in it make a great deal of difference. When milk is heated, those proteins and sugars can settle, stick, and scorch if the heat is too hard or the pot goes unattended. That is why milk-based dishes usually reward steadier heat and a little attention.
Acid changes the picture further. Milk proteins can remain comfortably dispersed under the right conditions, but enough acid, especially when paired with heat, can cause them to cluster together. In plain terms, the dairy begins to curdle or split. Sometimes that is desirable, as in fresh cheese making. In a cream sauce, it is usually not what you had in mind.
Cream is often more forgiving because its higher fat content changes how the mixture feels and behaves. It can still split under the wrong conditions, but it generally gives the cook a wider margin for error. That is one reason a cream-enriched sauce often feels steadier than one built from milk alone.
Butter carries a different lesson. Butter is mostly fat, but it also contains water and milk solids. As butter melts, the water cooks off and the milk solids remain behind. Those milk solids are what can brown into a nutty aroma if handled well. They are also what can burn if the heat gets away from you. This is why butter can be both delicious and just a little temperamental.
Cheese adds another layer. Cheese is made from milk proteins and fat arranged into a more concentrated form. When cheese is heated gently, especially in the presence of enough moisture, it can soften and melt into something smooth. But too much heat or too little supporting liquid can cause the proteins to tighten and separate from the fat, leaving a sauce grainy or greasy. The cook sees a broken cheese sauce. The chemistry behind it is mostly a question of protein tightening and fat slipping free.
Whipped cream shows yet another side of dairy behavior. Cream begins as an emulsion, with fat dispersed in water. As it is whipped, air is introduced and the fat helps support that airy structure. If stopped at the right point, the cream becomes light and stable enough to hold soft peaks. If pushed too far, the fat clumps more aggressively and the cream moves toward graininess and eventually butter.
Dairy also changes texture in starch-based foods. Add milk or cream to grits, mashed potatoes, or a sauce, and the fat and proteins can help create a fuller mouthfeel and softer finish. That does not mean dairy fixes every problem, but it does mean it changes how texture is perceived, not just how flavor is delivered.
Three practical ideas will carry you a long way here.
First, dairy generally prefers gentler heat than water-based cooking alone.
Second, fat content matters. Higher-fat dairy is often richer and somewhat more forgiving.
Third, dairy can split, scorch, or turn grainy when heat, acid, and concentration drift out of balance.
Once you learn to watch for those patterns, dairy starts feeling less finicky and more understandable. That is helpful, because these are the ingredients that often show up when a cook wants food to feel complete.
What to Notice
When working with milk, butter, cream, and cheese, watch for cues that tell you whether the dairy is staying smooth or starting to head off course.
- Look for steam, not fury. Milk and cream often do best when they are hot but not boiling hard.
- Watch the edges of the pot. Scorching and sticking often begin there or at the bottom before the whole mixture gives itself away.
- Notice gloss. A smooth dairy sauce usually looks cohesive and lightly shiny, not greasy or curdled.
- Smell the butter. Nutty and warm is good. Sharp and dark means it is headed too far.
- Watch whipped cream closely. It moves from soft to overdone faster than many cooks expect.
- Pay attention to graininess. In cheese sauces and whipped dairy, graininess is often an early warning sign.
A little attention here saves a good deal of disappointment later.
Recipe 1 — Béchamel Sauce
Why This Recipe Belongs Here
Béchamel is one of the clearest lessons in milk handling. It depends on moderate heat, steady stirring, and enough patience to let the sauce thicken without scorching. It also shows how dairy and starch can support one another, producing a sauce that feels fuller and smoother than either ingredient could manage alone.
Yield / Time / Equipment
- Yield: About 2 cups
- Prep time: 5 minutes
- Cook time: 10 to 12 minutes
- Equipment: Medium saucepan; whisk
Ingredients
- 2 tablespoons unsalted butter
- 2 tablespoons all-purpose flour
- 2 cups whole milk, warmed slightly
- 1/2 teaspoon kosher salt, plus more to taste
- Pinch of white or black pepper
- Pinch of nutmeg, optional
Method
- Melt the butter in a medium saucepan over medium heat.
- Whisk in the flour and cook for 1 to 2 minutes, stirring often, until smooth and lightly cooked but not browned.
- Add the milk gradually, whisking well after each addition.
- Continue cooking over medium to medium-low heat, whisking often, until the sauce thickens and smooths out.
- Stir in the salt, pepper, and nutmeg if using.
- Taste and adjust seasoning. Serve warm.
What’s Happening Here
The roux thickens the milk as the starch granules hydrate and swell, while the milk adds body, proteins, and a softer mouthfeel than water alone would give. Moderate heat matters because milk can scorch if pushed too hard. The result is a smooth sauce that can stand on its own or serve as the base for several other preparations.
Trouble Signs
- Lumpy sauce: The milk likely went in too fast, or the roux was not smooth.
- Scorched flavor: The heat was too high, or the pan was not stirred enough.
- Thin sauce: It may need a little more time to thicken.
- Raw flour taste: The roux needed another minute before the milk went in.
Variations
- Add grated cheese off the heat for a simple cheese sauce.
- Use onion gently infused in the milk for more depth.
- Add a spoonful of mustard for sharper flavor.
Recipe 2 — Macaroni and Cheese
Why This Recipe Belongs Here
Macaroni and cheese is a practical lesson in dairy structure. It teaches how cheese sauce depends on heat control, moisture, and proportion. Done well, it is creamy and cohesive. Pushed too far, it goes grainy, greasy, or stiff. That makes it one of the best everyday teachers in the chapter.
Yield / Time / Equipment
- Yield: 4 to 6 servings
- Prep time: 15 minutes
- Cook time: 20 minutes
- Equipment: Pot; saucepan; whisk; baking dish optional
Ingredients
- 8 ounces elbow macaroni
- 2 tablespoons unsalted butter
- 2 tablespoons all-purpose flour
- 2 cups whole milk
- 1/2 teaspoon kosher salt, plus more to taste
- 1/4 teaspoon black pepper
- 2 cups shredded sharp cheddar cheese
- 1/2 cup shredded Monterey Jack or similar melting cheese
Method
- Cook the macaroni in salted water until just tender. Drain.
- In a saucepan, melt the butter over medium heat.
- Whisk in the flour and cook 1 to 2 minutes.
- Add the milk gradually, whisking until smooth.
- Cook until the sauce thickens slightly, then season with salt and pepper.
- Lower the heat and add the cheeses a handful at a time, stirring until melted.
- Fold in the cooked macaroni and stir to coat.
- Serve as is, or transfer to a baking dish and bake briefly for a browned top.
What’s Happening Here
The béchamel-style base gives the sauce enough body and moisture to help the cheese melt smoothly into it. Lower heat matters once the cheese goes in. Too much heat can tighten the proteins in the cheese and let the fat separate, which is how a creamy sauce starts turning greasy or grainy. The starch in the sauce helps keep the mixture more stable and cohesive.
Trouble Signs
- Grainy sauce: The heat was too high, or the cheese was added too aggressively.
- Greasy surface: The fat separated from the cheese.
- Too thick: The sauce reduced too much or too much cheese went in.
- Bland flavor: It likely needs more salt than you think.
Variations
- Add a little smoked paprika.
- Use part Gruyère or fontina for a different flavor profile.
- Top with buttered crumbs and bake until golden.
Recipe 3 — Fresh Whipped Cream
Why This Recipe Belongs Here
Whipped cream shows dairy behaving in a different direction. Instead of heat building the structure, agitation and fat do the work. It is a simple recipe, but it teaches the importance of stopping at the right point. Push it too little and it slumps. Push it too far and it starts heading toward butter.
Yield / Time / Equipment
- Yield: About 2 cups
- Prep time: 10 minutes
- Cook time: none
- Equipment: Chilled bowl; whisk or mixer
Ingredients
- 1 cup cold heavy cream
- 2 tablespoons powdered sugar, optional
- 1 teaspoon vanilla extract, optional
Method
- Place the cold cream in a chilled bowl.
- Add the powdered sugar and vanilla if using.
- Whisk by hand or beat with a mixer until soft peaks form.
- Continue briefly if you want firmer peaks, but stop before the cream turns grainy.
- Serve at once or chill briefly until needed.
What’s Happening Here
As the cream is whipped, air is incorporated and the milk fat helps support that airy structure. Cold temperature matters because the fat behaves better when chilled. If the whipping continues too long, the fat begins clumping more aggressively and the texture turns coarse, then eventually separates further toward butter and liquid.
Trouble Signs
- Cream will not whip: It may not be cold enough, or the fat content is too low.
- Grainy texture: It was whipped too far.
- Weeping cream: It sat too long or was underwhipped.
- Flat flavor: It may need a little sweetness or vanilla.
Variations
- Add citrus zest for brightness.
- Sweeten lightly with maple syrup.
- Fold into fruit for a simple dessert.
Recipe 4 — Creamy Grits
Why This Recipe Belongs Here
Grits are a good reminder that dairy is not only about sauces and sweets. Milk, butter, or cream can change the body and finish of a simple starch dish in a way that feels generous without becoming fussy. This recipe also shows how dairy softens texture and rounds flavor in a very practical, Southern kind of way.
Yield / Time / Equipment
- Yield: 4 servings
- Prep time: 5 minutes
- Cook time: 25 to 30 minutes
- Equipment: Medium saucepan; whisk or spoon
Ingredients
- 1 cup stone-ground grits
- 4 cups water
- 1 teaspoon kosher salt
- 1 cup whole milk or half-and-half
- 2 tablespoons unsalted butter
- Black pepper to taste
Method
- Bring the water and salt to a gentle boil in a medium saucepan.
- Whisk in the grits slowly.
- Lower the heat and cook gently, stirring often, until the grits begin to soften and thicken.
- Stir in the milk or half-and-half and continue cooking until tender and creamy.
- Finish with the butter and black pepper.
- Serve hot.
What’s Happening Here
The grits absorb liquid and soften as their starch hydrates, while the dairy adds fat, proteins, and a fuller mouthfeel. Finishing with butter enriches the texture further and helps smooth the edges of the dish. This is less about emulsion or curdling and more about how dairy changes body, flavor, and perception of richness.
Trouble Signs
- Grits are lumpy: They were added too quickly without enough whisking.
- Scorched bottom: The heat was too high or the pot went unstirred too long.
- Thin texture: They need more cooking time.
- Heavy finish: Too much dairy for the amount of grits.
Variations
- Stir in grated cheddar off the heat.
- Finish with scallions or chives.
- Serve with sautéed mushrooms or shrimp.
Why This Works
Why Dairy Scorches or Splits
Milk and cream contain proteins and sugars that make them more sensitive to heat than plain water alone. In a pan, those proteins and sugars can settle, stick, and brown at the bottom if the heat is too high or the stirring too infrequent. That is the beginning of scorching.
Splitting is a different problem. Dairy can split when heat, acid, or concentration push the proteins out of their usual dispersed arrangement and into tighter clusters. In a sauce, that often shows up as curdling, graininess, or visible fat separation. Cream usually tolerates stress better than milk because its higher fat content changes the overall system, but it is not immune.
The practical lesson is straightforward: keep the heat controlled, keep enough moisture in the system, and be cautious when acid enters the picture.
Why Cheese Sauce Turns Grainy
Cheese melts best when there is enough moisture and not too much direct heat. In a well-built cheese sauce, the melted cheese is supported by a warm liquid base, often thickened slightly with starch. That added viscosity helps the proteins and fat stay more evenly dispersed.
If the heat gets too high, the proteins in the cheese tighten and squeeze out fat. The result is a sauce that looks greasy, grainy, or both. This is why cheese is usually added after the sauce base has already formed and the heat has been lowered.
The practical lesson here is one worth keeping close: once the cheese goes in, gentleness is often the difference between creamy and disappointing.
From the Old Books
Earlier household chemistry writers understood that milk and cream were not simple liquids and that heating them called for attention. They may not have described protein clustering or fat-phase behavior in the language we use now, but they knew from practice that dairy could scorch, curdle, or separate if handled poorly.
Modern food science gives us a more precise explanation for those failures. We can describe how proteins respond to heat and acid, why fat content changes the system, and how starch can help stabilize a sauce. But the older lesson still holds without much revision: dairy asks for steadier heat and better timing than many cooks first assume.
That is not a burden once you understand it. It is simply part of cooking dairy well.
Trouble Signs and Fixes
Problem: Milk sauce scorches
Likely cause: The heat was too high, or the sauce was not stirred often enough.
What to do now: Move the unscorched portion to a clean pan without scraping the bottom.
What to do next time: Use gentler heat and stir more consistently.
Problem: Cheese sauce turns grainy
Likely cause: The sauce got too hot after the cheese went in.
What to do now: Lower the heat immediately and stir gently. A splash of warm milk may help loosen it, though it may not fully recover.
What to do next time: Add the cheese off the heat or over very low heat.
Problem: Whipped cream turns coarse
Likely cause: It was whipped past soft or firm peaks.
What to do now: If only slightly overwhipped, fold in a little unwhipped cream.
What to do next time: Stop earlier and watch the texture closely.
Problem: Dairy sauce splits after acid is added
Likely cause: The acid went in too abruptly, or the sauce was already too hot.
What to do now: Remove from heat and stir gently, though full recovery may not be possible.
What to do next time: Add acid gradually and with care, especially in lower-fat dairy sauces.
Problem: Grits feel heavy instead of creamy
Likely cause: Too much dairy or too little seasoning.
What to do now: Thin slightly with hot water or milk if needed and adjust the salt.
What to do next time: Add the dairy in stages and taste before adding more.
Kitchen Takeaway
If you remember one thing from this chapter, let it be this: dairy does not usually need force. It needs balance. Controlled heat, enough moisture, and a little attention will carry you a long way.
Once you understand that, milk sauces, whipped cream, macaroni and cheese, and a pot of grits all become easier to guide.
Chapter 10 — Vegetables and Texture
Vegetables can be sweet, crisp, silky, chewy, watery, browned, limp, bright, or dull, sometimes within the span of one cooking method. That range is part of what makes them useful and, now and then, a little unforgiving. A green bean that is lively and crisp-tender can become tired in a hurry. A cabbage that seems stubborn at first can turn silky if given the right kind of time. A potato can go fluffy, waxy, gluey, or creamy depending on how it is cut, cooked, and handled.
This chapter explains why vegetables change texture the way they do, why some methods preserve color while others trade color for sweetness and depth, and why timing matters so much once heat starts working on plant structure. Once you understand those patterns, vegetables become easier to cook on purpose instead of by routine.
We are not trying to make every side dish impressive. We are trying to make vegetables taste like they were treated with some thought.
Core Lesson
Vegetables are built differently from meats, eggs, and doughs. Their structure depends on water held inside cells, rigid cell walls, fibers, starches in some cases, sugars in others, and a range of compounds that affect flavor and color. Heat changes those structures in ways that can either improve the vegetable beautifully or take it past its best point.
A useful starting point is this: vegetables often move along two main tracks at once. Their structure softens as heat works on their internal support, and their flavor changes as moisture moves, sugars concentrate, or browning begins. The exact balance depends on the vegetable and the method.
Take green vegetables. Their bright color is often strongest when they are cooked quickly and just enough. Keep going too long, especially in moist heat, and they can turn duller, softer, and less lively. That does not always make them inedible, but it changes the kind of dish they become.
Root vegetables follow a different pattern. Carrots, potatoes, and similar vegetables often need more time for their interiors to soften. Some also become sweeter or fuller in flavor when roasted, because moisture evaporates and the surface begins to brown. That is why a roasted carrot tastes deeper than a boiled carrot, even though both may be fully cooked.
Water matters a great deal here. In a pot, the heat transfer is efficient and steady, but browning is limited. In the oven or skillet, the surface can dry enough to brown, and flavor often becomes more concentrated. That is one reason vegetables rarely respond well to a single default method.
Fat changes the experience too. It can coat the surface, help with browning, carry flavor, and soften the feel of a dish without changing the vegetable’s internal structure in exactly the same way water does. A buttered cabbage and a plain boiled cabbage may both be tender, but they will not feel at all alike on the plate.
Salt matters early and late. Salt can begin drawing moisture from some vegetables before cooking, and it can also sharpen flavor after cooking. Acid matters too, though carefully. In some cases, it brightens and balances. In others, especially if added too early, it can slow softening or change the texture in ways the cook did not intend. That is one reason a squeeze of lemon often belongs at the end of vegetable cooking rather than the beginning.
Starch plays a major role in some vegetables, especially potatoes. A potato’s final texture depends not only on heat but on variety, water content, and handling. Some potatoes stay more intact and waxy. Others break down more readily into fluff or mash. Overstir them after cooking and the texture can turn gluey because the starches are being worked too hard once softened.
Moisture movement is one of the best ideas to keep in mind. A vegetable can release water before it browns. It can soften before it sweetens. It can look nearly finished while still holding too much moisture to taste concentrated. This is why a crowded pan so often disappoints. Too much vegetable in too little space traps steam and delays the drier surface conditions that help flavor develop.
Timing matters because vegetable texture often has a shorter ideal window than cooks wish it did. There is usually a point where the vegetable is just tender enough, just colored enough, or just soft enough for the dish at hand. Wait too little and it feels underdone. Wait too long and it loses some of its character.
Three practical ideas will carry you a long way here.
First, vegetables often need different methods depending on whether you want brightness, tenderness, concentration, or browning.
Second, moisture control matters almost as much as heat.
Third, the best vegetable texture is usually intentional rather than accidental.
Once those ideas settle in, vegetables stop being the part of the meal a cook merely gets through. They start becoming one of the clearest places to show judgment.
What to Notice
When working with vegetables, pay attention to the signs that tell you what direction the texture is moving.
- Watch the color. Green vegetables often tell you quickly whether they are still lively or have gone dull.
- Notice the surface. Browning needs a surface dry enough to color.
- Check the resistance. A fork, knife, or bite tells you more than the clock when it comes to tenderness.
- Watch the steam. A lot of trapped moisture usually means less browning and more softening.
- Pay attention to gloss. Butter or oil can change the look and feel of a vegetable even before the first bite.
- Taste before declaring it done. Vegetables often cross from not quite there to just right before they move into too much.
Vegetables usually tell you what kind of treatment they received if you are willing to look closely.
Recipe 1 — Roasted Green Beans
Why This Recipe Belongs Here
Green beans are a good lesson in quick, high-heat vegetable cooking. They show how a vegetable can stay fairly lively inside while developing browning and concentration outside. They also make it easy to see what crowding and trapped steam do to a pan.
Yield / Time / Equipment
- Yield: 4 servings
- Prep time: 10 minutes
- Cook time: 12 to 18 minutes
- Equipment: Sheet pan
Ingredients
- 1 pound green beans, trimmed
- 1 tablespoon olive oil
- 1/2 teaspoon kosher salt
- 1/4 teaspoon black pepper
- 1 teaspoon lemon juice, optional
Method
- Heat the oven to 425°F.
- Spread the green beans on a sheet pan.
- Drizzle with olive oil and season with salt and pepper.
- Toss and spread in a single layer.
- Roast 12 to 18 minutes, until browned in spots and crisp-tender.
- Finish with lemon juice if using.
- Serve at once.
What’s Happening Here
The hot oven drives off surface moisture quickly enough for browning to begin before the beans soften too far. The interior stays relatively lively if the cooking is not pushed too long. If the pan is crowded, the beans steam more than they roast and the result turns softer, paler, and less distinct.
Trouble Signs
- Wrinkled but pale beans: Too much moisture stayed on the pan.
- Soft all the way through: They roasted too long or steamed too much.
- Burnt tips, underdone middles: The beans were uneven in size.
- Flat flavor: They likely need more salt before more acid.
Variations
- Add sliced almonds.
- Finish with Parmesan.
- Use red pepper flakes for heat.
Recipe 2 — Glazed Carrots
Why This Recipe Belongs Here
Glazed carrots show a more controlled middle ground between boiling and roasting. They soften in a small amount of liquid, then finish in a glossy coating as the liquid reduces. This recipe teaches that a vegetable can become tender and concentrated without going fully dry-heat roasted.
Yield / Time / Equipment
- Yield: 4 servings
- Prep time: 10 minutes
- Cook time: 15 to 20 minutes
- Equipment: Skillet or saucepan with lid
Ingredients
- 1 pound carrots, peeled and sliced on the diagonal
- 1 tablespoon butter
- 1/2 cup water
- 1 tablespoon honey or brown sugar
- 1/2 teaspoon kosher salt
- Black pepper to taste
Method
- Place the carrots, butter, water, honey or brown sugar, and salt in a skillet or saucepan.
- Bring to a simmer.
- Cover and cook until the carrots are nearly tender.
- Remove the lid and continue cooking until the liquid reduces to a light glaze.
- Season with black pepper and serve.
What’s Happening Here
The covered first stage softens the carrots through moist heat. The uncovered second stage lets the liquid reduce and the glaze concentrate around the surface. This gives the carrots tenderness and a fuller finish without requiring the drier conditions of roasting.
Trouble Signs
- Watery finish: The liquid did not reduce enough.
- Sticky, over-reduced glaze: It cooked down too far.
- Firm centers: The covered phase was too short.
- Too sweet: The glaze outweighed the carrot itself.
Variations
- Add thyme.
- Finish with lemon zest.
- Use maple syrup instead of honey.
Recipe 3 — Braised Cabbage
Why This Recipe Belongs Here
Cabbage is a good teacher because it begins firm, fibrous, and a little stubborn, then becomes soft and silky if given enough time. It shows how some vegetables benefit from surrender rather than crispness and how moist cooking can build comfort as well as tenderness.
Yield / Time / Equipment
- Yield: 4 to 6 servings
- Prep time: 10 minutes
- Cook time: 30 to 40 minutes
- Equipment: Large skillet or Dutch oven
Ingredients
- 1 small green cabbage, sliced
- 1 tablespoon butter or bacon drippings
- 1 small onion, sliced
- 1/2 teaspoon kosher salt
- Black pepper to taste
- 1/2 cup broth or water
- 1 teaspoon vinegar, optional at the end
Method
- Heat the butter or drippings in a large skillet or Dutch oven.
- Add the onion and cook until softened.
- Add the cabbage, salt, and pepper.
- Toss until the cabbage begins to wilt.
- Add the broth or water and cover.
- Cook gently until the cabbage is tender, stirring now and then.
- Uncover for the last few minutes if you want a little concentration.
- Add the vinegar at the end if using and serve hot.
What’s Happening Here
The cabbage softens as heat and moisture work through its structure, while the covered pot keeps enough humidity in the system to prevent drying. A little uncovered cooking at the end can reduce excess liquid and bring the flavor together. The final vinegar brightens the dish without interfering early with softening.
Trouble Signs
- Harsh, underdone cabbage: It simply needs more time.
- Watery pot: The lid stayed on too long at the end.
- Dull flavor: It may need salt or a little acid.
- Mushy texture: It went too far for the intended style.
Variations
- Use red cabbage.
- Add apple slices.
- Finish with mustard for a sharper note.
Recipe 4 — Skillet Okra
Why This Recipe Belongs Here
Okra is useful because it teaches a lesson many cooks would rather avoid: moisture can change texture in very obvious ways. Okra’s mucilage becomes more noticeable under certain conditions, while higher heat and drier cooking can make the pods feel more browned, crisp-edged, and direct. It is a good vegetable for learning that texture is often the result of method, not merely the ingredient’s reputation.
Yield / Time / Equipment
- Yield: 4 servings
- Prep time: 10 minutes
- Cook time: 10 to 15 minutes
- Equipment: Large skillet
Ingredients
- 1 pound okra, sliced
- 1 tablespoon neutral oil
- 1/2 teaspoon kosher salt
- Black pepper to taste
- 1 teaspoon lemon juice or vinegar, optional at the end
Method
- Heat a large skillet over medium-high heat and add the oil.
- Add the okra in a fairly even layer.
- Cook, stirring only occasionally, until the okra is tender and browned in spots.
- Season with salt and pepper.
- Finish with lemon juice or vinegar if using.
- Serve at once.
What’s Happening Here
The relatively high heat helps the okra brown and limits how much surface moisture lingers in the pan. That does not erase the vegetable’s character, but it shifts the texture toward a drier, less slippery finish. Too much crowding or too much stirring can keep the pan wetter than needed and make the mucilage more noticeable.
Trouble Signs
- Slimier than intended: The pan stayed too wet or crowded.
- Pale okra: The heat was too low.
- Burnt edges, tough centers: The pieces were too large or uneven.
- Flat finish: It may need a little acid at the end.
Variations
- Add corn.
- Use smoked paprika.
- Finish with sliced green onion.
Why This Works
Why Green Vegetables Lose Their Bright Color
Green vegetables owe much of their fresh color to chlorophyll. During cooking, heat and the conditions around the vegetable can change how that pigment appears. Long cooking, trapped acids, and excess time in moist heat often push green vegetables toward a duller tone.
That does not mean every green vegetable should be barely cooked. It means the cook should know that color and cooking style are linked. Quick cooking often preserves brightness better, while longer cooking may produce a softer, less vivid but still intentional result.
The practical lesson is simple: decide whether you want lively green or fully softened green, then cook accordingly.
Why Potatoes Turn Fluffy, Waxy, or Gluey
Potatoes behave differently because their starch and moisture balance varies by type and because cooked starch responds strongly to handling. A potato that breaks down easily can make a fluffy mash if treated gently. A waxier potato holds together better in boiling or roasting. But once cooked potatoes are overworked, their softened starches can turn gluey.
This is one reason potato choice and handling both matter. Even without a full potato recipe in this chapter, potatoes remain one of the clearest examples of vegetable texture depending on both the ingredient and the method. The variety gives you the starting point. The method and your spoon finish the job.
The practical lesson here is worth keeping close: potato texture depends on both the potato and what you do to it after cooking.
From the Old Books
Earlier household chemistry writers paid close attention to the way vegetables changed under heat, especially in relation to water, softness, and practical household cookery. They may not have described cell walls, chlorophyll behavior, or starch handling the way we would now, but they understood from practice that vegetables needed different treatment depending on the desired result.
Modern food science gives us a more exact vocabulary for those changes. We can describe moisture loss, pigment change, starch response, and concentration with more precision. But the older practical lesson still holds well enough: vegetables do not all want the same thing from the cook.
That is one reason they reward attention.
Trouble Signs and Fixes
Problem: Vegetables are soft but bland
Likely cause: They softened before enough browning or seasoning developed.
What to do now: Add salt, acid, or a quick high-heat finish if the dish allows.
What to do next time: Decide earlier whether you want simple tenderness or concentrated flavor as well.
Problem: Vegetables will not brown
Likely cause: Too much moisture, crowding, or too little heat.
What to do now: Give them more space and time.
What to do next time: Dry the vegetables better and avoid crowding the pan.
Problem: Green vegetables look tired
Likely cause: They cooked too long or in too much trapped moisture.
What to do now: Finish and season them well.
What to do next time: Cook more quickly if brightness is the goal.
Problem: Potatoes or similar vegetables feel gluey
Likely cause: The cooked starch was overworked.
What to do now: Serve as best you can; full repair is unlikely.
What to do next time: Handle cooked starchy vegetables more gently.
Problem: Okra or similar vegetables feel wetter than intended
Likely cause: The pan stayed too moist for the chosen method.
What to do now: Keep cooking over higher heat if the vegetable can take it.
What to do next time: Use more space, less stirring, and a hotter pan.
Kitchen Takeaway
If you remember one thing from this chapter, let it be this: vegetables are not asking for one correct texture. They are asking for the right texture for the dish. Some want brightness, some want softness, some want browning, and some want a little of each.
Once you see that clearly, vegetables become much easier to cook with intention.
Chapter 11 — Meat, Moisture, and Tenderness
Meat can be wonderfully generous or deeply disappointing, sometimes with only a few minutes separating the two. A pork chop can go from juicy to dry in a hurry. A pot roast can spend hours in the oven and come out spoon-tender instead of stringy and stubborn. Those outcomes are not random. They come from the way heat changes muscle, fat, moisture, and connective tissue.
This chapter explains why some cuts do best with quick cooking while others need time, why juicy and fatty are not the same thing, and why tenderness can come from either restraint or patience depending on what is in the pan. Once you understand those patterns, you can make better decisions about temperature, timing, and when to stop.
We are not trying to make every home cook sound like a butcher or a pitmaster. We are trying to understand what the meat is made of and what heat is likely to do to it.
Core Lesson
Meat is mostly muscle, along with varying amounts of fat, connective tissue, and water. Those parts do not respond to heat in the same way, which is why one cooking method can treat two cuts very differently.
Start with muscle proteins. As meat heats, its proteins begin to denature and tighten. In plain kitchen terms, the structure firms up and moisture is held less loosely than before. That is why a tender cut cooked just to the right point can still feel juicy, but the same cut cooked too far can turn firm and dry. The water did not simply vanish all at once. The protein structure changed in a way that made moisture easier to lose and the texture less pleasant to eat.
Fat changes the experience, but it does not fully protect a cut from overcooking. Fat can add flavor, richness, and a sense of juiciness, but a fatty cut and a juicy cut are not always the same thing. A well-cooked chicken thigh may feel more forgiving than a lean pork chop partly because it contains more fat and connective tissue, but the handling still matters.
Connective tissue is where slow cooking earns its keep. Tougher cuts from harder-working parts of the animal often contain more collagen and related structural material. With enough time and moderate heat, collagen gradually converts into gelatin, which softens the texture and gives braised meats their tender, almost silky feel. That change is one reason a tough roast can become spoon-tender without ever being a quick-cook candidate.
This is why meat generally falls into two broad kitchen categories. Some cuts are naturally tender and do best with quicker cooking. They benefit from enough heat to brown the outside and cook the interior to an appealing doneness, but not so much time that the proteins tighten excessively. Other cuts are tougher at the start and need longer cooking to transform. If treated like a quick-cook cut, they stay chewy. If given enough time, they become tender in a completely different way.
Surface browning matters too. Browning develops flavor through Maillard reactions at the surface of the meat. That deeper color and roasted aroma make a great difference in the finished dish, but browning does not guarantee tenderness by itself. A chop can be beautifully browned and still overcooked inside. A pot roast can begin with a hard sear, then rely on gentle braising to do the rest of the work.
Moisture moves during cooking, but it does not always behave the way people assume. Searing does not seal in juices the way older kitchen folklore sometimes claimed. What it does do is build flavor on the surface. The internal moisture story is more about protein tightening, rendering fat, evaporation, and resting. Resting matters because it gives the hot meat a chance to settle before slicing. Cut too soon, and more juices often run out onto the board instead of staying in the meat.
Temperature control matters in two different ways. For quick-cooking cuts, it helps prevent overshooting the point where the meat is most enjoyable. For slow-cooking cuts, it allows collagen to gradually soften without the exterior turning harsh or dry too early. In both cases, the cook is managing competing changes rather than chasing one single idea of doneness.
Carryover cooking belongs here too. Meat does not stop changing the moment it leaves the heat. The outer layers remain hotter than the center for a while, and that heat continues moving inward. A roast or thick chop may rise a few degrees after it is removed from the oven or pan. That is useful to remember if you want the final doneness rather than the in-the-pan temperature.
Three practical ideas will carry you a long way here.
First, lean and tender cuts usually want less time, not more.
Second, tougher cuts often need time for connective tissue to soften before they become pleasant to eat.
Third, browning builds flavor, but tenderness depends on what kind of cut you have and how you manage the heat afterward.
Once you begin thinking in those terms, meat stops feeling mysterious. A dry chop, a juicy thigh, and a tender pot roast all start making more sense as different responses to the same basic rules.
What to Notice
When working with meat, pay attention to cues that tell you whether you are building flavor, losing control of moisture, or moving toward tenderness.
- Look at the cut. Thin, lean cuts usually need a different plan than thick or collagen-rich ones.
- Watch the surface. Good browning looks deep and appetizing, not gray or scorched.
- Notice the resistance. A braise that is ready yields easily. One that still pushes back needs more time.
- Pay attention to rendered fat. As some cuts cook, fat softens and adds richness, but it does not replace careful timing.
- Watch the juices on the board. A flood after slicing often means the meat was cut too soon.
- Notice the fork test. For braises, tenderness is often easier to judge with a fork than by time alone.
Meat often tells you what stage it is in if you stop treating the clock as the only witness.
Recipe 1 — Pan-Seared Pork Chops
Why This Recipe Belongs Here
Pork chops are a good lesson in restraint. They are easy to overcook, quick to tighten, and often blamed for being dry when the real problem was simply too much heat or too much time. They show how leaner, quicker-cooking cuts depend on timing and carryover awareness more than brute force.
Yield / Time / Equipment
- Yield: 4 servings
- Prep time: 10 minutes
- Cook time: 8 to 12 minutes
- Equipment: Large skillet
Ingredients
- 4 pork chops, about 1 inch thick
- 1 tablespoon neutral oil
- 1 teaspoon kosher salt
- 1/2 teaspoon black pepper
- 1 teaspoon chopped fresh thyme or rosemary, optional
- 1 tablespoon butter, optional for finishing
Method
- Pat the pork chops dry and season with salt and pepper.
- Heat a large skillet over medium-high heat and add the oil.
- When the oil is hot, add the chops and cook until well browned on the first side, about 3 to 4 minutes.
- Turn and cook the second side until browned and the interior reaches your preferred doneness, usually another 3 to 5 minutes depending on thickness.
- Add the butter and herbs if using, then spoon the melted butter over the chops for the final minute.
- Rest the chops 5 minutes before serving.
What’s Happening Here
The skillet heat browns the outside quickly, building flavor at the surface. Inside, the muscle proteins are tightening as the temperature rises. Because pork chops are relatively lean, there is not much room for careless overcooking. Resting helps the temperature even out and gives the meat a chance to settle before slicing.
Trouble Signs
- Dry chop: It cooked too long or too hot.
- Pale surface: The pan was not hot enough, or the chops were too wet.
- Tough texture: The proteins tightened too far.
- Juices all over the board: The chops were sliced without resting.
Variations
- Use smoked paprika and garlic for a deeper crust.
- Finish with a squeeze of lemon.
- Deglaze the pan for a quick pan sauce.
Recipe 2 — Oven-Roasted Chicken Thighs
Why This Recipe Belongs Here
Chicken thighs show why some cuts are more forgiving than others. Their fat content and connective tissue make them friendlier to the home cook than a lean breast, and they reward enough heat to crisp the skin while keeping the interior tender. They are a good lesson in the difference between juicy, fatty, and simply undercooked.
Yield / Time / Equipment
- Yield: 4 servings
- Prep time: 10 minutes
- Cook time: 30 to 40 minutes
- Equipment: Sheet pan or oven-safe skillet
Ingredients
- 6 bone-in, skin-on chicken thighs
- 1 tablespoon olive oil
- 1 1/2 teaspoons kosher salt
- 1/2 teaspoon black pepper
- 1 teaspoon paprika
- 1/2 teaspoon garlic powder
Method
- Heat the oven to 425°F.
- Pat the chicken thighs dry and rub with the olive oil.
- Season with salt, pepper, paprika, and garlic powder.
- Arrange on a sheet pan or in an oven-safe skillet, skin side up.
- Roast 30 to 40 minutes, until the skin is browned and the meat is cooked through.
- Rest a few minutes before serving.
What’s Happening Here
The higher oven heat helps render fat under the skin and encourages browning at the surface. The dark meat contains more fat and connective tissue than a chicken breast, so it generally remains pleasant over a wider range of doneness. That extra forgiveness does not mean it can be ignored, but it does explain why thighs are often easier to roast well.
Trouble Signs
- Rubbery skin: The surface stayed too wet or the roast needed more time.
- Pale color: The oven was not hot enough.
- Dry interior: It cooked too long.
- Greasy feel without crispness: The fat rendered but the skin did not brown enough.
Variations
- Add cumin and chili powder for a more savory spice blend.
- Finish with vinegar or lemon for contrast.
- Roast over onions or cabbage for a built-in side dish.
Recipe 3 — Sunday Pot Roast
Why This Recipe Belongs Here
Pot roast is the long road to tenderness. It begins with a cut that would be disappointing if cooked quickly and turns it into something generous and deeply satisfying through time, moisture, and steady heat. It teaches what collagen can become when the cook is patient enough to let the process finish.
Yield / Time / Equipment
- Yield: 6 to 8 servings
- Prep time: 20 minutes
- Cook time: 3 to 4 hours
- Equipment: Dutch oven or heavy covered pot
Ingredients
- 3 to 4 pounds chuck roast
- 2 teaspoons kosher salt
- 1 teaspoon black pepper
- 1 tablespoon neutral oil
- 1 onion, sliced
- 3 carrots, cut into chunks
- 2 celery stalks, cut into chunks
- 3 garlic cloves, smashed
- 2 cups beef broth
- 1 tablespoon tomato paste
- 1 teaspoon Worcestershire sauce
- 2 sprigs thyme or 1 teaspoon dried thyme
Method
- Heat the oven to 300°F.
- Season the roast with salt and pepper.
- Heat the oil in a Dutch oven over medium-high heat and brown the roast well on all sides. Remove to a plate.
- Add the onion, carrots, celery, and garlic and cook briefly until they begin to soften.
- Stir in the tomato paste.
- Add the broth, Worcestershire, and thyme, scraping up any browned bits.
- Return the roast to the pot. The liquid should come partway up the sides, not cover it completely.
- Cover and braise in the oven for 3 to 4 hours, until the meat yields easily to a fork.
- Rest briefly, then slice or shred and serve with the cooking liquid.
What’s Happening Here
The initial browning develops flavor at the surface, but the real transformation happens during the braise. Over time, the connective tissue in the chuck roast softens and collagen converts toward gelatin, which gives the meat a tender, succulent texture. If the roast is removed too early, it may still seem tough even though it is technically cooked. This is one of those dishes where temperature alone does not tell the whole story.
Trouble Signs
- Tough roast after hours of cooking: It likely needs more time, not less.
- Dry slices: The roast may have been overcooked without enough braising liquid, or sliced too aggressively.
- Thin flavor: The browning step was rushed, or the liquid needed seasoning.
- Stringy rather than tender: The connective tissue had not fully softened yet.
Variations
- Add potatoes in the last part of cooking.
- Use red wine for part of the braising liquid.
- Finish with mushrooms for extra savoriness.
Why This Works
Why Low and Slow Can Tenderize
Tougher cuts often contain more connective tissue, especially collagen. At ordinary quick-cooking times, that collagen stays firm enough to make the meat seem chewy. Given enough time in a moist environment, collagen gradually converts into gelatin and the texture softens dramatically.
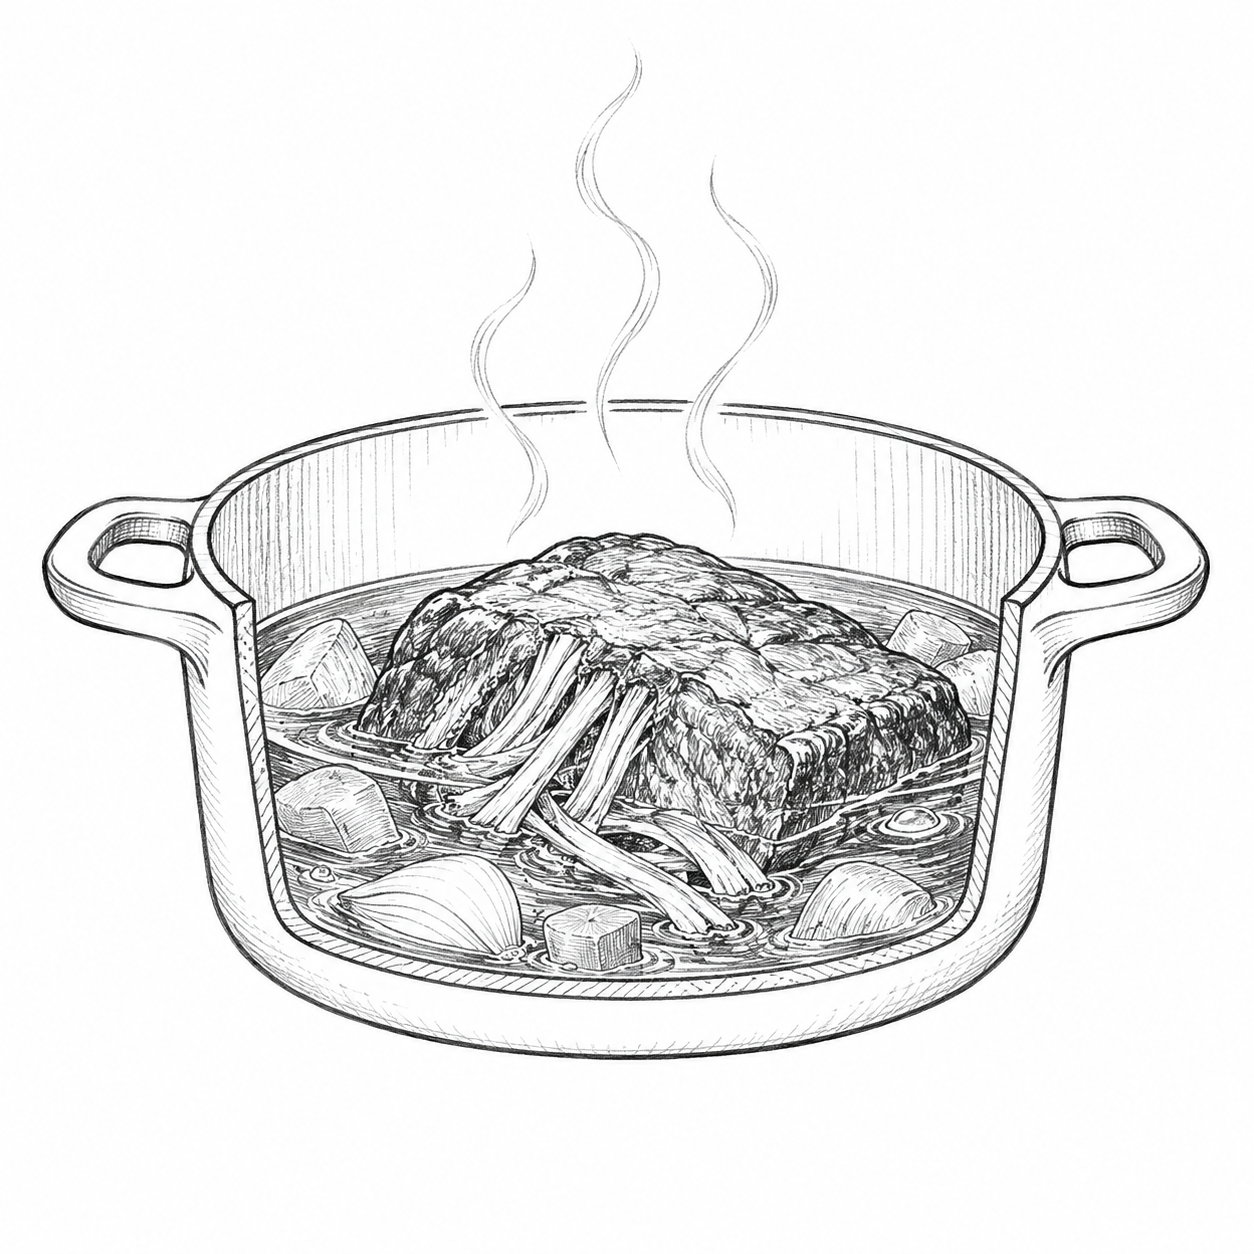
This is why a pot roast that seems stubborn at two hours may become tender at three and a half. The change is not only about internal temperature. It is about allowing enough time for connective tissue to convert and for the overall structure of the meat to relax.
The practical lesson is simple: for collagen-rich cuts, tenderness often arrives later than the cook first expects.
Why Lean Cuts Dry Out Faster
Lean cuts have less fat and often less connective tissue working in their favor. Their tenderness depends more on not overshooting the point where the muscle proteins tighten too far. Once that happens, the texture becomes firmer and moisture is easier to lose.
This is why lean chops, cutlets, and breasts usually benefit from careful timing rather than extended cooking. Browning the outside is useful for flavor, but after that point, the path to a good result is often shorter than people think.
The practical lesson is worth remembering: a lean cut usually needs precision more than endurance.
From the Old Books
Earlier household chemistry writers paid close attention to the way different foods responded to heat, even if they did not frame meat cookery in today’s language of denatured proteins, carryover cooking, and collagen conversion. They understood from practice that some cuts improved from prolonged cooking while others suffered from it.
Modern food science explains those differences more precisely. We can now describe how muscle proteins tighten, why connective tissue softens over time, and why browning adds flavor without literally sealing in juices. But the older kitchen wisdom still carries weight: the cut in front of you should help determine the method.
That is still one of the best rules in meat cookery.
Case Study: Why BBQ Brisket Takes Time
Brisket is one of the clearest examples of a collagen-rich cut that needs patience more than enthusiasm. It comes from a hard-working part of the animal, so it begins with a good deal of connective tissue and a structure that does not yield much to quick cooking. If treated like a chop or steak, it is usually firm, chewy, and disappointing.
What makes brisket interesting is that several important changes are happening on different timelines. The surface can brown early and begin building bark, which brings smoky, roasted flavor and texture. Fat can begin rendering. Moisture can be leaving the meat. And yet the interior may still feel tight because the connective tissue has not softened enough. That is why a brisket can look promising well before it is actually ready.
This is also why temperature helps, but does not tell the whole story. A brisket is not truly done just because it has reached a respectable number on a thermometer. It is ready when the structure has relaxed enough that the meat feels yielding rather than resistant. In plain terms, bark and internal tenderness are not the same event, and the second one often arrives later.
Resting matters just as much. A brisket sliced too soon will often lose more juice than it ought to and may feel tighter than one that has been allowed to settle. Given enough time, the meat becomes easier to slice cleanly and more satisfying to eat.
The practical lesson is simple: brisket is a reminder that some cuts do not reward hurry. They reward patience, attention, and the good sense to wait until tenderness, not just color or temperature, says the work is done.
Trouble Signs and Fixes
Problem: Pork chop is dry
Likely cause: It cooked too long, or the heat was too aggressive for the thickness.
What to do now: Slice and serve with a pan sauce if possible.
What to do next time: Pull it a little earlier and let resting finish the job.
Problem: Chicken skin is not crisp
Likely cause: The skin started too wet, or the oven heat was too low.
What to do now: Roast a little longer if the meat can take it.
What to do next time: Pat the skin dry and use enough heat to render and brown it.
Problem: Pot roast is still tough
Likely cause: The connective tissue has not finished softening.
What to do now: Return it to the oven and give it more time.
What to do next time: Trust tenderness more than the clock.
Problem: Meat loses lots of juice after slicing
Likely cause: It was cut too soon after cooking.
What to do now: Serve the juices with the meat.
What to do next time: Let the meat rest before slicing.
Problem: Browned outside, dry inside
Likely cause: The surface heat did its job, but the interior cooked past the sweet spot.
What to do now: Pair with sauce or braising liquid.
What to do next time: Match the cooking time and method to the cut more carefully.
Kitchen Takeaway
If you remember one thing from this chapter, let it be this: tenderness comes from understanding the cut. Some meats want less time and more care. Others want more time and less interference.
Once you see that clearly, meat cookery becomes much easier to manage, and a disappointing result starts looking less like bad luck and more like a solvable problem.
Chapter 12 — Stocks, Soups, and Sauces
A good pot of stock, a well-made soup, or a simple pan sauce can make the whole kitchen feel more competent. These are the foods and preparations that teach a cook how flavor moves through liquid, how reduction changes more than volume, and how a dish can be built in stages rather than all at once.
This chapter explains how water extracts flavor, why some liquids taste thin while others feel full, how reduction concentrates both good and bad qualities, and how a sauce can go from loose to finished with just a few well-timed decisions. Once you understand those patterns, soups and sauces stop feeling like a vague art and start looking more like a series of manageable choices.
We are not trying to turn every weeknight dinner into a French brigade. We are trying to understand how liquid cooking works and why it matters.
Core Lesson
Stocks, soups, and sauces all depend on the same broad idea: liquid can carry flavor, body, aroma, and seasoning through a dish in ways dry cooking alone cannot. But liquid is not magic. It extracts selectively, concentrates with time, and changes as ingredients dissolve, soften, release starch, or give up their juices.
A cook sees this every time a thin broth becomes fuller, a soup settles into balance, or a pan sauce comes together from what looked like not much more than browned bits and a splash of stock.
Start with stock. A stock is not just water with ingredients in it. It is the result of extraction. As bones, vegetables, herbs, and other ingredients simmer, water draws out soluble compounds that contribute aroma, savoriness, and body. Some of those compounds dissolve readily. Others take more time. Some flavors are pleasant at first and harsh later if the extraction runs too long or at too hard a boil.
This is one reason a chicken stock does not benefit from aggressive boiling. A hard boil can cloud the liquid, break ingredients apart more roughly than needed, and create a stock that tastes less clean than one kept at a gentler simmer. The goal is not violence. The goal is steady transfer.
Body matters too. A stock that feels rich in the mouth is not only about salt or intensity. It can also reflect gelatin and dissolved compounds that change how the liquid feels. That is one reason a stock made with bones and connective tissue often feels fuller than a quick vegetable broth, even when both are properly seasoned.
Soup builds on stock but adds a second layer of structure. Some soups are mostly about extraction and seasoning. Others rely on starch from potatoes, grains, legumes, or flour to create body. Some gain fullness from dairy or pureed vegetables. In every case, the cook is balancing liquid, solids, texture, and concentration.
Sauces are the most deliberate form of this work. A sauce is often a liquid that has been thickened, reduced, enriched, or otherwise shaped to finish a dish. It may depend on starch, as in gravy. It may depend on reduction and finishing butter, as in a quick pan sauce. It may depend on pureed vegetables, cream, or gelatin from a stock. What matters is not the category so much as the function. A sauce carries flavor and helps control the final texture of the dish.
Reduction is one of the most useful ideas in this chapter. When a liquid reduces, water evaporates and the remaining flavors become more concentrated. That can improve a sauce beautifully, but it can also make problems louder. If the sauce is too salty, reduction makes it saltier. If it is bitter, reduction makes it more bitter. If it is balanced, reduction can make it taste deeper and more complete. This is why reduction requires attention rather than blind loyalty.
Thickening works by different routes. Starch can thicken quickly and reliably. Pureed vegetables can add body more softly. Cream and butter can enrich the texture without producing the same kind of measurable viscosity as starch. Gelatin-rich stock can also give a sauce more body as it reduces. In practice, cooks often combine these effects rather than relying on only one.
There is also a sequencing lesson here. Good soups and sauces are usually built in stages. Browned bits in the pan create one layer of flavor. Aromatics contribute another. Liquid extracts and carries those flavors forward. Reduction tightens the whole thing. A finishing ingredient such as butter, cream, or fresh herbs adjusts the final texture and aroma. If a cook understands that sequence, the process stops feeling mysterious.
Three practical ideas will carry you a long way here.
First, liquid extracts flavor, but extraction has limits. More time is not always better.
Second, reduction concentrates everything, including mistakes.
Third, the body of a soup or sauce can come from starch, gelatin, vegetables, dairy, or some combination of them.
Once you begin seeing stocks, soups, and sauces as structured liquids rather than background elements, you cook them with more purpose. That alone improves a surprising number of meals.
What to Notice
When working with stocks, soups, and sauces, look for cues that tell you whether the liquid is becoming cleaner, fuller, or more concentrated in the right way.
- Watch the simmer. Gentle movement is usually enough. A hard boil is often more force than the pot needs.
- Look at clarity. Some preparations should stay clearer than others, but cloudy liquid can tell you the pot has been handled roughly.
- Notice coating. A finished sauce often lightly coats a spoon instead of running off like plain water.
- Watch the bubbles. As reduction progresses, bubbles often look slower and slightly thicker.
- Pay attention to aroma. A good reduction smells deeper without smelling harsh.
- Taste along the way. This is one of the few places in cooking where frequent tasting is not optional if you want control.
Liquid cooking rewards the cook who checks in rather than merely waits.
Recipe 1 — Simple Chicken Stock
Why This Recipe Belongs Here
Chicken stock is the clearest way to teach extraction, body, and restraint. It asks the cook to notice what a gentle simmer does, what bones and aromatics contribute, and how a liquid can become fuller without becoming muddled. It is a foundation recipe, but it is also a lesson in patience and proportion.
Yield / Time / Equipment
- Yield: About 2 quarts
- Prep time: 15 minutes
- Cook time: 2 1/2 to 3 hours
- Equipment: Large pot; strainer
Ingredients
- 2 to 3 pounds chicken backs, wings, or bones
- 1 onion, halved
- 2 carrots, cut into chunks
- 2 celery stalks, cut into chunks
- 2 garlic cloves, smashed
- 1 bay leaf
- 6 to 8 peppercorns
- 8 cups cold water
- Salt only at the end, if using the stock on its own
Method
- Place the chicken bones, onion, carrots, celery, garlic, bay leaf, and peppercorns in a large pot.
- Add the cold water.
- Bring slowly just to a simmer over medium heat.
- Reduce the heat so the liquid moves gently rather than boiling hard.
- Skim foam if needed during the early part of cooking.
- Simmer 2 1/2 to 3 hours.
- Strain and discard the solids.
- Cool promptly. Season lightly only if serving the stock as is.
What’s Happening Here
Water is extracting soluble flavor compounds from the bones and vegetables, while connective tissue contributes body as the stock cooks. The gentle simmer helps the stock develop flavor without turning rough or muddy. Salt is often held back because the stock may later be reduced, and seasoning too early can limit your control.
Trouble Signs
- Cloudy stock: The pot boiled too hard or was stirred too much.
- Thin flavor: Too little time, too much water, or too few bones.
- Harsh vegetable note: The extraction went too long for the aromatics.
- Greasy finish: The fat was not skimmed or chilled off if desired.
Variations
- Roast the bones first for a darker stock.
- Add parsley stems for a fresher herbal note.
- Use the same method with turkey bones after a holiday meal.
Recipe 2 — Tomato Soup
Why This Recipe Belongs Here
Tomato soup teaches how liquid, acidity, reduction, and texture work together. It is simple enough to make on a weeknight, but it shows how a soup can be built in stages and improved through careful concentration rather than a long ingredient list.
Yield / Time / Equipment
- Yield: 4 to 6 servings
- Prep time: 10 minutes
- Cook time: 30 to 40 minutes
- Equipment: Pot; blender or immersion blender
Ingredients
- 2 tablespoons olive oil or butter
- 1 onion, chopped
- 2 garlic cloves, chopped
- 1 tablespoon tomato paste
- 1 can (28 ounces) crushed tomatoes
- 3 cups chicken stock or vegetable broth
- 1/2 teaspoon kosher salt, plus more to taste
- 1/4 teaspoon black pepper
- 1 teaspoon sugar, optional
- 1/4 cup cream, optional
Method
- Heat the oil or butter in a pot over medium heat.
- Add the onion and cook until softened.
- Stir in the garlic and tomato paste and cook for 1 minute.
- Add the crushed tomatoes and stock.
- Bring to a simmer and cook 20 to 30 minutes.
- Blend until smooth.
- Return to the pot and season with salt, pepper, and sugar if needed.
- Stir in the cream if using and serve hot.
What’s Happening Here
The tomato paste deepens the base, the stock stretches and rounds the tomato flavor, and the simmer allows the mixture to concentrate and soften. Blending changes the body as much as the flavor, creating a smoother texture without requiring starch. Cream, if used, softens the acidity and alters the mouthfeel more than it changes the basic structure.
Trouble Signs
- Too sharp: The soup may need a little more cooking, a touch of sugar, or a bit of cream.
- Too thin: It likely needs more reduction.
- Flat flavor: It may need salt more than anything else.
- Harsh raw edge: The aromatics or tomato paste needed a little more cooking at the start.
Variations
- Add basil at the end.
- Use roasted tomatoes for a deeper flavor.
- Serve with grilled cheese and call it a good evening.
Recipe 3 — Pan Gravy
Why This Recipe Belongs Here
Pan gravy shows how a cook can build a sauce from what is already in the skillet or roasting pan. It teaches the value of browned bits, the usefulness of deglazing, and the way starch can turn flavorful liquid into a sauce with clear body and staying power.
Yield / Time / Equipment
- Yield: About 2 cups
- Prep time: 5 minutes
- Cook time: 10 minutes
- Equipment: Skillet or roasting pan; whisk
Ingredients
- 2 tablespoons pan drippings or butter
- 2 tablespoons all-purpose flour
- 2 cups stock or broth
- Salt and black pepper to taste
Method
- Pour off excess fat from the pan, leaving about 2 tablespoons along with the browned bits.
- Set the pan over medium heat and whisk in the flour.
- Cook for 1 to 2 minutes until smooth.
- Add the stock gradually, whisking to loosen the browned bits and keep the gravy smooth.
- Simmer until thickened.
- Season with salt and pepper and serve warm.
What’s Happening Here
The browned bits from the pan dissolve into the liquid during deglazing, carrying concentrated flavor into the gravy. The flour thickens the stock as it hydrates and swells, while the drippings add depth and savoriness. This is a good example of a sauce built from extraction, not just from separate ingredients.
Trouble Signs
- Lumpy gravy: The liquid went in too fast or the roux was not smooth.
- Thin gravy: It needs more cooking time or slightly more starch.
- Flat flavor: The drippings were weak or the seasoning was not adjusted.
- Greasy finish: Too much fat remained in the pan.
Variations
- Add black pepper and sage.
- Use turkey drippings after roasting.
- Add a splash of cream for a richer finish.
Recipe 4 — Weeknight Pan Sauce
Why This Recipe Belongs Here
A pan sauce is one of the clearest examples of fast, deliberate sauce-making. It teaches how browned bits, a little liquid, reduction, and a finishing knob of butter can create a lighter, less starch-driven sauce than gravy. It is a small recipe with a big lesson behind it.
Yield / Time / Equipment
- Yield: About 1/2 cup
- Prep time: 5 minutes
- Cook time: 5 to 7 minutes
- Equipment: Skillet
Ingredients
- 1 teaspoon minced shallot or onion
- 1/2 cup stock, wine, or a combination
- 1 teaspoon mustard or a squeeze of lemon, optional
- 1 tablespoon cold butter
- Salt and black pepper to taste
Method
- After cooking meat or vegetables, pour off excess fat from the skillet, leaving the browned bits behind.
- Add the shallot and cook briefly if needed.
- Pour in the stock, wine, or both and scrape the pan to dissolve the browned bits.
- Simmer until reduced by about half.
- Stir in the mustard or lemon if using.
- Remove from the heat and swirl in the cold butter.
- Taste and adjust seasoning.
What’s Happening Here
The pan liquid dissolves the browned fond, reduction concentrates the flavor, and the final butter enriches the texture and gloss. The cold butter does not thicken the sauce like flour would, but it does help round the finish and give the sauce a more cohesive feel. This is less about heavy body and more about concentration, balance, and finish.
Trouble Signs
- Too salty: The sauce reduced too far, or the base liquid was already seasoned heavily.
- Too sharp: It may need a little more butter or a little less acid.
- Greasy surface: The butter was not incorporated well, or too much pan fat remained.
- Weak flavor: The pan did not have enough browned material to begin with.
Variations
- Add fresh herbs at the end.
- Use vinegar instead of lemon for brightness.
- Spoon over pork chops, chicken, or roasted mushrooms.
Why This Works
Why Stock Tastes Full or Thin
A stock tastes full when it has enough extracted flavor compounds, enough dissolved body, and enough seasoning to make those qualities noticeable. Bones, connective tissue, vegetables, and aromatics all contribute different things, and the balance between them matters.
A thin stock is not always weak because it lacks salt. It may simply lack enough extraction or enough body from connective tissue and dissolved solids. This is one reason a stock made mostly from bones with cartilage and joints often feels richer than one made from lean meat alone.
The practical lesson is plain: flavor intensity and body are related, but they are not the same thing.
Why Reduction Changes More Than Volume
Reduction concentrates whatever is already in the pot. That includes savoriness, sweetness, acidity, bitterness, and salt. It can improve a sauce beautifully by making it taste more complete, but it can also magnify imbalance.
This is why a cook should not reduce blindly. Tasting as the liquid changes is part of the method, not an optional flourish. The right reduction point is not just about how much liquid is left. It is about whether the flavor has tightened into something better rather than something harsher.
The practical lesson here is worth keeping close: reduction is a tool for control, not simply a test of patience.
From the Old Books
Earlier household chemistry writers paid close attention to liquids that extracted, carried, or transformed material in the kitchen. They understood that simmering could draw useful qualities out of ingredients, that thickening changed texture and utility, and that household cooking often depended on managing liquids well.
Modern food science gives us a more exact way to describe extraction, reduction, gelatin, viscosity, and dissolved flavor compounds. But the practical lesson remains much the same: liquids can be built, shaped, and improved with intention.
That is part of why a good soup or sauce still feels like real cooking, not just assembly.
Trouble Signs and Fixes
Problem: Stock tastes muddy
Likely cause: The pot boiled too hard, or the aromatics cooked too long.
What to do now: Strain carefully and use it in a soup where clarity matters less.
What to do next time: Keep the simmer gentler and shorten the extraction if needed.
Problem: Soup tastes flat
Likely cause: It needs more salt, more reduction, or a brighter finishing note.
What to do now: Adjust seasoning first, then consider a little acid or more simmer time.
What to do next time: Taste in stages instead of waiting until the end.
Problem: Gravy is greasy
Likely cause: Too much fat remained in the pan.
What to do now: Skim if possible or blot lightly.
What to do next time: Pour off more excess fat before building the gravy.
Problem: Pan sauce is too sharp or concentrated
Likely cause: It reduced too far or the acid was out of balance.
What to do now: Add a small splash of stock or water and a little butter if appropriate.
What to do next time: Reduce more gradually and taste along the way.
Problem: Finished sauce feels thin
Likely cause: It needs more reduction or a different source of body.
What to do now: Reduce a little more if the flavor can support it.
What to do next time: Decide whether the sauce needs starch, gelatin-rich stock, cream, or simply more time.
Kitchen Takeaway
If you remember one thing from this chapter, let it be this: liquid cooking works best when you know what the liquid is supposed to do. Extract, carry, thicken, reduce, or finish. Once that purpose is clear, the method gets easier to manage.
That is useful knowledge, because a good sauce or soup can make the rest of the meal feel like it knew where it was headed all along.
Chapter 13 — Custards, Cakes, and Cookies
Desserts are often where kitchen science becomes easiest to see. Custards set because proteins tighten. Cakes rise because structure and leavening stay in balance long enough to hold air and steam. Cookies spread, brown, and firm up because sugar, fat, flour, and heat are all working at once. That is part of what makes baking satisfying when it goes well and irritating when it does not.
This chapter explains why some desserts need gentleness, why others need enough structure to stand up, and why small changes in fat, sugar, flour, and heat can produce noticeably different results. Once you understand those patterns, cakes, cookies, cobblers, and custards begin feeling less temperamental and more readable.
We are not trying to make dessert solemn. We are trying to understand why it behaves the way it does.
Core Lesson
Custards, cakes, and cookies all depend on balance, but they do not balance the same things. Custards depend mainly on proteins and careful heat. Cakes depend on structure, aeration, and leavening. Cookies depend on a more complicated negotiation among fat, sugar, flour, moisture, and oven heat.
Start with custard. A custard sets because eggs contain proteins that denature and then link together as they heat. That network gives the dessert body. In plain kitchen terms, the liquid mixture turns into something spoonable or sliceable because the egg proteins tighten into a delicate structure. Push them too far, and the structure becomes grainy, curdled, or watery.
That is why custards like gentle heat, whether on the stovetop or in the oven. It is also why a water bath can help in baked custards. The water buffers the heat and slows the rise in temperature, giving the proteins a better chance to set evenly rather than too quickly around the edges.
Cakes ask something different of the cook. They need enough structure to trap expanding gases from air, steam, and chemical leavening while still remaining tender. Flour provides the framework, eggs contribute both structure and moisture, sugar sweetens and softens, and fat tenderizes while changing the crumb. If the balance holds, the cake rises and sets into a texture that feels light but supported. If the balance breaks, the cake may sink, dome oddly, dry out, or bake into something coarse and heavy.
The mixing method matters here. In a butter cake, creaming butter and sugar helps incorporate tiny air pockets that contribute to lift. In other cakes, whipped eggs or a different order of mixing may do more of that work. The point is not that one method is correct for all cakes. The point is that the structure begins forming long before the batter goes into the oven.
Cookies are less polite than cakes. They begin as dough, then soften, spread, puff a little, brown, and finally set as they cool. Sugar melts, fat softens, flour provides structure, and eggs help hold things together. More butter can mean more spread. More flour can limit it. White sugar and brown sugar do not behave exactly the same, and oven temperature can change whether a cookie spreads wide and thin or stays thicker and chewier.
This is one reason cookies are so sensitive to small recipe changes. A little more flour, slightly warmer dough, or a hotter oven can all shift the final texture. That is what makes cookies such good teachers. They respond clearly to ingredient ratios, dough temperature, and baking conditions.
Fruit desserts such as cobbler bring yet another pattern into play. The fruit softens, releases liquid, concentrates in sweetness, and interacts with whatever topping or batter is placed over it. A cobbler depends on contrast: soft fruit below, browned topping above. Too much liquid, and the topping may slump. Too little, and the filling can seem dry or mean-spirited. A good cobbler is a small lesson in moisture balance and surface browning.
Across all of these desserts, the oven is doing more than one job at once. It is setting proteins, evaporating moisture, melting sugar, softening fat, activating leavening, and driving browning at the surface. This is why a dessert can look nearly done and still need a few more minutes to finish setting, or why one can go from just right to overdone faster than a cook would prefer.
Three practical ideas will carry you a long way here.
First, custards need gentler heat and a lighter hand than most cakes and cookies.
Second, cakes depend on balanced structure. Too little structure and they collapse; too much and they turn heavy.
Third, cookies and fruit desserts make ingredient ratio and oven behavior easy to see. Small changes often lead to visible results.
Once you start seeing dessert through those patterns, baking stops feeling like a separate kingdom. It becomes another part of kitchen science, only sweeter.
What to Notice
When working with desserts, pay attention to cues that tell you whether the structure is forming the way it should.
- Look for gentle set in custards. The center should often tremble slightly rather than stand rigid at once.
- Watch the edges of cakes and bars. The edges often finish before the center and can tell you whether the bake is moving too quickly.
- Notice spread in cookies early. The first few minutes often tell you what kind of cookie you are about to get.
- Smell for browning. Butter, sugar, and flour all change aroma as the surface develops color.
- Pay attention to cooling. Many desserts finish setting after they leave the oven.
- Watch the fruit bubbles. In cobbler and similar desserts, bubbling tells you the filling has heated through and the starches or sugars are doing their work.
Desserts often reveal their condition in small clues before the clock gives permission.
Recipe 1 — Baked Vanilla Custard
Why This Recipe Belongs Here
Custard is one of the clearest demonstrations of protein setting in the kitchen. It is simple enough to show the principle plainly and delicate enough to punish rough handling. That makes it a fine teacher. It asks for patience, steadiness, and the good sense to stop before the eggs go too far.
Yield / Time / Equipment
- Yield: 4 to 6 servings
- Prep time: 10 minutes
- Cook time: 35 to 45 minutes
- Equipment: Baking dish or ramekins; roasting pan for water bath optional
Ingredients
- 2 cups whole milk
- 3 eggs
- 1/3 cup sugar
- 1 teaspoon vanilla extract
- Pinch of kosher salt
- Grated nutmeg, optional
Method
- Heat the oven to 325°F.
- Warm the milk slightly, but do not boil it.
- In a bowl, whisk together the eggs, sugar, vanilla, and salt.
- Gradually whisk the warm milk into the egg mixture.
- Pour into ramekins or a baking dish.
- Place in a water bath if desired for gentler heat.
- Bake 35 to 45 minutes, until the custard is mostly set but still trembles slightly in the center.
- Cool before serving warm or chilled.
What’s Happening Here
The egg proteins are forming the network that sets the custard, while the milk and sugar soften the overall texture and flavor. The water bath, if used, helps moderate the heat so the proteins set more evenly. If the custard bakes too hard or too long, the protein network tightens too much and the texture turns curdled, watery, or grainy.
Trouble Signs
- Curdled texture: The custard got too hot.
- Watery seepage: The proteins tightened too far and squeezed out liquid.
- Underset center: It needs a little more time.
- Rubbery texture: It was baked too aggressively.
Variations
- Add cinnamon or nutmeg.
- Use a little citrus zest.
- Top with berries or lightly sweetened whipped cream.
Recipe 2 — Simple Butter Cake
Why This Recipe Belongs Here
A butter cake is a good lesson in balanced structure. It depends on flour for support, butter for tenderness, eggs for body, and leavening for lift. It also shows why mixing method matters. A cake does not rise and set well by accident. The structure begins with the batter.
Yield / Time / Equipment
- Yield: One 8-inch or 9-inch cake
- Prep time: 15 minutes
- Cook time: 30 to 35 minutes
- Equipment: Cake pan; mixing bowls; mixer helpful
Ingredients
- 1 1/2 cups all-purpose flour
- 1 1/2 teaspoons baking powder
- 1/2 teaspoon kosher salt
- 1/2 cup unsalted butter, softened
- 3/4 cup sugar
- 2 eggs
- 1 teaspoon vanilla extract
- 1/2 cup milk
Method
- Heat the oven to 350°F. Grease and flour the pan.
- Whisk together the flour, baking powder, and salt.
- In another bowl, cream the butter and sugar until lighter in color and texture.
- Beat in the eggs one at a time, then the vanilla.
- Add the dry ingredients and milk in alternating additions, beginning and ending with the dry ingredients.
- Mix just until combined.
- Spread in the pan and bake 30 to 35 minutes, until golden and a tester comes out clean.
- Cool before serving.
What’s Happening Here
Creaming the butter and sugar helps build small air pockets that contribute to lift. The flour and eggs then provide structure to hold that lift, while the baking powder adds additional gas as the cake bakes. If the batter is undermixed, the cake may bake unevenly. If overmixed after the flour goes in, the crumb may turn tougher than it should.
Trouble Signs
- Sunken center: The structure set too weakly, the leavening failed, or the cake was disturbed too early.
- Tough crumb: The batter was overmixed after the flour was added.
- Dry cake: It baked too long.
- Dense cake: The butter and sugar were not creamed enough, or the batter lacked proper lift.
Variations
- Add lemon zest.
- Serve with berries and whipped cream.
- Bake as a snack cake with a light glaze.
Recipe 3 — Chocolate Chip Cookies
Why This Recipe Belongs Here
Cookies are one of the clearest places to see ratio at work. A chocolate chip cookie teaches how sugar affects spread, how butter affects tenderness, how flour limits or supports structure, and how oven heat changes the final texture. Few recipes give clearer feedback for small adjustments.
Yield / Time / Equipment
- Yield: About 24 cookies
- Prep time: 15 minutes
- Cook time: 10 to 12 minutes per batch
- Equipment: Mixing bowls; sheet pan
Ingredients
- 2 1/4 cups all-purpose flour
- 1 teaspoon baking soda
- 1 teaspoon kosher salt
- 1 cup unsalted butter, softened
- 3/4 cup brown sugar
- 1/2 cup granulated sugar
- 2 eggs
- 2 teaspoons vanilla extract
- 2 cups chocolate chips
Method
- Heat the oven to 350°F.
- Whisk together the flour, baking soda, and salt.
- In another bowl, beat the butter with both sugars until combined and somewhat fluffy.
- Beat in the eggs and vanilla.
- Stir in the dry ingredients just until combined.
- Fold in the chocolate chips.
- Scoop onto a sheet pan, spacing the dough well apart.
- Bake 10 to 12 minutes, until the edges are golden and the centers are still a little soft.
- Cool on the pan briefly before moving.
What’s Happening Here
The butter softens and helps the cookies spread, the sugars melt and contribute both sweetness and browning, and the flour provides enough structure for the cookies to hold together as they cool. Brown sugar brings more moisture and chew than white sugar alone. The cookies may look underdone in the center when they first leave the oven, but they continue setting as they cool.
Trouble Signs
- Too much spread: The dough was too warm, or the flour was too light for the fat and sugar balance.
- Puffy and cakey texture: Too much flour or too little spread.
- Dry cookie: It baked too long.
- Pale cookie: The bake was too short or the oven too cool.
Variations
- Chill the dough before baking for thicker cookies.
- Add chopped pecans or walnuts.
- Use dark chocolate for a less sweet cookie.
Recipe 4 — Fruit Cobbler
Why This Recipe Belongs Here
Cobbler brings together fruit behavior, starch, sugar, and surface browning. It depends on the fruit releasing enough juice to become saucy, while the topping bakes into something browned and tender. It is less precise than a cake and less delicate than a custard, but it teaches moisture balance just as clearly.
Yield / Time / Equipment
- Yield: 6 to 8 servings
- Prep time: 15 minutes
- Cook time: 40 to 50 minutes
- Equipment: 8-inch or 9-inch baking dish; mixing bowl
Ingredients
For the filling
- 5 cups sliced peaches or mixed berries
- 1/3 cup sugar
- 1 tablespoon flour or cornstarch
- 1 tablespoon lemon juice
- Pinch of salt
For the topping
- 1 cup all-purpose flour
- 1/4 cup sugar
- 1 1/2 teaspoons baking powder
- 1/4 teaspoon kosher salt
- 4 tablespoons cold unsalted butter
- 1/2 cup milk
Method
- Heat the oven to 375°F.
- Toss the fruit with the sugar, flour or cornstarch, lemon juice, and salt. Spread in the baking dish.
- In a bowl, whisk together the flour, sugar, baking powder, and salt for the topping.
- Cut in the butter until crumbly.
- Stir in the milk just until a soft dough forms.
- Spoon the topping over the fruit.
- Bake 40 to 50 minutes, until the fruit bubbles and the topping is golden.
- Let rest briefly before serving.
What’s Happening Here
The fruit softens and releases juice as it heats, while the sugar and starch help create a thickened filling rather than a watery one. The topping depends on flour for structure, fat for tenderness, and baking powder for lift. The contrast between bubbling fruit and browned topping is the whole point of the dessert.
Trouble Signs
- Runny filling: The fruit was especially juicy, or the dessert was served before it had a chance to settle.
- Pale topping: It needed more oven time.
- Dry topping: Too little fat or too much flour.
- Underdone center: The fruit had not fully heated and bubbled.
Variations
- Use blackberries or apples instead of peaches.
- Add cinnamon or ginger.
- Serve with vanilla ice cream.
Why This Works
Why Custard Sets Gently and Then All at Once
Custard usually seems quiet right up until it begins to set. That is because the egg proteins are gradually denaturing and linking together as the temperature rises, but the visible change in texture becomes obvious only once enough of that network has formed. The setting looks sudden even though the process has been underway for a while.
Because the protein network is delicate, a custard has a narrow comfortable range. Too little heat and it stays loose. Too much and the network tightens too far, squeezing out liquid and producing curdling or graininess.
The practical lesson is simple: pull a custard when it is almost fully set, not when it looks fully firm in the oven.
Why Cookies Spread or Stay Thick
Cookies spread because butter softens, sugars dissolve, and the dough structure loosens before the flour and eggs fully set the final shape. How far they spread depends on the balance among fat, sugar, flour, moisture, and temperature.
A warmer dough usually spreads more because the fat softens sooner. More flour or a colder dough usually limits spread by helping the structure set before the cookie runs too far. Brown sugar contributes more moisture and chew, while oven heat influences how quickly the edges set compared with the center.
The practical lesson here is worth keeping close: cookie texture is often a ratio question before it is a technique question.
From the Old Books
Earlier household chemistry writers understood well enough that sweets and baked goods could not be treated casually. They recognized that eggs, flour, sugar, and heat all influenced the final texture, even if they did not describe those changes in today’s language of protein networks, aeration, or moisture balance.
Modern food science explains those patterns more precisely. We can describe why custard curdles, why cake structure depends on both mixing and leavening, and why cookies respond so quickly to shifts in ratio and temperature. But the older practical lesson still stands: dessert rewards attention to proportion and method.
That is as true for a plain custard as it is for a tray of cookies.
Trouble Signs and Fixes
Problem: Custard curdles
Likely cause: It baked or cooked too hot.
What to do now: Chill it and serve anyway if the texture is still acceptable.
What to do next time: Use gentler heat and pull it earlier.
Problem: Cake sinks in the middle
Likely cause: The structure was too weak, the leavening failed, or the cake was disturbed too soon.
What to do now: Trim and serve with fruit or whipped cream.
What to do next time: Measure carefully, avoid overmixing or undermixing, and do not open the oven early.
Problem: Cookies spread too much
Likely cause: The dough was too warm, or the fat-to-flour balance was too loose.
What to do now: Chill the dough before baking the next batch.
What to do next time: Measure carefully and watch dough temperature.
Problem: Cobbler is watery
Likely cause: The fruit released more liquid than expected, or the cobbler was served too soon.
What to do now: Let it rest longer.
What to do next time: Add a little more starch with especially juicy fruit and bake until the filling bubbles well.
Problem: Dessert looks underdone but may not be
Likely cause: Cooling and carryover setting are still happening.
What to do now: Give it the resting time the recipe asks for.
What to do next time: Remember that some desserts finish setting after they leave the oven.
Kitchen Takeaway
If you remember one thing from this chapter, let it be this: dessert is structure wearing a sweeter face. Eggs set, cakes rise, cookies spread, and fruit bubbles according to the same kind of kitchen rules that guide the rest of cooking.
Once you see that, baking starts feeling less mysterious and a good deal more manageable.
Chapter 14 — Storage, Preservation, and Food Safety
A good kitchen does not end when the food leaves the stove. It continues into the refrigerator, the freezer, the pantry, and the decisions a cook makes about leftovers, cooling, storage, and when something should simply be discarded. This part of cooking is not glamorous, but it quietly decides how much good food stays good and how much trouble is avoided.
This chapter explains how cold storage slows change without stopping it, why moisture and time matter after cooking as much as before, and how a few practical preservation methods can be useful without turning the kitchen into a canning lab. Once you understand those patterns, storage feels less like an afterthought and more like part of cooking well.
We are not trying to turn this chapter into a generic rulebook. We are trying to keep the book practical, modern, and honest about what food does after the cooking is over.
Core Lesson
Food keeps changing after it is cooked. Cooling, storage, and reheating are not passive steps. They are simply later stages in the life of the dish. Moisture keeps moving. Texture keeps shifting. Aromas fade or settle. Starches can firm up. Fat can solidify. And time and temperature continue affecting whether food remains safe and pleasant to eat.
Cold slows many of those changes, but it does not stop them. Refrigeration buys time. Freezing buys more time. Neither one gives infinite protection. This is one reason leftovers can move from excellent to questionable even when they have been stored with decent intentions.
A useful way to think about storage is that it is mainly about control: temperature, moisture, and exposure. A covered container limits drying and odor transfer. Prompt cooling reduces the length of time food sits in a more risky state. A freezer slows quality loss and spoilage more than a refrigerator can, but it also changes texture in some foods because water becomes ice and later returns as melt.
Moisture matters as much in storage as it does in cooking. Too little moisture and foods dry out, stale, or toughen. Too much trapped moisture and some foods become soggy, weepy, or unpleasantly soft. This is why crisp foods and moist foods often need different storage strategies. A roasted vegetable stored tightly covered may keep from drying, but it may also lose the texture that made it appealing in the first place.
Temperature matters in two ways. First, it affects safety. Second, it affects quality. A pot of stock cooled and portioned promptly keeps better than one left lingering too long before refrigeration. Cooked rice held and reheated carelessly can go wrong in ways that have nothing to do with how good it looked when fresh. A refrigerator pickle stays bright and crisp not because it is immortal, but because acid and cold are both slowing unwanted change.
Preservation methods work by changing the conditions food lives in. Acidic pickling shifts the environment in a way that makes preservation more favorable for some foods. Freezing slows the progress of spoilage and quality decline. Drying reduces available moisture. High sugar or salt can also play preserving roles in some foods, though those methods need proper understanding and are not interchangeable shortcuts.
This chapter stays on the practical side. It is not a full preserving manual, and it should not pretend to be one. The goal here is to give the reader a sensible framework for common home-kitchen storage and a few modest preservation builds that are safe, useful, and realistic.
Three practical ideas will carry you a long way here.
First, cold slows change, but it does not stop time.
Second, moisture control matters in storage almost as much as it does in cooking.
Third, safe storage depends on method, timing, and honest judgment more than on hope.
Once those ideas settle in, leftovers, freezer portions, and quick preservation stop feeling like an afterthought. They become part of the cook’s real work.
What to Notice
When storing or preserving food, pay attention to cues that tell you whether quality or safety is beginning to drift.
- Watch condensation. Trapped moisture can change texture quickly.
- Notice drying at the edges. Exposure to air often shows up there first.
- Pay attention to smell. A food that smells off does not need a philosophical debate.
- Watch starch-based foods. Rice, grains, and potatoes often change texture noticeably in storage.
- Notice separation. Sauces, soups, and dressings may need stirring or reheating adjustments after storage.
- Look for cloudiness or gas where it does not belong. Unexpected change in stored food deserves caution, not optimism.
A good cook pays attention not only to how food tasted fresh, but to what it is telling them now.
Recipe / Process 1 — Simple Refrigerator Pickles
Why This Recipe Belongs Here
Refrigerator pickles are a practical preservation lesson without the complexity of shelf-stable canning. They show how acid, salt, cold storage, and time work together to keep a vegetable bright and useful for a while longer. They are also an honest example of preservation that stays within a home cook’s everyday reach.
Yield / Time / Equipment
- Yield: About 1 quart
- Prep time: 15 minutes
- Cook time: 5 minutes
- Equipment: Jar or storage container; saucepan
Ingredients
- 2 cucumbers, sliced
- 1 cup vinegar
- 1 cup water
- 1 tablespoon kosher salt
- 1 tablespoon sugar
- 1 garlic clove, smashed
- 1 teaspoon dill seed or a few sprigs fresh dill
- 1/2 teaspoon peppercorns
Method
- Pack the cucumbers into a clean jar or storage container.
- In a small saucepan, combine the vinegar, water, salt, sugar, garlic, dill, and peppercorns.
- Bring just to a simmer, stirring until the salt and sugar dissolve.
- Pour the warm brine over the cucumbers.
- Cool, cover, and refrigerate.
- Let stand at least several hours before using, preferably overnight.
What’s Happening Here
The brine seasons the cucumbers while the acid and cold storage help slow unwanted change. The pickles are not shelf-stable; they remain refrigerator pickles and should be treated that way. Their texture and flavor improve over a short period, then continue changing with time.
Trouble Signs
- Cloudy or off-smelling jar: Do not keep reasoning with it.
- Too sharp: The vinegar balance is too aggressive.
- Too salty: The brine is too strong for the amount of water and cucumber.
- Soft pickles: They sat too long or started with a weaker texture.
Variations
- Add sliced onion.
- Use mustard seed.
- Add red pepper flakes.
Process 2 — Freezer-Ready Chicken Stock Portions
Why This Process Belongs Here
Stock is useful precisely because it can be stored and brought back into later cooking. This process teaches cooling, portioning, freezing, and sensible reuse. It is one of the clearest examples of how good storage practice turns one cooking project into several later meals.
Yield / Time / Equipment
- Yield: Varies by batch
- Prep time: 10 minutes after stock is made
- Cook time: none beyond cooling
- Equipment: Containers, jars with headspace, or freezer bags
Method
- Strain the finished stock.
- Cool it promptly.
- Portion it into practical amounts such as 1 cup, 2 cups, or another amount you will actually use.
- Label and date each portion.
- Freeze.
- Thaw in the refrigerator or reheat directly if the container and recipe allow.
What’s Happening Here
The main goal is control. Prompt cooling reduces risk, portioning makes later use more practical, and freezing slows quality loss and spoilage far more than refrigeration alone. Labeling matters because forgotten stock at the back of the freezer is not a preservation strategy.
Trouble Signs
- Odd smell after thawing: Discard it.
- Freezer burn or dull flavor: The storage method allowed too much air exposure.
- Container cracked: It was overfilled before freezing.
- Large unusable blocks: The portions were not planned around actual cooking needs.
Variations
- Freeze in small cubes for pan sauces.
- Freeze in larger portions for soup bases.
- Chill and remove excess fat first if desired.
Process 3 — Cooked Rice Storage and Reheat Method
Why This Process Belongs Here
Rice is one of the best examples of a food that seems harmless yet deserves careful storage. It also changes texture noticeably after cooking and chilling, which makes it a useful lesson in both safety and quality. This process keeps the instruction practical without overcomplicating it.
Yield / Time / Equipment
- Yield: Depends on the batch
- Prep time: 5 minutes after cooking
- Cook time: Reheat time varies
- Equipment: Shallow container or tray; storage container; microwave or skillet
Method
- Spread freshly cooked rice out enough to cool promptly.
- Transfer to a covered container once it is no longer steaming heavily.
- Refrigerate promptly.
- Reheat thoroughly before serving.
- Add a small splash of water during reheating if the rice needs moisture.
What’s Happening Here
Cooked rice changes texture as it cools because the starches begin firming and reorganizing. It can become drier and tighter in storage, which is why reheating often benefits from a little added moisture. The more important lesson, though, is that rice should be cooled and stored with care rather than left to coast along on the counter.
Trouble Signs
- Dry reheated rice: It lost moisture in storage or reheating.
- Clumpy texture: The starches firmed up and need gentler loosening with moisture.
- Questionable smell or holding history: Do not guess.
- Mushy reheat: Too much added water or overheated steam.
Variations
- Reheat in a covered bowl with a spoonful of water.
- Reheat in a skillet for fried-rice style use.
- Portion small amounts for easier later use.
Why This Works
Why Cold Helps but Does Not Solve Everything
Cold slows many forms of spoilage and quality loss because lower temperatures reduce the speed of biological and chemical change. But slow is not the same as stopped. Texture still shifts. Aromas still fade. Moisture still moves. Time still matters.
This is why refrigeration should be thought of as a tool for delay, not an argument against judgment. A chilled leftover may still dry out, separate, stale, or move beyond what should be kept.
The practical lesson is simple: cold buys time, but it does not replace judgment.
Why Some Foods Reheat Better Than Others
Foods reheat differently because their structure changes differently during cooling and storage. Soups and braises often reheat kindly because they already live in a moist environment. Crisp foods often lose their best qualities in storage because trapped moisture softens them. Starch-based foods may firm up and then need added moisture or gentler reheating to feel right again.
This is why reheating should be treated as part of the recipe’s life, not merely a mechanical afterthought. The food that goes into the refrigerator is not always the same food that comes back out.
The practical lesson here is worth keeping close: reheat according to the structure of the food, not just the convenience of the appliance.
From the Old Books
Earlier household chemistry writers took household management seriously, including the handling of food after cooking. They knew that timing, storage conditions, and practical care affected usefulness and waste, even if their safety language and preservation assumptions do not always match modern standards.
Modern food science and food safety practice give us a much clearer framework for refrigeration, freezing, moisture control, spoilage, and risk. But the older practical lesson still stands: what happens after cooking matters.
That remains true in every modern kitchen worth trusting.
Trouble Signs and Fixes
Problem: Leftovers taste dull the next day
Likely cause: Aromas settled, seasoning flattened, or moisture shifted.
What to do now: Reheat thoughtfully and adjust with salt, acid, or a finishing element if appropriate.
What to do next time: Store in a way that protects moisture and re-season after reheating if needed.
Problem: Stored food is wet in the wrong way
Likely cause: Condensation or trapped steam changed the texture.
What to do now: Vent, blot, or reheat in a way that can drive off excess moisture if the food allows.
What to do next time: Cool a bit before sealing, or use the storage method that best matches the food.
Problem: Frozen food tastes tired
Likely cause: Air exposure, overly long storage, or weak packaging.
What to do now: Use it in a preparation where other ingredients can support it, or discard if quality is poor.
What to do next time: Package more tightly, label more clearly, and rotate sooner.
Problem: Reheated starches are dry or clumped
Likely cause: Moisture loss and starch firming during storage.
What to do now: Add a small amount of water and reheat more gently.
What to do next time: Store tightly covered and portion more realistically.
Problem: The storage history is uncertain
Likely cause: Poor labeling, vague memory, or wishful thinking.
What to do now: Do not keep negotiating with uncertainty.
What to do next time: Label and date the food at the moment it is stored.
Kitchen Takeaway
If you remember one thing from this chapter, let it be this: storage is part of cooking, not an afterthought to it. Cold slows change, acid can help in some preparations, and good judgment matters all the way through.
That is how a kitchen keeps good food useful instead of merely hoping for the best.
Chapter 15 — Kitchen Troubleshooting
A good kitchen is not one where nothing ever goes wrong. It is one where the cook can tell what went wrong, decide whether it can be fixed, and avoid repeating the same trouble next time. Most kitchen failures are not mysterious. They are patterns. Something stayed too wet to brown. Something thickened too little or too much. Something set too hard, reduced too far, baked too long, or never had the structure to hold what the cook asked of it.
This chapter gathers those patterns into one practical reference section. It is meant to help a cook diagnose common problems quickly, respond calmly, and improve the next attempt. The point is not to memorize every possible failure. It is to recognize the usual ones and connect them to the forces that caused them.
We are not trying to make the kitchen feel fragile. We are trying to make it recoverable.
Core Lesson
Most kitchen problems come down to a handful of recurring causes: heat, moisture, structure, timing, seasoning, or proportion. Once you know which category a problem belongs to, the next move becomes easier.
A dish that will not brown usually has a moisture problem, a crowding problem, or a heat problem. A sauce that breaks often has a heat problem, a ratio problem, or a timing problem. A baked good that rises poorly may have a leavening problem, a structure problem, or a timing problem. A vegetable that tastes flat may not be undercooked at all. It may simply need salt, acid, or a more suitable method.
This is why troubleshooting works best when the cook stops asking only whether the result was bad and starts asking what kind of bad it was. Dry is not the same as bland. Dense is not the same as underbaked. Greasy is not the same as rich. Watery is not the same as tender. Those distinctions matter because they point toward different corrections.
A useful kitchen habit is to think in three steps.
First, identify the symptom as clearly as possible. What is actually wrong: texture, flavor, appearance, or structure?
Second, identify the most likely cause. Was the heat too high? Was the batter overmixed? Was the pan crowded? Was the acid added too early? Did the sauce reduce too far? Did the dough sit too long before baking?
Third, separate what can be fixed now from what must wait until next time. Some problems are reversible. A thin soup can reduce. A flat sauce may need salt or acid. Dry rice may improve with moisture during reheating. Other problems are mostly lessons. Overwhipped cream, a curdled custard, or gluey potatoes rarely return to their best selves.
The rest of the book teaches those patterns chapter by chapter. This chapter gathers them into a working reference. It is organized not by ingredient but by symptom, which is usually how trouble appears in a real kitchen.
Three practical ideas will carry you a long way here.
First, name the problem accurately before trying to fix it.
Second, decide whether the problem is mainly about heat, moisture, structure, timing, seasoning, or proportion.
Third, know whether you are looking for a rescue or a lesson for next time.
That is usually enough to turn frustration into useful information.
What to Notice
When something goes wrong, pay attention to the clue that appeared first.
- Look at the surface. Browning, curdling, weeping, and separation often show up there first.
- Check the center. A cake, custard, or casserole may fail in the middle before the edges tell the truth.
- Watch the liquid. Thin, watery, greasy, or over-reduced results usually point toward different causes.
- Notice the smell. Scorching, overbrowning, and stale fat usually announce themselves early.
- Taste before correcting. Some dishes need salt, some need acid, and some need less of both.
- Remember the sequence. What happened just before the problem showed up is often the most useful clue.
The kitchen usually gives warning before it gives disaster.
Problem Set 1 — Sauces, Soups, and Liquid Cooking
Problem: Gravy or sauce is too thin
Likely cause: It needs more reduction, more starch, or more time for thickening to finish.
What to do now: Simmer a little longer if the flavor can support it. If needed, add a small slurry or additional thickener appropriate to the sauce.
What to do next time: Measure thickening ingredients carefully and do not judge the sauce too early.
Problem: Sauce is lumpy
Likely cause: The thickener was not dispersed well, or the liquid went in too fast.
What to do now: Whisk firmly. Strain if needed.
What to do next time: Start with a smoother base and add liquid more gradually.
Problem: Sauce broke or looks greasy
Likely cause: Too much heat, poor ratio, or fat separated from the rest of the mixture.
What to do now: Pull it off the heat. A small splash of warm water may help in some sauces.
What to do next time: Build the sauce more gently and watch temperature more closely.
Problem: Soup tastes flat
Likely cause: It needs salt, acid, more reduction, or a better finishing element.
What to do now: Adjust one thing at a time and taste after each change.
What to do next time: Season in stages and taste during cooking, not only at the end.
Problem: Stock tastes muddy
Likely cause: It boiled too hard, ran too long, or the aromatics overextracted.
What to do now: Strain and use where clarity matters less.
What to do next time: Keep the simmer gentler and the extraction more deliberate.
Problem Set 2 — Eggs, Dairy, and Protein Setting
Problem: Scrambled eggs are rubbery
Likely cause: Too much heat or too much time.
What to do now: Pull them from the pan immediately.
What to do next time: Use lower heat and stop earlier.
Problem: Custard curdled or wept
Likely cause: The protein network tightened too far.
What to do now: Chill and serve if still usable, but full repair is unlikely.
What to do next time: Use gentler heat and pull it while the center still trembles slightly.
Problem: Cheese sauce turned grainy
Likely cause: It got too hot after the cheese was added.
What to do now: Lower the heat and stir gently. A little warm milk may help loosen it.
What to do next time: Add cheese off the heat or over very low heat.
Problem: Whipped cream turned coarse
Likely cause: It was whipped too far.
What to do now: Fold in a little unwhipped cream if only slightly overwhipped.
What to do next time: Stop sooner and watch the texture more closely.
Problem: Meringue will not whip well
Likely cause: Fat contamination or insufficient whipping.
What to do now: Start over if needed.
What to do next time: Keep the bowl clean and separate the eggs carefully.
Problem Set 3 — Breads, Cakes, Cookies, and Doughs
Problem: Biscuits are tough
Likely cause: The dough was overmixed or overhandled.
What to do now: Serve them warm and use them well.
What to do next time: Handle the dough lightly and stop before it turns smooth.
Problem: Bread loaf is dense
Likely cause: Too little fermentation, too little structure, or weak yeast activity.
What to do now: Slice thin and toast it.
What to do next time: Allow enough kneading and proofing time, and check the yeast.
Problem: Cake sinks in the middle
Likely cause: Weak structure, poor leavening, or early disturbance.
What to do now: Trim and serve with fruit, glaze, or whipped cream.
What to do next time: Measure carefully and avoid opening the oven too early.
Problem: Cookies spread too much
Likely cause: Warm dough, too little flour, or too much fat relative to structure.
What to do now: Chill the remaining dough before baking the next batch.
What to do next time: Measure carefully and watch dough temperature.
Problem: Waffles are soft instead of crisp
Likely cause: The iron was too cool or steam got trapped after cooking.
What to do now: Hold them in a single layer on a rack in a warm oven.
What to do next time: Preheat thoroughly and avoid stacking.
Problem Set 4 — Meat, Vegetables, and Everyday Cooking
Problem: Meat is browned outside but dry inside
Likely cause: The exterior heat did its job, but the interior cooked past the sweet spot.
What to do now: Use sauce or braising liquid.
What to do next time: Match time and method to the cut more carefully.
Problem: Pot roast is still tough
Likely cause: The connective tissue has not finished softening.
What to do now: Return it to the oven and give it more time.
What to do next time: Trust tenderness more than the clock.
Problem: Vegetables will not brown
Likely cause: Too much moisture, crowding, or insufficient heat.
What to do now: Give them more space and more time.
What to do next time: Dry them better and avoid crowding the pan.
Problem: Green vegetables look tired
Likely cause: They cooked too long or in too much trapped moisture.
What to do now: Season and finish them as well as you can.
What to do next time: Cook more quickly if brightness is the goal.
Problem: Potatoes turned gluey
Likely cause: The cooked starch was overworked.
What to do now: Serve them as best you can.
What to do next time: Handle cooked starchy vegetables more gently.
Problem Set 5 — Seasoning, Storage, and Reheating
Problem: Dish tastes dull even though it seems properly cooked
Likely cause: It may need salt, acid, or a finishing element rather than more time.
What to do now: Adjust one thing at a time and taste.
What to do next time: Season in stages instead of waiting until the end.
Problem: Food tastes sharp rather than bright
Likely cause: Too much acid or not enough support from fat, sweetness, or salt.
What to do now: Round it out if the dish allows.
What to do next time: Add acid in smaller steps.
Problem: Leftovers reheat dry or clumped
Likely cause: Moisture loss or starch firming during storage.
What to do now: Add a little moisture and reheat more gently.
What to do next time: Store more tightly covered and portion more realistically.
Problem: Stored food feels wet in the wrong way
Likely cause: Condensation or trapped steam changed the texture.
What to do now: Vent, blot, or reheat in a way that drives off excess moisture if the food allows.
What to do next time: Let the food cool a bit before sealing, or choose a better storage method for that texture.
Problem: The storage history is uncertain
Likely cause: Poor labeling, vague memory, or wishful thinking.
What to do now: Do not keep negotiating with uncertainty.
What to do next time: Label and date food when it is stored.
Why This Works
Why Most Failures Repeat
Kitchen failures feel personal in the moment, but most of them are built from a short list of repeated causes. Moisture prevents browning. Too much heat tightens proteins. Weak structure cannot hold lift. Poor timing wastes leavening. Too much reduction makes a sauce harsh or salty.
This is good news. If failures repeat, they can also be recognized and interrupted. A few reliable categories go a long way.
The practical lesson is simple: the more clearly you classify the problem, the easier it becomes to solve.
Why Rescue and Prevention Are Different Skills
Not every kitchen problem can be fixed in the moment. Some can be softened, covered, or redirected. Others mostly belong to the next attempt. This is why a cook should learn both rescue and prevention.
A thin soup can reduce. A salty sauce might be balanced or diluted if the dish allows. But a curdled custard, gluey potato, or badly overbaked cookie usually becomes more of a lesson than a rescue mission.
The practical lesson here is worth keeping close: good troubleshooting separates what can still be saved from what should simply be learned from.
From the Old Books
Earlier household chemistry writers paid attention to kitchen errors because household cooking had to work. Waste mattered. Ingredients mattered. Time mattered. They knew that practical understanding often showed itself most clearly when something went wrong and the cook had to decide what to do next.
Modern food science gives us cleaner categories for those mistakes. We can speak more precisely now about moisture, structure, protein tightening, starch response, leavening failure, and reduction. But the older practical lesson still stands firmly enough: good judgment is often easiest to see in recovery.
That remains true in every working kitchen.
Kitchen Takeaway
If you remember one thing from this chapter, let it be this: most kitchen failures are not random. They are patterns. Once you learn to name the pattern, the next move becomes much easier to see.
That is what turns a bad result into a better cook.
Chapter 16 — Notes from Classic Household Chemistry
Long before modern food media made every home cook feel as if dinner required a camera angle, household writers were already paying close attention to what happened in ordinary kitchens. They watched starch thicken, eggs set, sugar change under heat, and bread rise or fail. They observed that some foods improved with patience, some needed restraint, and some could be spoiled by too much fire, too much stirring, or too much confidence.
This book owes a quiet debt to that older way of noticing. The language has changed. The scientific vocabulary has sharpened. Some explanations from the past no longer hold up as written. But the habit of careful attention remains one of the most useful things a cook can inherit.
This chapter is not meant to turn the book into an archive. It is here to draw the thread tight. The kitchen science in these pages did not appear out of nowhere. It grew, in part, from generations of cooks and writers who watched what food did and tried to explain it as honestly as they could.
Core Lesson
Classic household chemistry was often practical before it was elegant. It asked what happened when flour met liquid, when milk was heated too hard, when sugar browned, when bread failed to rise, or when food kept badly after cooking. It treated the kitchen as a place where ordinary work deserved explanation.
That matters because modern readers sometimes imagine that kitchen science is a recent invention, as if understanding food only arrived once laboratories and television did. In truth, many of the most useful kitchen ideas were already being observed long ago, even when the language was incomplete. Cooks knew that gravies thickened for reasons, that eggs needed care, that heat could improve or ruin, and that method mattered as much as ingredients.
What modern food science offers is not the first insight but a more precise vocabulary. We can now describe starch gelatinization, protein denaturation, emulsification, Maillard browning, collagen conversion, moisture migration, and leavening reactions with more confidence. We can separate better explanations from weaker ones. We can be clearer about where the older writers were close, where they were partly right, and where later science corrected the picture.
But precision should not make us arrogant. The old writers were often doing solid observational work with the tools they had. They were watching cause and effect in the kitchen, which is still the heart of practical cooking science. If a sauce broke, they knew something had happened in the process. If a loaf rose poorly, they looked to method, ingredients, or timing. If vegetables lost their brightness, they recognized that cooking conditions mattered. That habit of close notice is still worth more than a pocketful of jargon.
This is one reason the best kitchen science stays humble. It explains, but it also observes. It does not assume that knowing a term is the same as knowing what to do. The point of understanding is not to sound clever over a saucepan. The point is to cook better, waste less, and recover more calmly when something goes sideways.
A useful way to read the older household chemistry tradition is to hold two ideas together at once.
First, respect the observations. They often came from real, repeated kitchen work.
Second, update the explanations where modern knowledge genuinely clarifies things.
That balance matters. Too much nostalgia and the old books become untouchable relics. Too much modern superiority and we miss how much they already understood about method, sequence, and cause.
The broader lesson is that the kitchen has always rewarded attention. Whether a writer used the word “gelatinization” or merely said that starch thickens under the right conditions, the cook still needed to watch the pot. Whether an older book described protein setting in modern terms or not, eggs still demanded restraint. Whether a household manual used contemporary safety language or not, timing and storage still mattered.
Three practical ideas will carry you out of this book well.
First, much of good cooking comes from observation that has been tested over time.
Second, modern science is most useful when it sharpens judgment rather than replacing it.
Third, the kitchen does not ask the cook to choose between tradition and understanding. It asks for both.
That is a useful note to end on, because a cook who can respect old wisdom, use better explanations, and still watch the food in front of them is usually in good shape.
What to Notice
As you look back across the book, notice how often the same practical ideas have returned in different forms.
- Heat changes texture before it changes opinion. The food responds whether the cook has language for it or not.
- Moisture controls more than most people first assume. Browning, softness, storage, and reheating all depend on it.
- Structure matters. In eggs, bread, cakes, sauces, and meat, the question is often what kind of structure is forming and whether it is holding.
- Timing matters. A dish can be technically cooked and still not truly ready.
- Small adjustments matter. Salt, acid, fat, and finish often decide whether food feels complete.
- Observation is still the cook’s best tool. That has not changed nearly as much as the vocabulary has.
The details vary, but the habit of paying attention keeps returning.
Note 1 — What Older Kitchen Writers Saw Clearly
Earlier household chemistry writers understood, often with surprising sharpness, that cooking involved repeatable change. They knew that starch thickened, that eggs and milk required careful heat, that leavening could fail, that fats behaved differently, and that some foods improved while others deteriorated under longer cooking. They also knew that household success depended on practical explanation, not just instructions barked from memory.
They were especially strong when they stayed close to direct kitchen observation. They watched what happened in the pot, in the oven, and on the table. That is one reason their work still feels alive when it does not wander too far from what they could see plainly.
Note 2 — Where Modern Science Improves the Picture
Modern food science improves the picture by naming mechanisms more precisely and separating reliable explanation from plausible guesswork. We now understand much more clearly why proteins tighten, why emulsions hold or break, why baking powder behaves differently from baking soda, why collagen-rich cuts need time, and why storage conditions matter so much after cooking.
That improved language helps because it makes troubleshooting cleaner and teaching clearer. A modern cook can connect a broken sauce, a curdled custard, or a dense loaf to a more exact cause than earlier writers sometimes could. That is not a small gain.
Note 3 — What Has Not Changed
What has not changed is the need to watch the food itself. A modern explanation does not remove the cook’s responsibility to notice smell, color, texture, moisture, or timing. If anything, better science makes those observations more useful because the cook has a better framework for understanding them.
The old kitchen and the modern kitchen are not enemies. They are often standing over the same pot.
Why This Works
Why Good Observation Ages Well
Scientific vocabulary changes. Techniques evolve. Equipment improves. But close observation remains useful across generations because food still responds to heat, moisture, fat, acid, salt, structure, and time in recognizable ways.
This is why a careful old note about scorching milk, weak bread rise, or overworked dough can still contain practical truth even if the explanation around it needs updating. Observation ages better than overconfidence.
The practical lesson is simple: if you want to learn from the past, pay closest attention to what the older writer noticed and what actually happened in the food.
Why Explanation Should Serve Judgment
A good explanation is not an ornament. It is a tool that helps the cook make better choices. Once explanation stops serving judgment, it becomes noise.
This is true whether the explanation comes from a historical source, a modern science text, or a contemporary cookbook. The value lies in whether it helps the cook decide what to do next: lower the heat, wait longer, add acid later, stop stirring, cool faster, or trust the dough a little more.
The practical lesson here is worth keeping close: explanation is useful when it improves action.
From the Old Books
The old books behind this project did not need to be flawless to be valuable. Their usefulness often lay in their seriousness. They treated household work as worthy of explanation. They assumed that a cook could learn, improve, and understand. That is a respectful thing for a book to assume.
Modern food science lets us refine, correct, and extend what those writers began. But it does not erase the value of their effort. If anything, it reveals how much of practical kitchen understanding grows from the same source it always has: paying close attention to what food actually does.
That is a good inheritance, and this book is better for having received it.
Trouble Signs and Fixes
Problem: A traditional explanation sounds doubtful
Likely cause: The observation may have been sound while the explanation was incomplete or outdated.
What to do now: Keep the useful observation and update the mechanism.
What to do next time: Separate what the food did from what someone thought caused it.
Problem: Modern explanations feel too abstract to use
Likely cause: The explanation has drifted away from kitchen decisions.
What to do now: Ask what action the explanation points toward.
What to do next time: Keep explanations tied to visible cues and practical choices.
Problem: A cook feels pulled between tradition and science
Likely cause: The choice has been framed too sharply.
What to do now: Use the tradition for tested practice and the science for clearer understanding.
What to do next time: Treat them as partners rather than rivals.
Problem: A familiar method works, but the reason is unclear
Likely cause: Practice got there before vocabulary did.
What to do now: Keep the method and study the reason if it helps you improve it.
What to do next time: Let good results invite explanation, not insecurity.
Kitchen Takeaway
If you remember one thing from this chapter, let it be this: the kitchen has long rewarded careful attention. Older household writers saw much of that clearly, and modern food science helps us explain it better. The cook does not have to choose between those gifts.
A steady hand, a watchful eye, and a better explanation are all welcome at the same table.